This article is intended for crew members based in the U.S. only. For crew based in Canada, please see Start+ Canada: Accepting an Offer. |
| Check out our employee-focused Start+ courses in Learning On-Demand. |
This article shows you how to perform this task in both Classic and New experiences.
Steps for Classic Experience
| Important: Some features are not available in the Classic Experience. To have the most up-to-date features, switch to the New Experience. |
Receiving the Email Invite
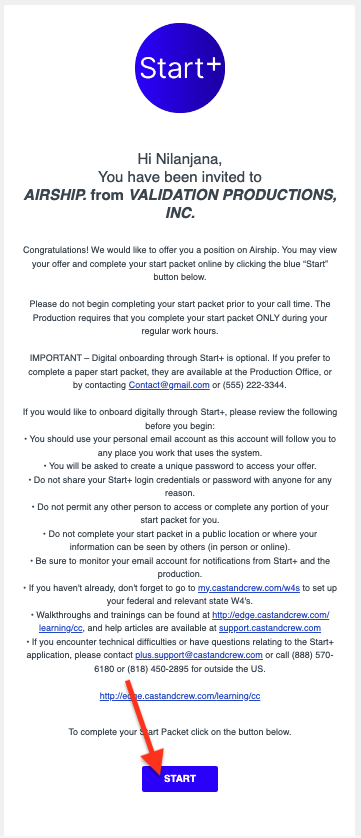
To begin, open the email you received and click the Start link.
First time using Start+?
If this is the first time you are using Start+, you'll need to go through the registration process to create your MyCast&Crew account. Learn how to do this here.
Rejecting and Accepting Your Offer
Reject your offer
Start+ displays the deal memo for your review. If you disagree with the terms, you can refuse the offer by clicking Reject.
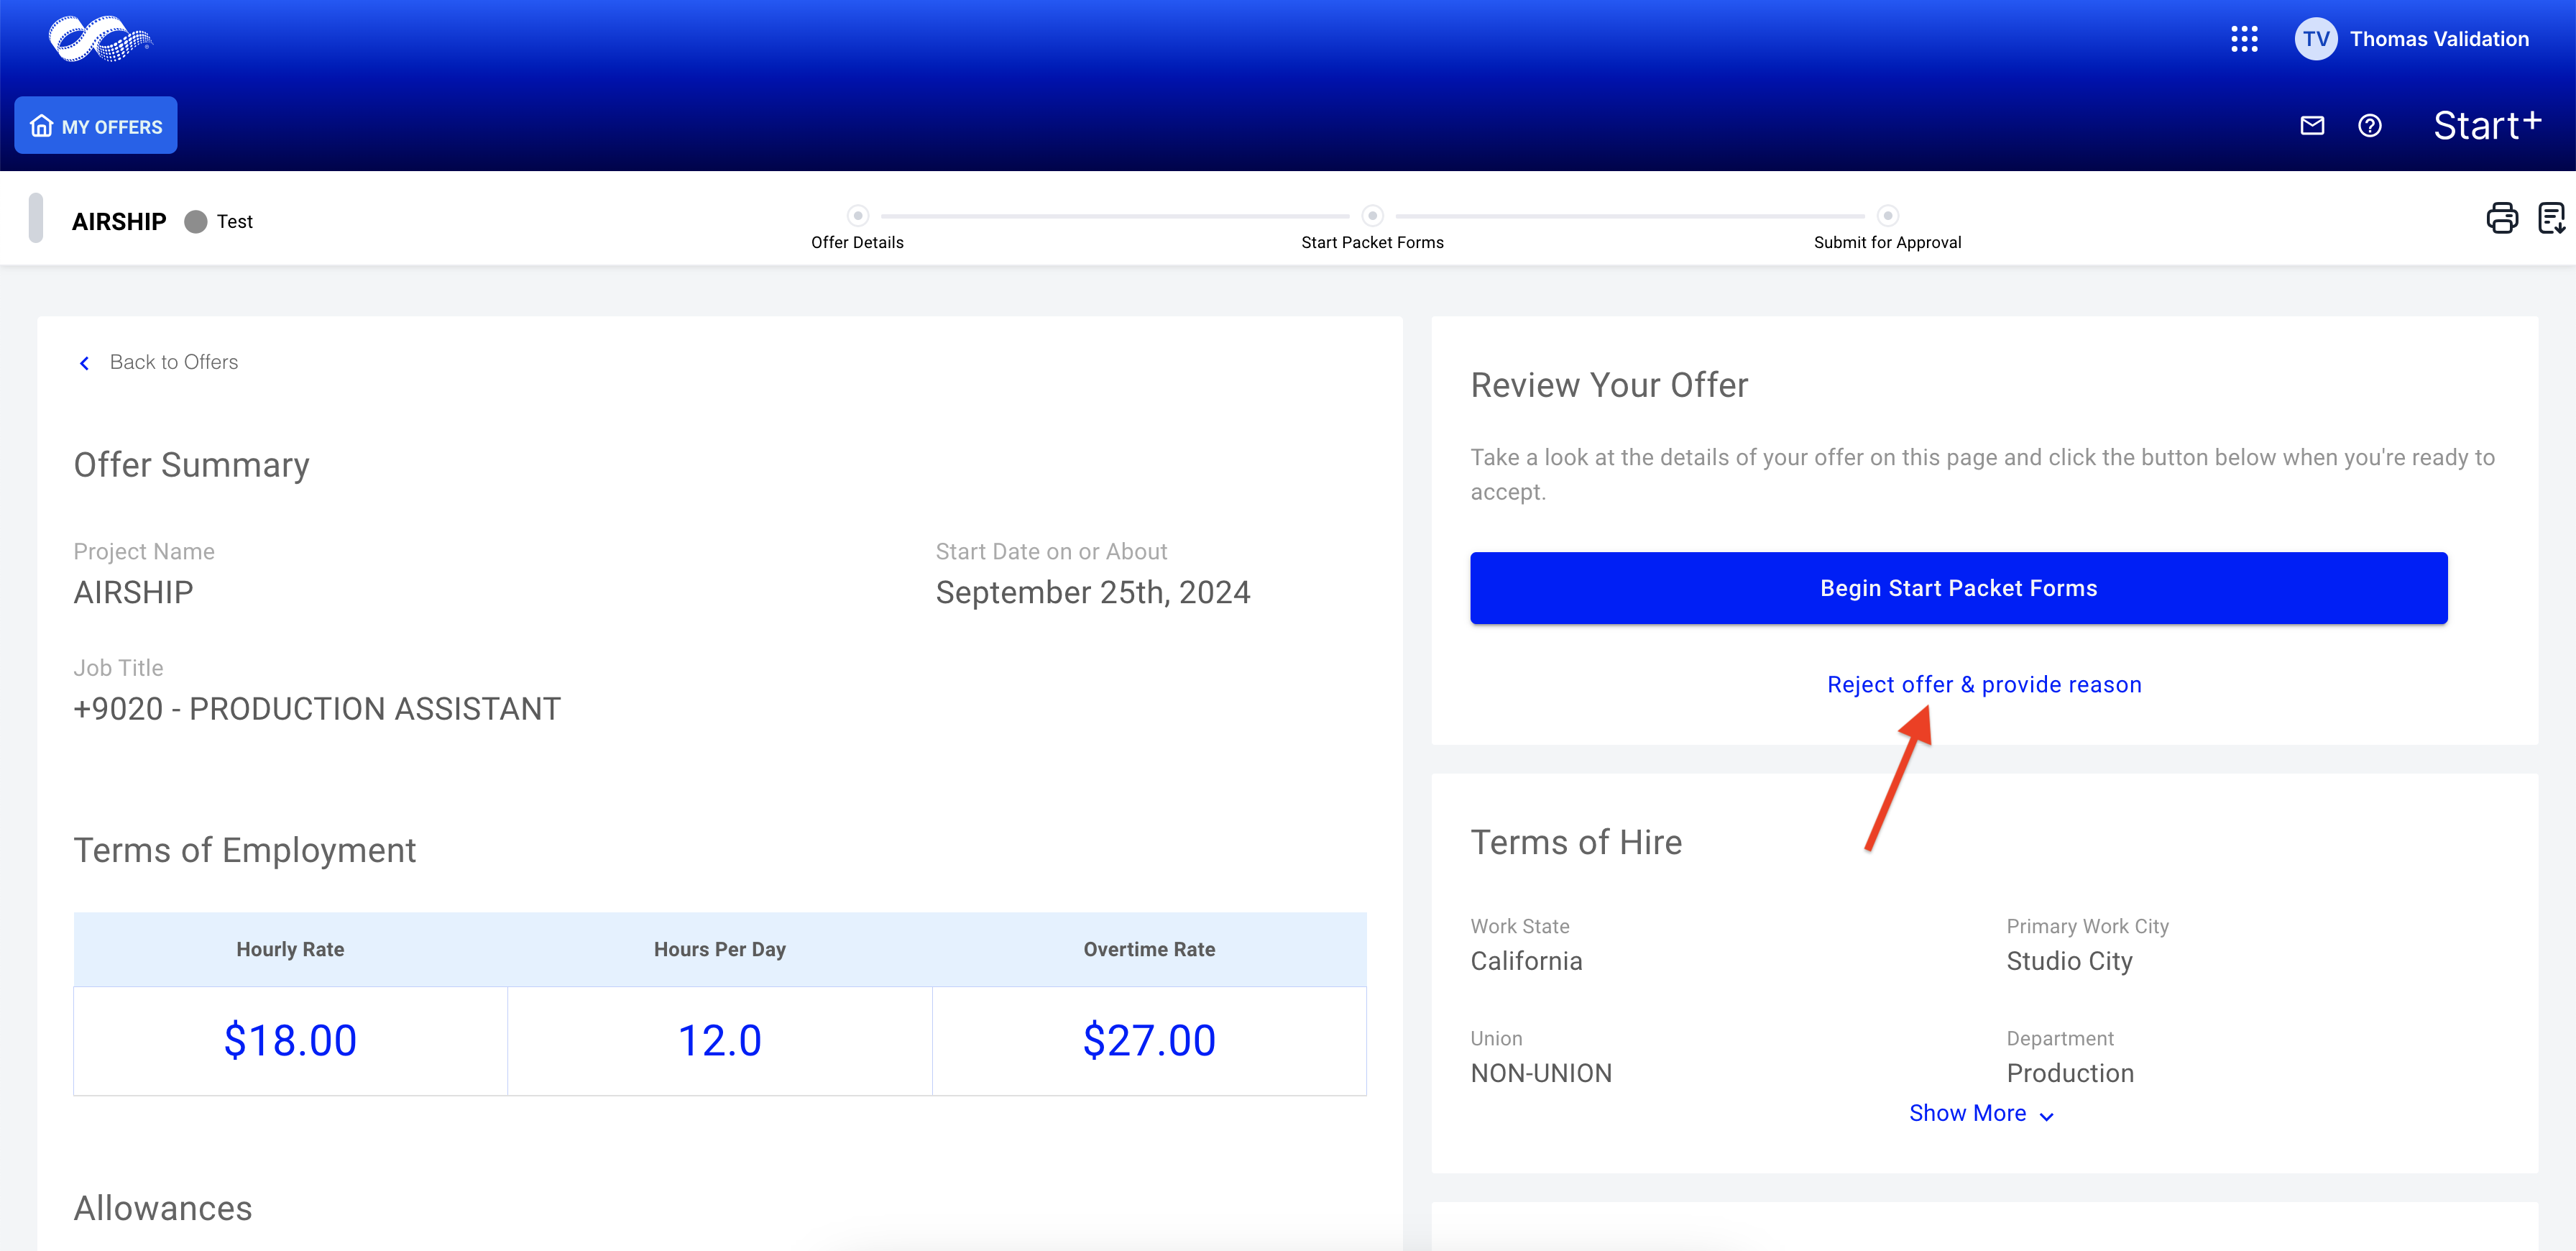
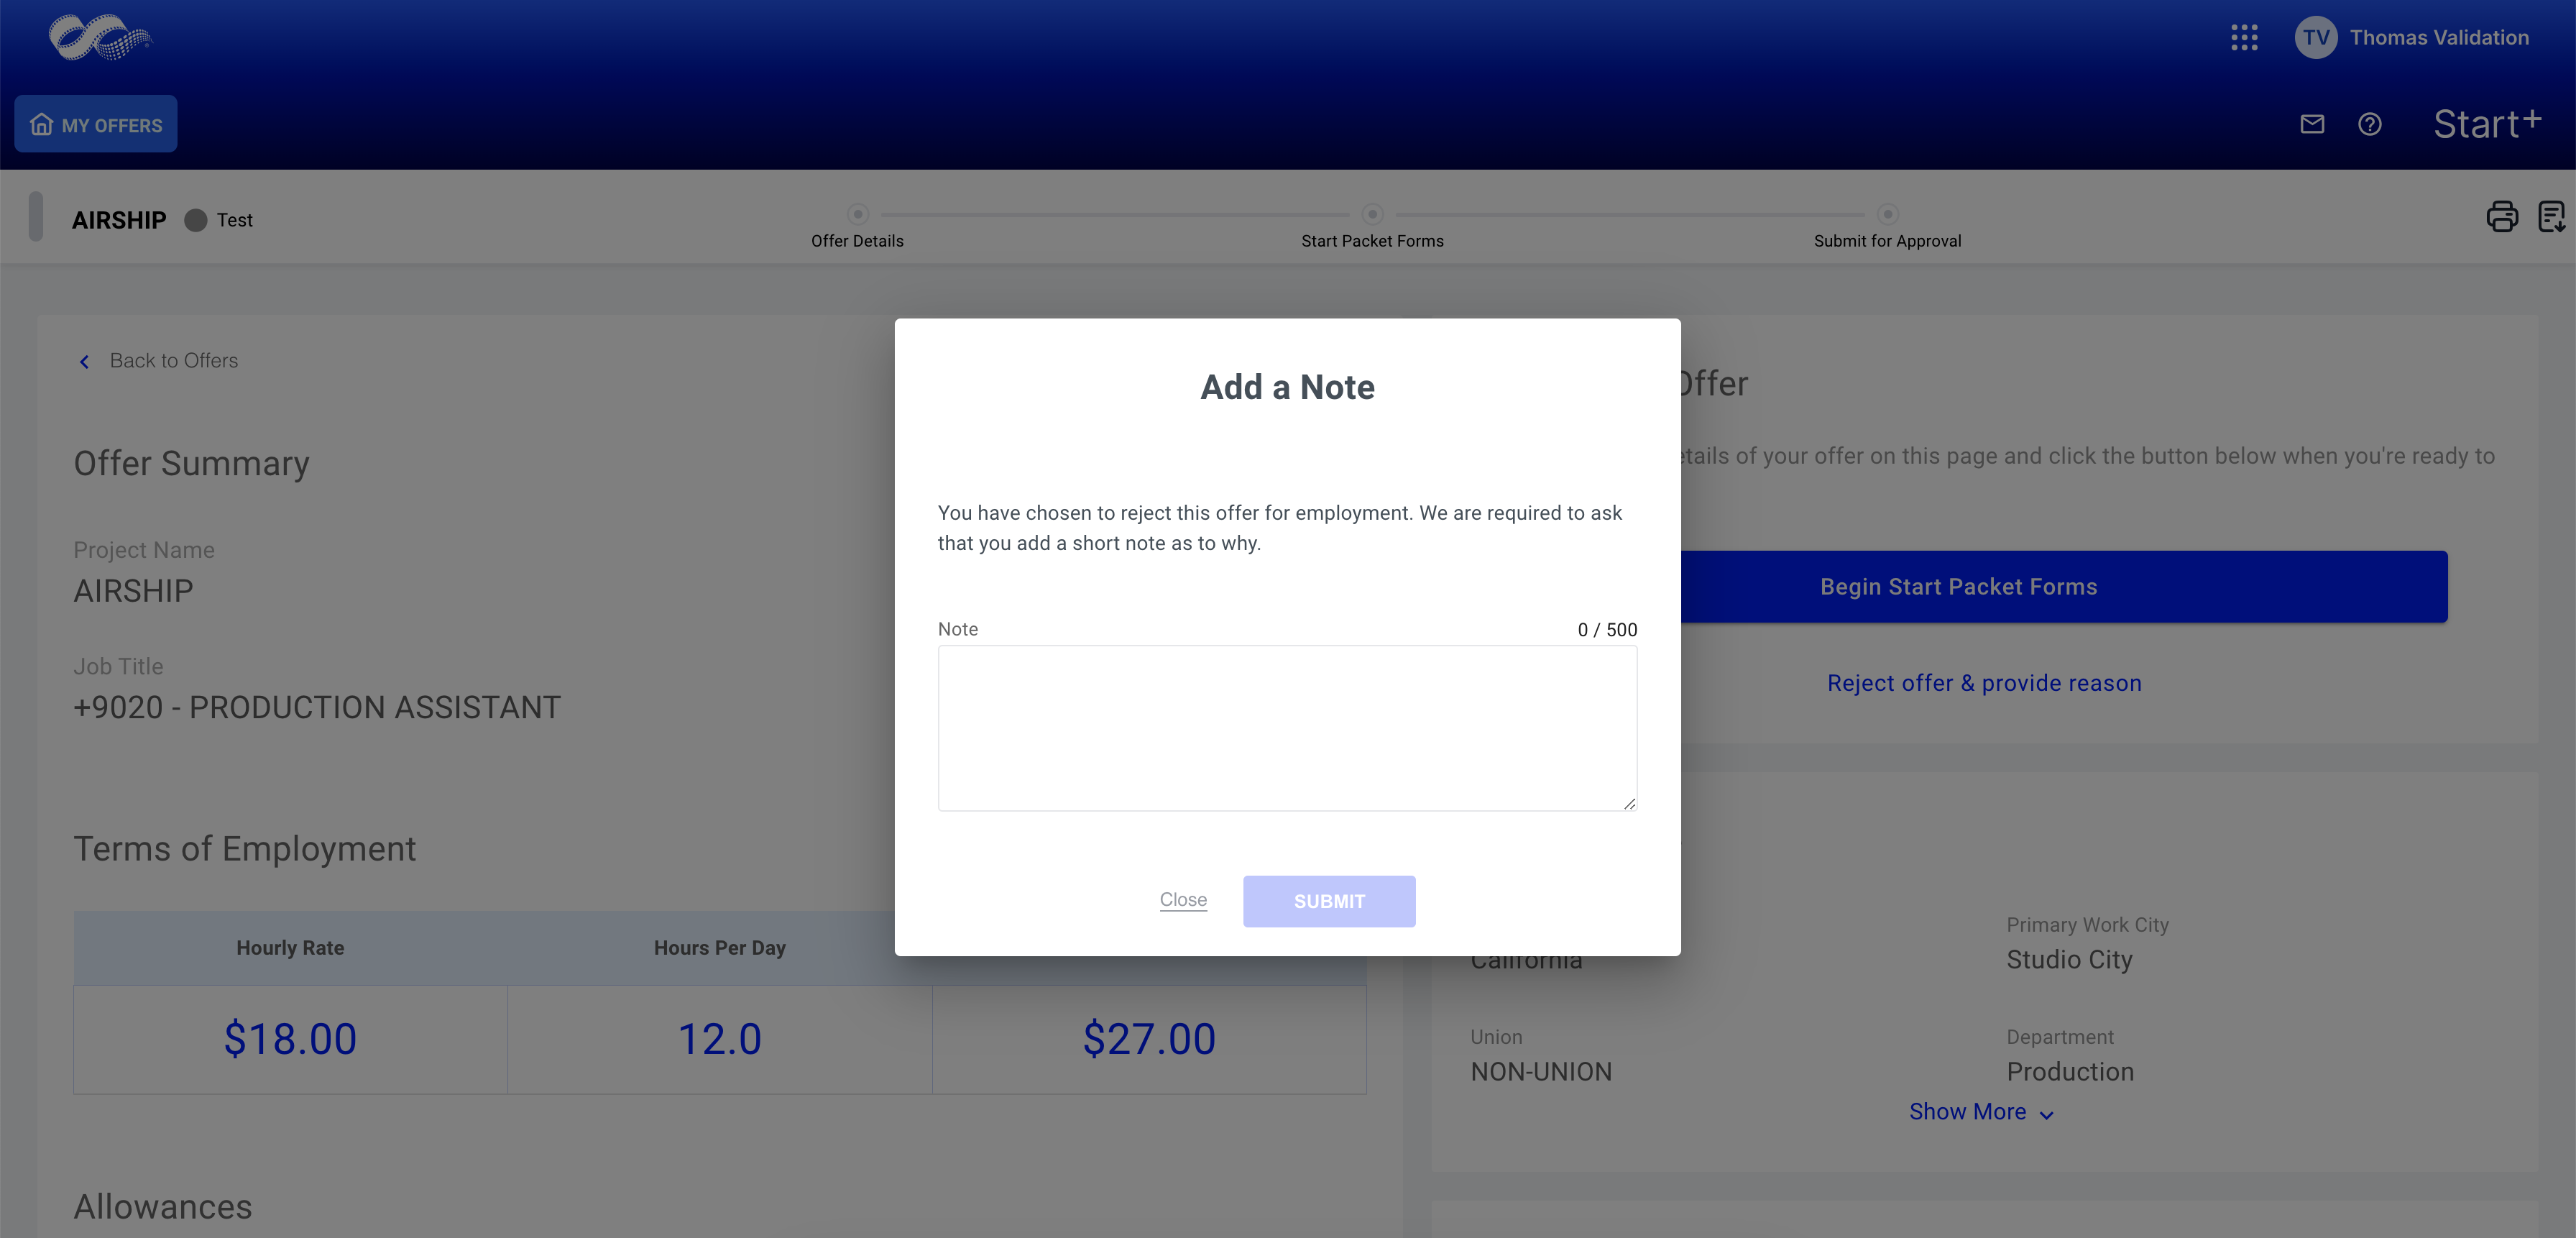
Note: You must always provide a reason. When you are ready, click Submit to reject the offer.
Accept your offer
- Review your offer information.
Loan-Outs: If you were onboarded as a loan-out employee, you’ll see a note regarding your loan-out profile under the “Your Hiring Profile” section. You’ll need to add a loan-out entity before you can continue accepting your offer. Learn more about this here.
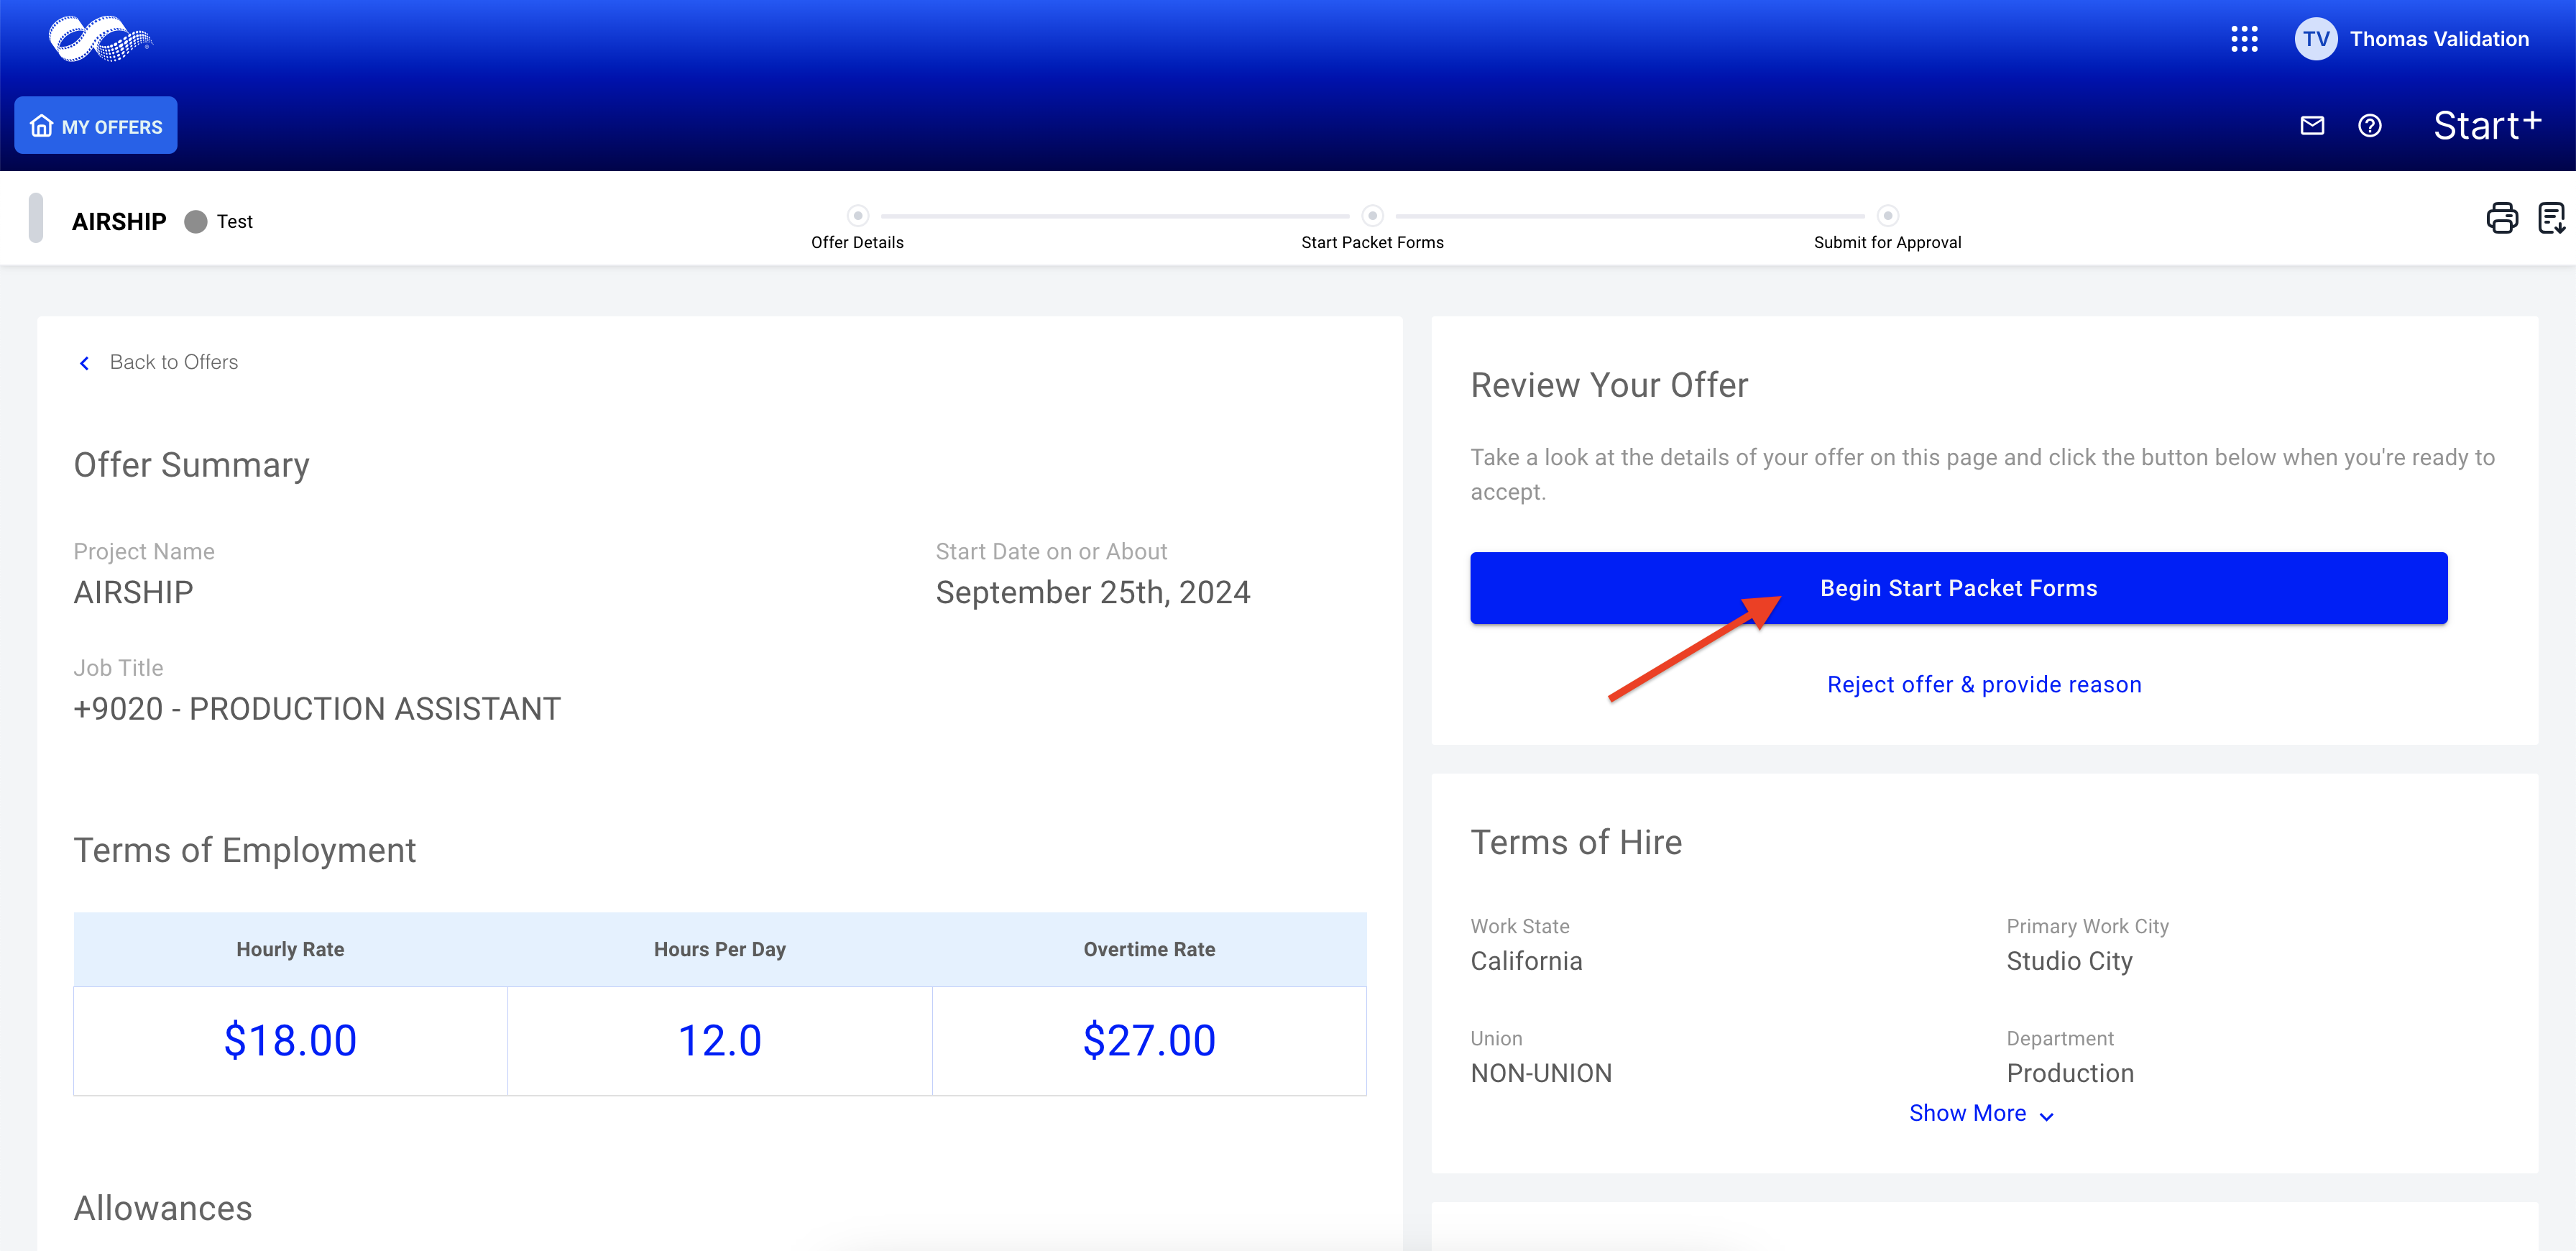
- If you are satisfied with the deal memo, click Begin Start Packet Forms.
-
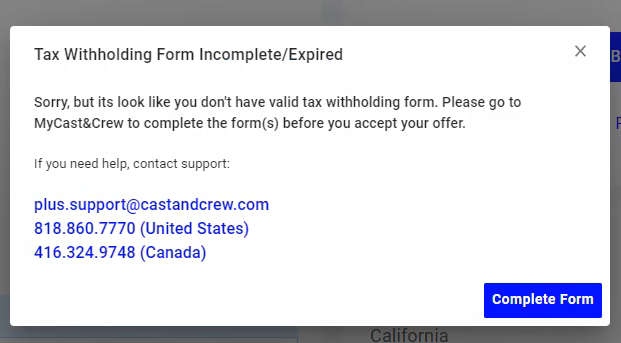
A window will pop up informing you that you do not have a withholding form on file. Click Complete Form.
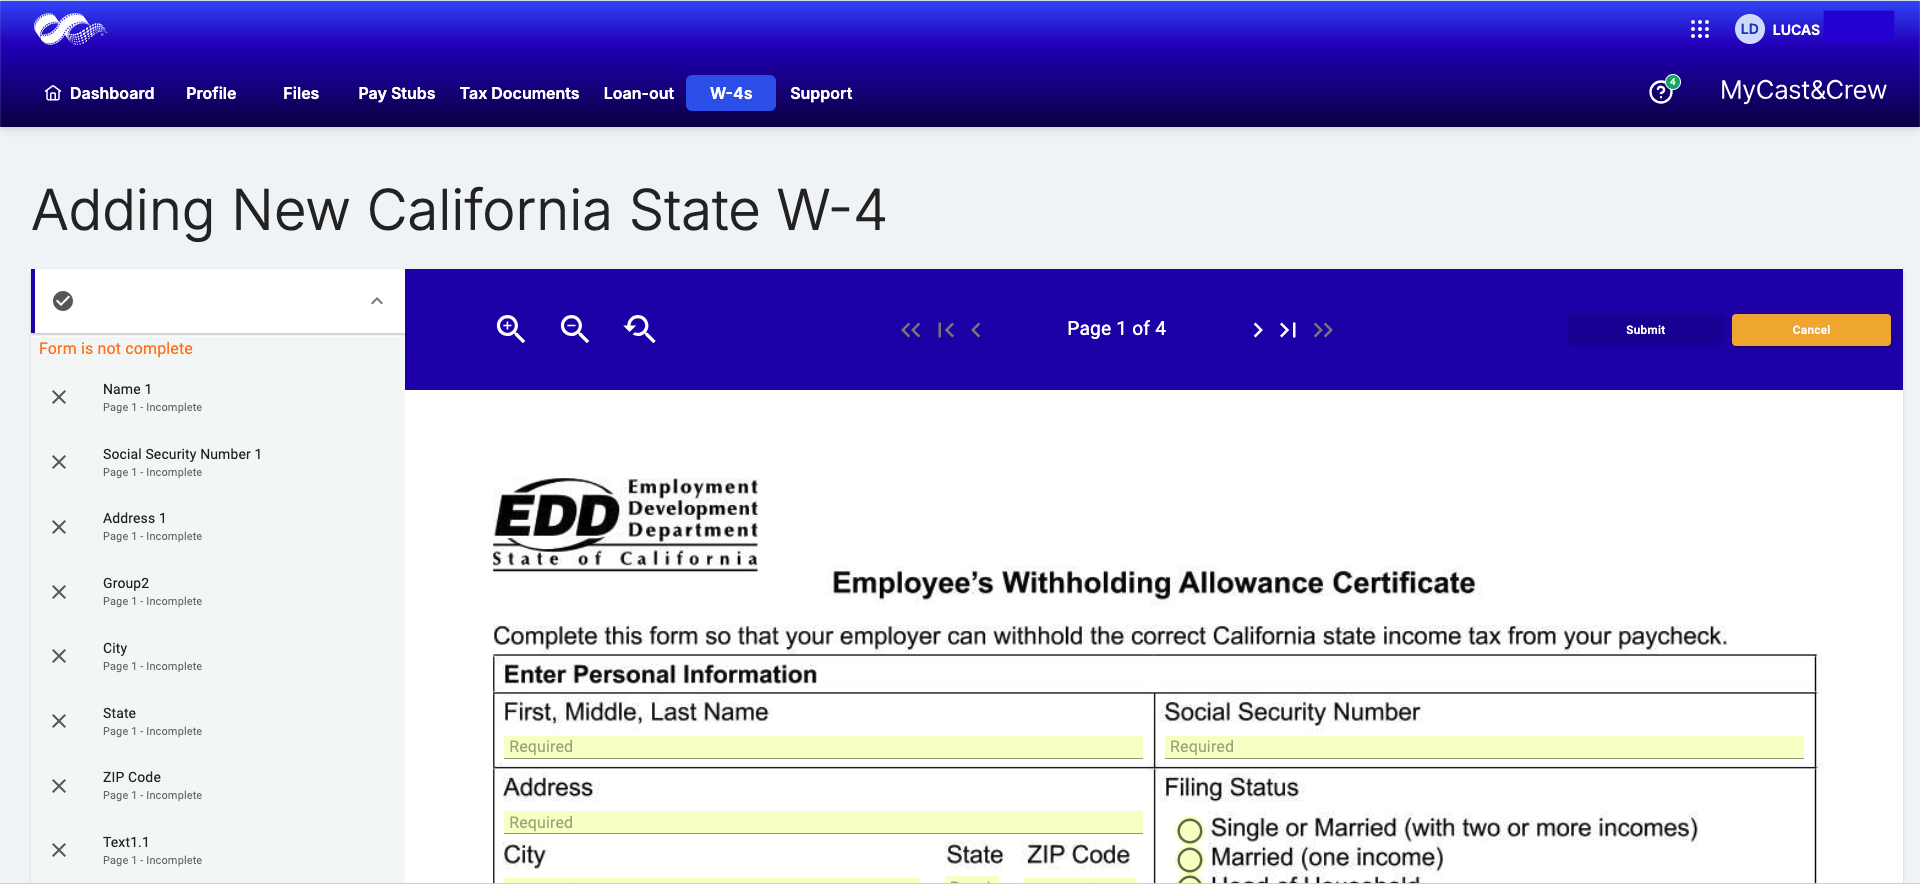
- You'll be directed to the applicable withholding form template in MyCast&Crew. (In the below example, California is the work state).
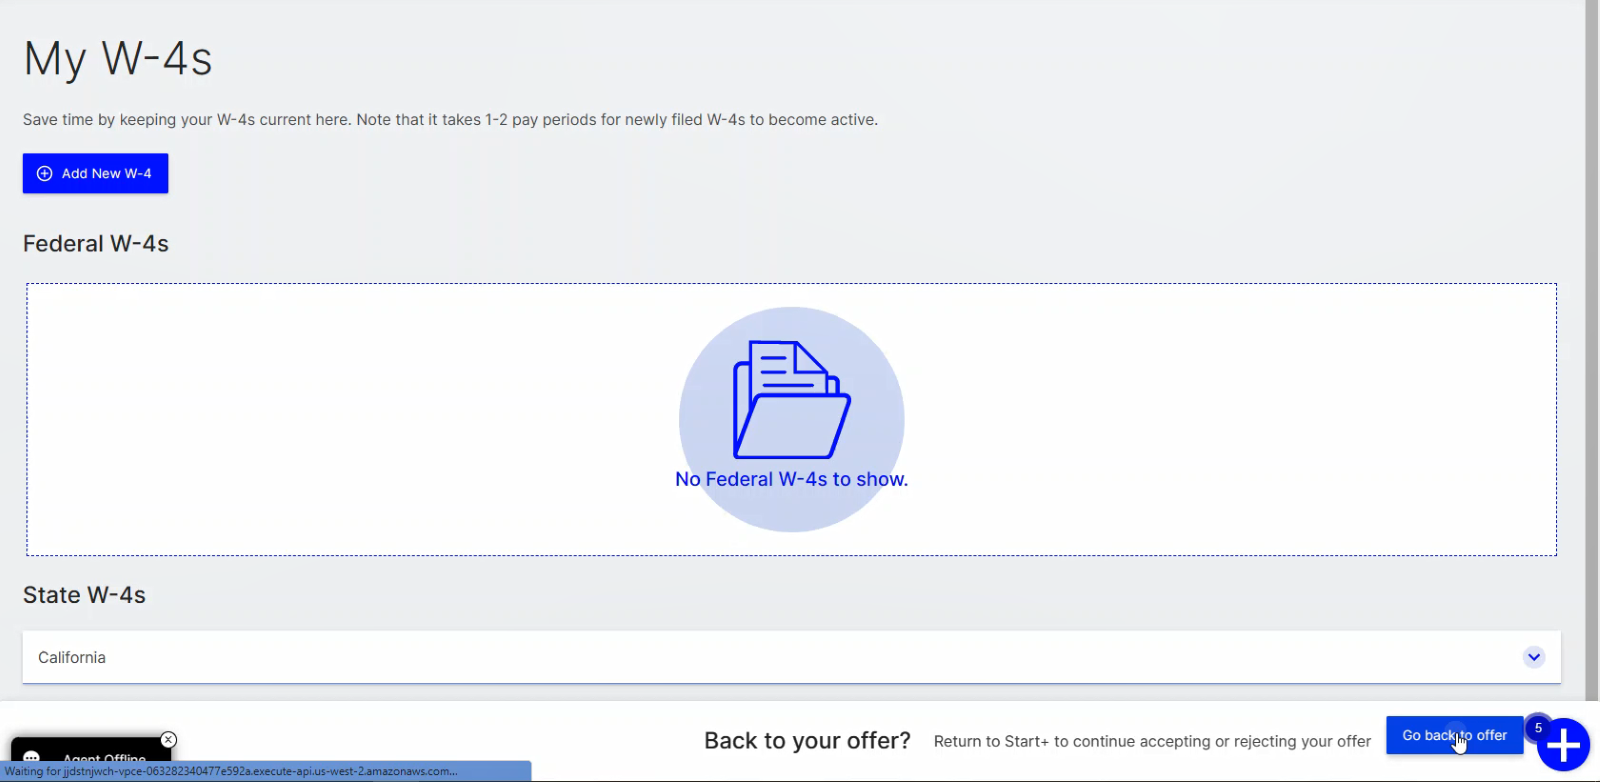
- After you complete and submit the form, click Go back to offer at the bottom of the screen.
- When you return to the Offer Summary page, click Begin Start Packet Forms again. The system will find the new withholding form, and you'll be asked to confirm it.
- Click Looks Good, Next to continue accepting the offer.
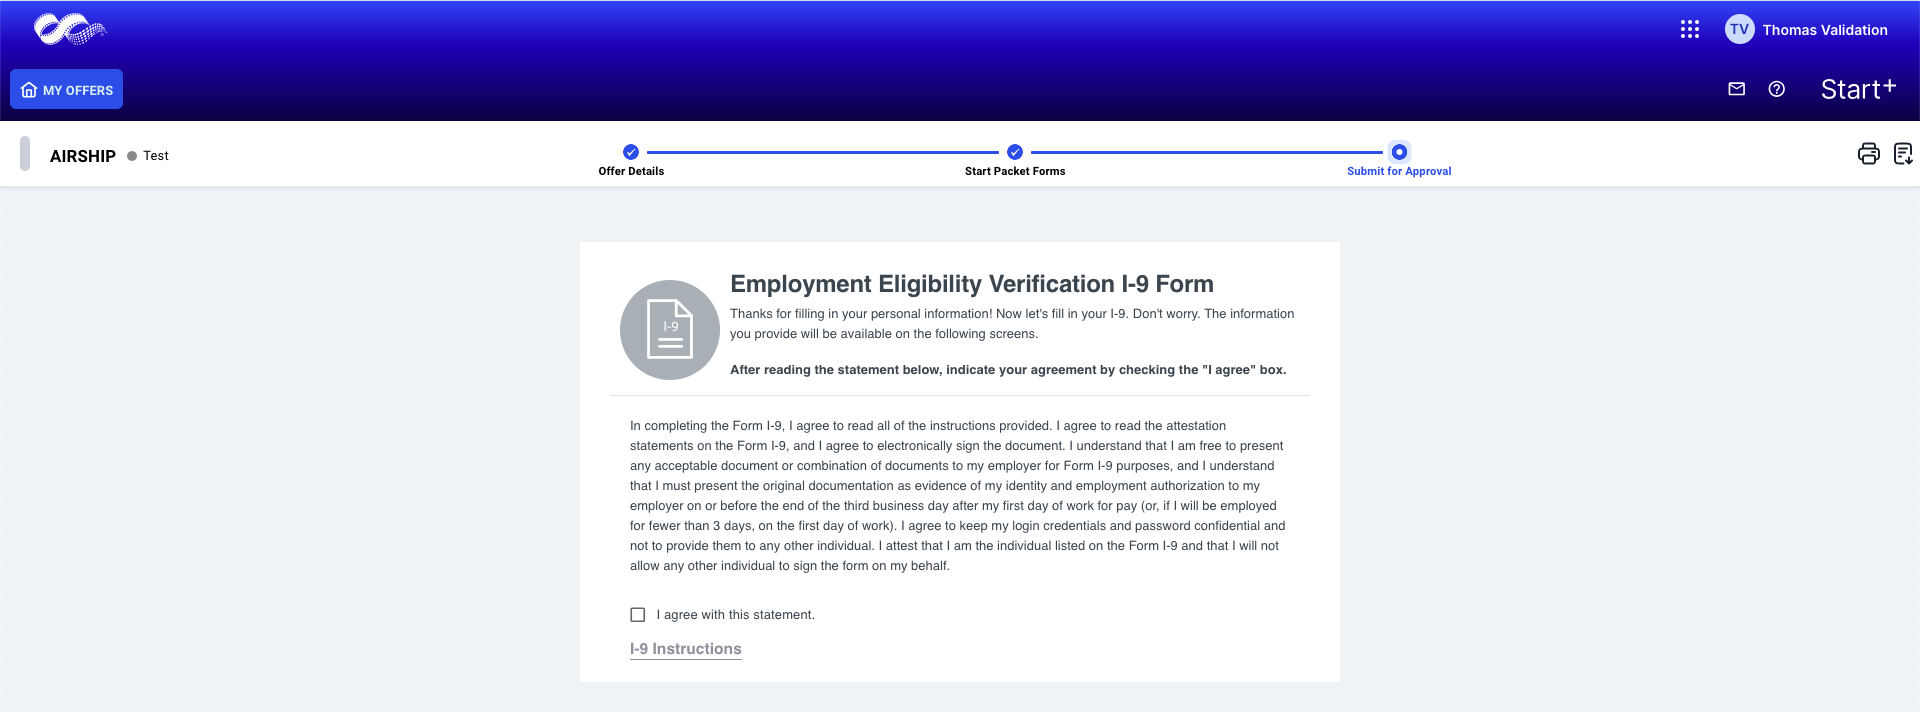
- Start+ will prompt you to complete the I-9 form. After reading the statement, select I agree with this statement. Then, click Continue.
- As a convenience, you can save your digital signature for use with all documents except the I-9 form. Enter your name as it appears in your profile, then your initials. Click Yes, Save For The Duration Of My Session to continue.
-
Depending on the production, the number of forms you must sign will vary. However, the first document is always the I-9 form.
Note: Notice the sidebar, which tracks your progress. Green checkmarks appear as you populate the fields.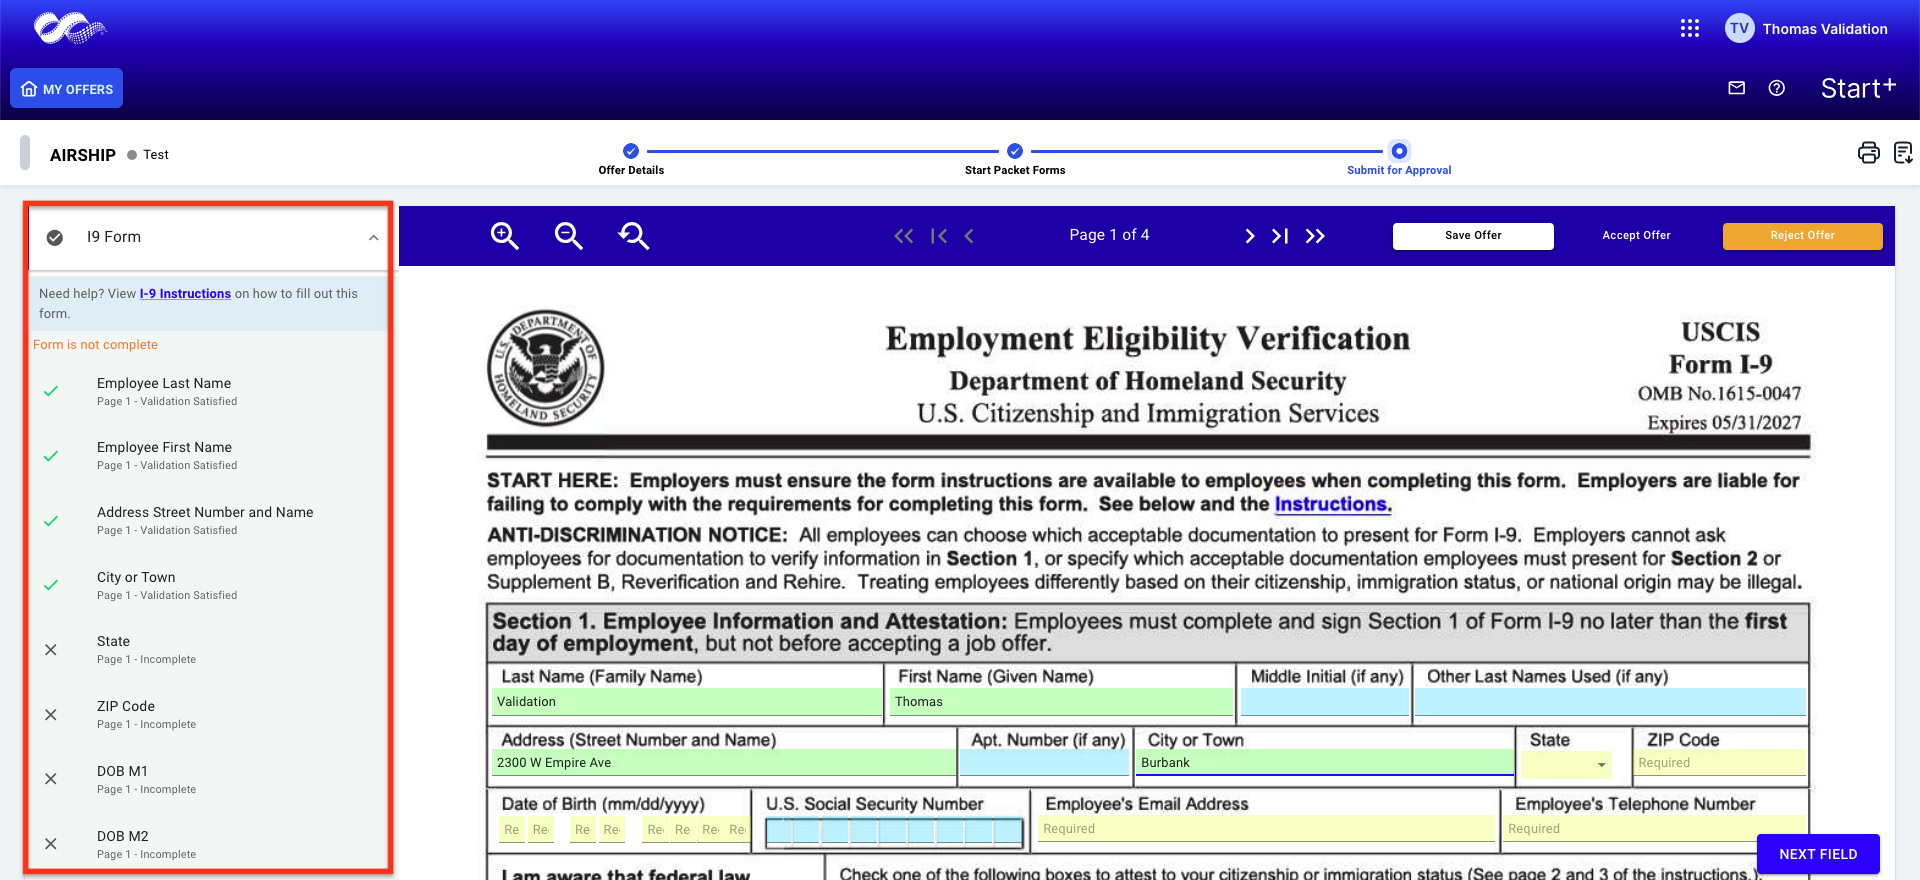
-
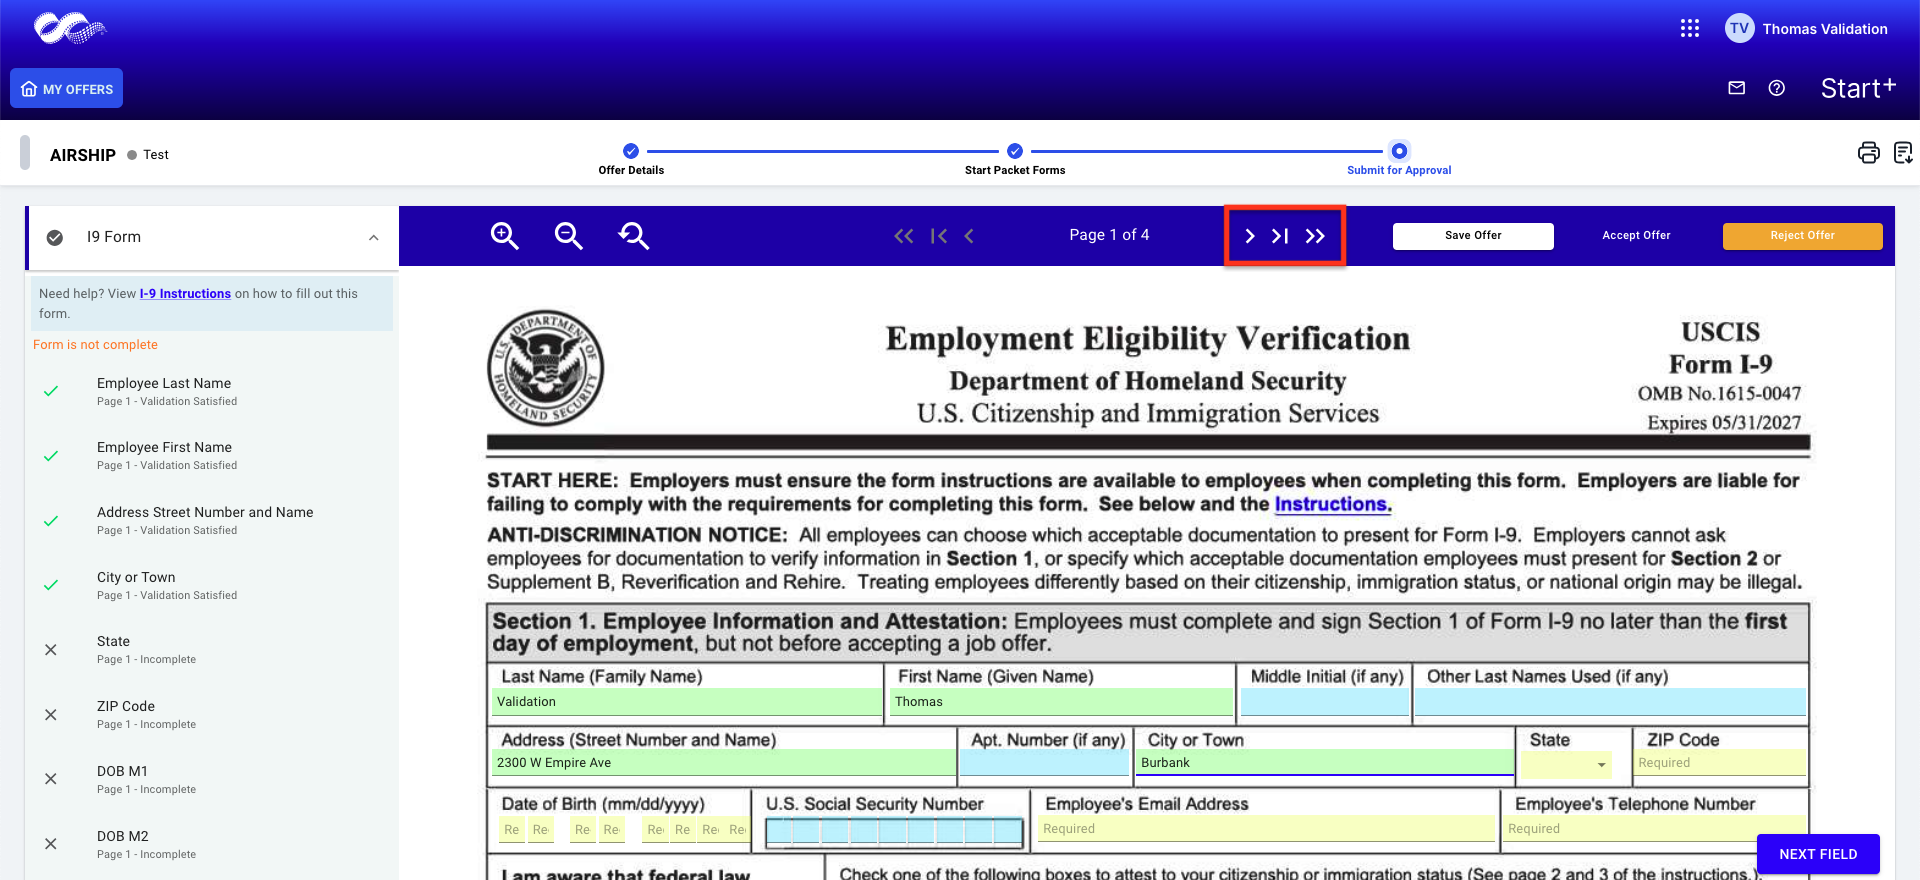
Complete all required fields, which are highlighted in yellow. Blue fields are not required. Sign and date the document. Use the arrows to move to the next pages. You can also click the names in the sidebar to jump to the respective page.
-
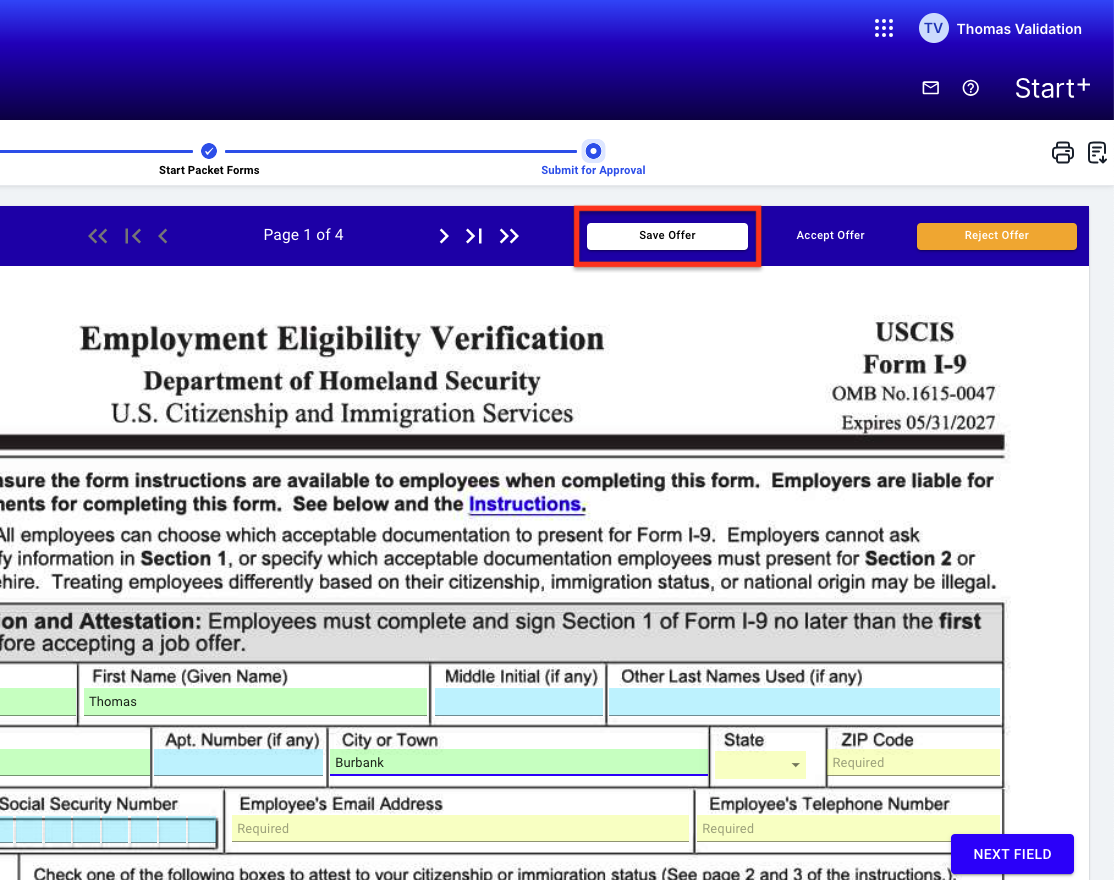
If you are unable to complete the process, you can always click Save Offer and sign out. When you log in again, Start+ will return you to where you left off.
-
Now, complete all remaining forms. When you are finished, click Accept Offer.
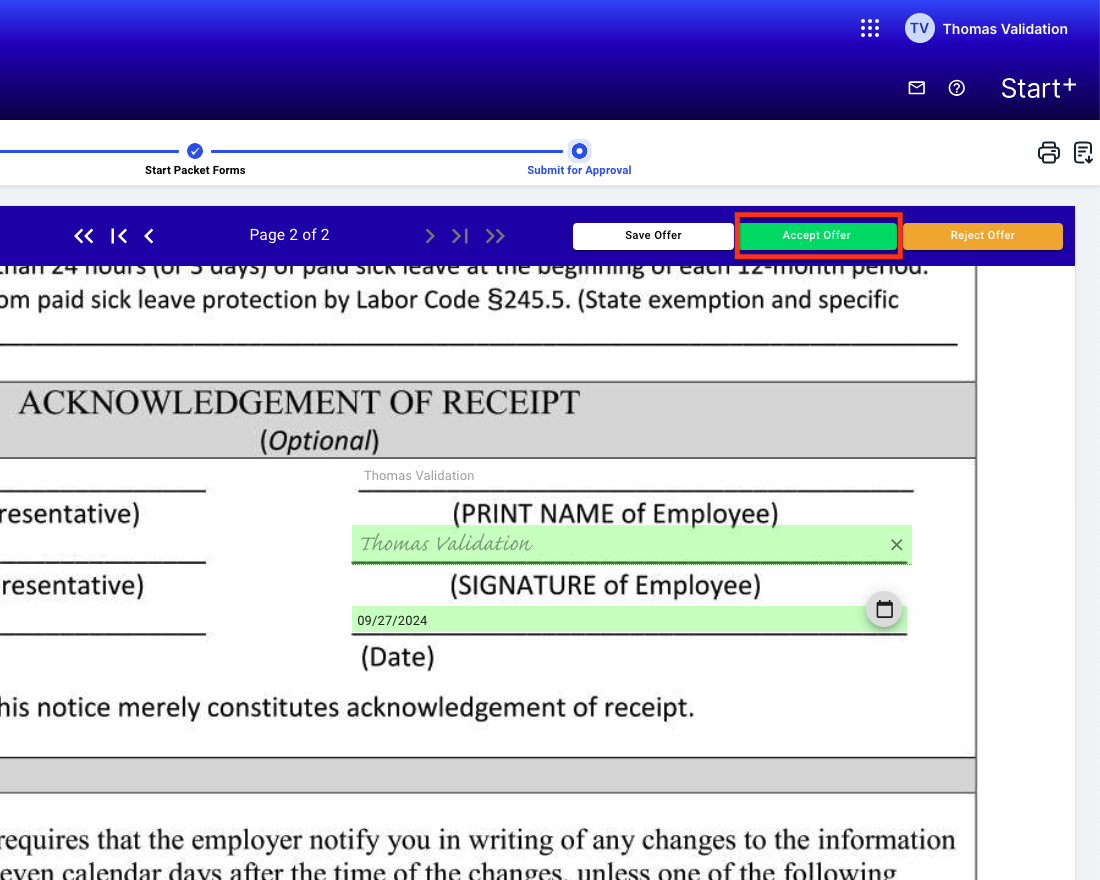
- A confirmation message will appear where you can navigate to your MyCast&Crew account and sign up for direct deposit for quick and easy retrieval of payments.
Steps for New Experience
Accepting an Offer on Mobile
Watch the Video:
Receiving the Email Invite
To begin, open the email you received and click the Start link.
First time using Start+?
If this is the first time you are using Start+, you'll need to go through the registration process to create your MyCast&Crew account. Learn how to do this here.
Requesting Corrections or Accepting Your Offer
Request Changes for Your Offer
Start+ displays the deal memo for your review. If you disagree with the terms, you can request changes to the offer. Click Request Changes at the bottom left to begin the process:
Enter your comment as to what you are requesting a change for (it is best to be as specific as possible to avoid delays) and click Request Change:
You'll be taken back to your list of offers and will see the offer under the "Change Requested" section:
Once your hiring manager completes your requested changes, you will receive an email notification to review the updated offer.
When you open the offer in Start+, you'll be prompted to review what has been updated, and the updated offer details page will be highlighted. Click View Updated Offer to continue:
If all changes look correct, click the checkbox above the "Begin Start Packet Forms" button to state you have reviewed the changes. Then click Start Onboarding to start signing the updated offer:
Accept your offer
- Review your offer information.
Loan-Outs: If you were onboarded as a loan-out employee, you’ll see a note regarding your loan-out profile under the “Your Hiring Profile” section. You’ll need to add a loan-out entity before you can continue accepting your offer. Learn more about this here.
-
If you are satisfied with the deal memo, click Start Onboarding >.
-
You will be taken to step 1 of the onboarding process. Step 1 is verifying your profile. On this screen, expand each section to verify the information is correct. Click "Edit" to make any changes. If all looks good, click Next in the bottom right corner:
Tip: You can track your progress by expanding the steps at the top of the screen:
-
Step 2 is confirming your Tax Witholdings. If you already have witholding forms on file, you can click Continue > in the bottom right corner. If you do not, you will add them here:
-
You'll be directed to the applicable withholding form template in MyCast&Crew. (In the example below, California is the work state). Complete the W4 form and scroll to the bottom to click Sign:
-
After you complete and submit the form, click Continue to move on to step 3:
-
Step 3 is verifying your payment information. If you do not have direct deposit set up, you will see your mailing address to receive physical checks. If you do have direct deposit set up, you will see your direct deposit information.
Click Next > once you've confirmed your payment information:
(You can set up direct deposit from this screen if you do not have it set up!)
- Step 4 is completing the I-9 form. This will prefill the I-9 form in your start paperwork. Enter your information and select your citizenship/immigration status at the bottom of the page. Click Apply to I-9 > once all is entered:
- Click Sign I-9 form to sign the form:
-
Type in your name to sign the form. You can also check the box next to "Save this signature for future projects" to save the signature. Click Adopt & Sign:
-
Click Continue >:
-
Step 5 is to complete the onboarding documents within the packet.
First, you'll be prompted to save your signature and initials. This will allow you to simply click to insert your signature on forms that require it.
Enter your first and last name and initials, and click Yes, Save My Signature:
You will see the list of forms you need to complete shown. You can click the downward arrow button to expand and preview a document. When ready to sign, click Sign All > to sign all forms at once: - You'll be walked through the fields to complete. Click View Field 1 of X to jump to the field needing completion. For signatures, simply click to insert your signature and dates:
-
You will repeat these steps until all forms are completed. You will receive a success message stating your packet has been submitted for approval:
Accepting on Desktop
Watch the Video:
Receiving the Email Invite
To begin, open the email you received and click the Start link.
First time using Start+?
If this is the first time you are using Start+, you'll need to go through the registration process to create your MyCast&Crew account. Learn how to do this here.
Requesting Corrections or Accepting Your Offer
Request Changes for Your Offer
Start+ displays the deal memo for your review. If you disagree with the terms, you can request changes to the offer. Click Request Changes to begin the process:
Enter your comment as to what you are requesting a change for (it is best to be as specific as possible to avoid delays) and click Request Change:
You'll be taken back to your list of offers and will see the offer under the "Change Requested" section:
Once your hiring manager completes your requested changes, you will receive an email notification to review the updated offer.
When you open the offer in Start+, you'll be prompted to review what has been updated, and the updated offer details page will be highlighted. Click View Updated Offer to continue:
If all changes look correct, click the checkbox above the "Start Onboarding >" button to state you have reviewed the changes. Then click Start Onboarding > to start signing the updated offer:
Accept your offer
- Review your offer information.
Loan-Outs: If you were onboarded as a loan-out employee, you’ll see a note regarding your loan-out profile under the “Your Hiring Profile” section. You’ll need to add a loan-out entity before you can continue accepting your offer. Learn more about this here.
-
If you are satisfied with the deal memo, click Begin Start Packet Forms.
-
You will be taken to step 1 of the onboarding process. Step 1 is verifying your profile. On this screen, expand each section to verify the information is correct. Click "Edit" to make any changes. If all looks good, click Next in the bottom right corner:
Tip: You can track your progress on the left side of the screen:
-
Step 2 is confirming your Tax Witholdings. If you already have witholding forms on file, you can click Continue > in the bottom right corner. If you do not, you will add them here:
-
You'll be directed to the applicable withholding form template in MyCast&Crew. (In the example below, California is the work state). Complete the W4 form and click Save & Sign:
-
After you complete and submit the form, click Continue > to move on to step 3:
-
Step 3 is verifying your payment information. If you do not have direct deposit set up, you will see your mailing address to receive physical checks. If you do have direct deposit set up, you will see your direct deposit information.
Click Next > once you've confirmed your payment information:
(You can set up direct deposit from this screen if you do not have it set up!)
- Step 4 is completing the I-9 form. This will prefill the I-9 form in your start paperwork. Enter your information and select your citizenship/immigration status at the bottom of the page. Click Apply to I-9 > once all is entered:
Click Sign I-9 form to sign the form: -
Type in your name to sign the form. You can also check the box next to "Save this signature for future projects" to save the signature. Click Adopt & Sign:
-
Click Continue >:
-
Step 5 is to complete the onboarding documents within the packet.
First, you'll be prompted to save your signature and initials. This will allow you to simply click to insert your signature on forms that require it.
Enter your first and last name and initials, and click Yes, Save My Signature:
You will see the list of forms you need to complete shown. You can click the downward arrow button to expand and preview a document. When ready to sign, click Sign All > to sign all forms at once: - You'll be walked through the fields to complete. Click View Field 1 of X to jump to the field needing completion. For signatures, simply click to insert your signature and dates:
-
You will repeat these steps until all forms are completed. You will receive a success message stating your packet has been submitted for approval: