To request a new project with Cast & Crew and select from our exciting suite of digital products, you’ll need to fill out a new Digital Onboarding Request Form via the MyCast&Crew portal.
If you’re only setting up payroll with Cast & Crew, the form should take less than 15 minutes to complete from start to finish.
Selecting digital products will add pages to the form, which will add more time, about 5-10 minutes for Start+ and Hours+ and less than 5 minutes for PSL+.
Working from a cloned project will speed up this process significantly. The only required field in a cloned project is the project name since it needs to be unique. However, depending on what additional changes will be made, it can take up to 5-10 additional minutes.
This can be a straightforward and easy process, and we’re here to help! Below are some tips to help you along the way.
To see an overview of the Project Onboarding dashboard, click here.
If you’re a new Cast & Crew client, you’ll receive a welcome email with a link to create a new Okta account.
You’ll use these credentials to sign in to MyCast&Crew to access the Project Onboarding form.
If you’re an existing client with access to MyCast&Crew, you’ll receive an email to log in to MyCast&Crew and access the Project Onboarding to submit a new project request.
Otherwise, you may receive a one-time use link to access the project onboarding form. If you have previously been provided a one-time link and are requesting a new project setup, you will receive another one-time link for the new one.
Can't access the link in the email?
We're sorry you are having problems getting started. This email might have been caught in your organization's security filters, which are blocking the links in the email from being accessed directly. Here are a few steps you can follow to solve the issue:
- Try to open the email from the Web Browser.
- Make sure that the @castandcrew.com domain is part of the allowed domains (whitelisted) by you or the organization you work for. (You may need to work with your IT Department.)
-
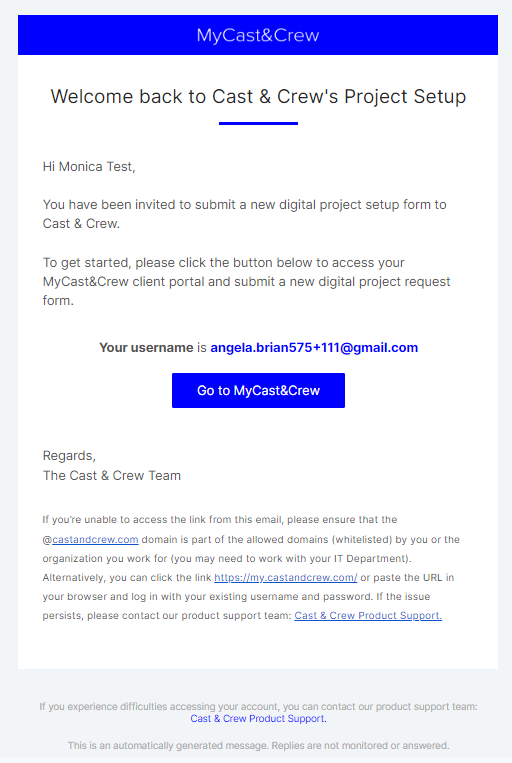
If you already have access to other Cast & Crew digital products, and can't click the "Go to MyCast&Crew" button (see example below), log in to the MyCast&Crew portal with your existing username and password.
If you're still having issues, please check out this alternative article if you can't access the registration link from the email.
This article shows you how to perform this task in both Classic and New experiences.
Steps for Classic Experience
Who can submit a new project request?
- Studio Executive
- Payroll Accountants
- Producer/Line Producer
Gathering the Documents You Need
The Project Onboarding Request form questions ask for information about your studio/production and your team who will be utilizing the digital products. Depending on what you choose for your project, you may need the following information or documents as you fill out the form:
- ACH Payment Form
- If you’re choosing PSL+, it’s helpful to have COA (Chart of Accounts)
Getting Help
If you need help filling out the form at any time, use these free tools:
- Hover over the question mark icon next to a question to view a “tool tip” that provides additional information.
- Click the Support tab to send a message to our support team for help.
-
Click the question mark icon in the top right of the project form to access the knowledge base:
Accessing the Project Onboarding Form
To navigate to the Digital Onboarding Setup Form:
- Open the Welcome Email sent by Cast & Crew.
- Click the link to activate your account or log in to your MyCast&Crew portal if you’re an existing user.
- Click the Project Onboarding tab in the top navigation.
Project Onboarding Dashboard
To create a new project request, click the +New Project button under the navigation menu:
Next, select your preferred method for creating your new project request:
- Start from Scratch: Create a net-new project request from a blank slate.
- Use a Template: Use one of your existing project templates to begin creation.
- Clone an Existing Project: Clone an already existing project you’ve created before to begin creation.
If you choose to use a template or clone an existing project, you’ll be prompted to select which template you want to use or which project you want to clone from:
Once you’ve selected your preferred starting point, click Create Project Draft.
Completing the Form
The Project Onboarding form is split into three sections:
- Part 1 - Project Details: Your core project information, including company details, payroll services, production dates, union selections, and required document uploads. Submitting this lets our team get started on setting up your project immediately.
- Part 2 - Users & Permissions: Add users, assign product access and roles, configure Studio+ folders, and set department structures for Hours+. Once Parts 1 and 2 are done, you can begin processing payroll.
- Part 3 - Settings & Approval Flows: Configure project settings and approval workflows for Start+, Hours+, and DPO.
Each section will guide you step by step from blank slate to completion.
When completing the form, certain selections may open new fields that require information. This ensures all essential information is captured.
You can easily track your progress within a section in the left-side menu. Completed steps will show a checkmark:
After filling out a step, click Next to move to the next one.
You can return to a prior step by clicking Previous or simply click on the step itself in the left-side menu.
Saving Drafts
At any time while completing the onboarding form, you can save your progress as a draft.
Click Save Draft to save a draft and continue editing. If you’d like to save a draft and exit the form, click the arrow/caret on the “Save Draft” button and select Save Draft & Exit:
If you attempt to close the form with the X in the top right corner with unsaved information, you will be warned and have the option to cancel:
Drafts can be accessed from the dashboard when you are ready to continue working on them. Click on the project to continue setup:
Review & Submit
At the end of each of the three sections, you will have a chance to review the information you entered.
If any of the section’s steps needs an update, click Edit on the step to be taken back to that step:
Optional Submission After Section 1 - Project Details
After completing section one – Project Details – you will have the option to submit the project request right away to allow Cast & Crew to begin setting up payroll for your project:
If you would like to submit now, click Review Details and then click Submit Project Details:
Otherwise, you can choose to wait to submit and click Continue with User & Permissions to move on to the next section – Users & Permissions.
If your project is not using Start+, Hours+, or DPO, you will not need to complete part three of the project request.
Add/update/delete Collaborators
You can add collaborators to help fill out the project request form. This can be helpful if multiple people need to work together on one single project request.
There are a few ways you can manage collaborators:
From the Dashboard
If you’re on the Project Onboarding Dashboard, click the three vertical dots button for the specific project, and then click Share:
While Completing Project Setup Form
- Ensure you complete ‘Section 1 – Products and services’ on the form. Click the Manage Collaborators button:
2. In the Manage Collaborators window on the right side of the screen, enter the email, name, and role of the team member you want to add. If they already exist in the system, their information will auto-populate:
3. Click Start Invite.
4. On the next screen, set their user permissions:
- View Only: Can view the form
- Edit: Can edit the form
5. If you grant the collaborator 'Edit' permission, you can also allow them to:
- Manage Collaborators: Can manage collaborator and permissions
- Submit: Can submit the form
-
Click Custom Sections to choose the form sections this collaborator can edit. This is helpful if you want to limit their editing accessibility. Choosing any digital product like PSL+ or Start+ will automatically select ‘Users for digital products.’
6. Click Invite Collaborator once you are satisfied with your selections.
7. (Optional) You'll be asked if you'd like to give the user Admin permissions, which will allow them to submit and create projects, as well as invite other admin users.
The user will receive an email invite notifying them that they have been added as a collaborator to your project request form.
To Update Collaborators
After adding a collaborator, click on their name in the 'Manage Collaborators' section to update their permissions:
This will open the edit options:
If you have Admin permissions, you can also edit their permissions in the 'Admin Users' section.
Multi-Country Support
If your project involves more than one country, the form will adjust according to reflect your selections:
This allows you to easily switch back and forth between locations to enter details for both in one step:
Admin Users
As an admin user, you can invite more admin users to create new projects at any time.
You’ll know you’re an admin user if you see this button on your dashboard:
Click the button to open the Admin Collaborators section, where you can:
- Add a new admin user by clicking + New Admin User.
-
Remove a team member or manage their permissions by clicking the 3-dot menu on a row:
- View the History log of the collaborators who have been added, removed, or updated.
Steps for New Experience
Watch Video:
Who can submit a new project request?
- Studio Executive
- Payroll Accountants
- Producer/Line Producer
Gathering the Documents You Need
The Project Onboarding Request form questions ask for information about your studio/production and your team who will be utilizing the digital products. Depending on what you choose for your project, you may need the following information or documents as you fill out the form:
- ACH Payment Form
- If you’re choosing PSL+, it’s helpful to have COA (Chart of Accounts)
Getting Help
If you need help filling out the form at any time, use these free tools:
- Hover over the question mark icon next to a question to view a “tool tip” that provides additional information.
- Click the Support tab in your MyCast&Crew dashboardto send a message to our support team for help.
-
Click the question mark icon in the top right of the project form to access the knowledge base:
Accessing the Project Onboarding Form
To navigate to the Digital Onboarding Setup Form:
- Open the Welcome Email sent by Cast & Crew.
- Click the link to activate your account or log in to your MyCast&Crew portal if you’re an existing user.
- Click the Project Onboarding button in the left-side navigation menu.
Project Onboarding Dashboard
To create a new project request, click the +New Project button under the navigation menu:
Next, select your preferred method for creating your new project request:
- Start from Scratch: Create a net-new project request from a blank slate.
- Use a Template: Use one of your existing project templates to begin creation.
- Clone an Existing Project: Clone an already existing project you’ve created before to begin creation.
If you choose to use a template or clone an existing project, you’ll be prompted to select which template you want to use or which project you want to clone from:
Once you’ve selected your preferred starting point, click Create Project Draft.
Completing the Form
The Project Onboarding form is split into three sections:
- Part 1 - Project Details: Your core project information, including company details, payroll services, production dates, union selections, and required document uploads. Submitting this lets our team get started on setting up your project immediately.
- Part 2 - Users & Permissions: Add users, assign product access and roles, configure Studio+ folders, and set department structures for Hours+. Once Parts 1 and 2 are done, you can begin processing payroll.
- Part 3 - Settings & Approval Flows: Configure project settings and approval workflows for Start+, Hours+, and DPO.
Each section will guide you step by step from blank slate to completion.
When completing the form, certain selections may open new fields that require information. This ensures all essential information is captured.
You can easily track your progress within a section in the left-side menu. Completed steps will show a checkmark:
After filling out a step, click Next to move to the next one.
You can return to a prior step by clicking Previous or simply click on the step itself in the left-side menu.
Saving Drafts
At any time while completing the onboarding form, you can save your progress as a draft.
Click Save Draft to save a draft and continue editing. If you’d like to save a draft and exit the form, click the arrow/caret on the “Save Draft” button and select Save Draft & Exit:
If you attempt to close the form with the X in the top right corner with unsaved information, you will be warned and have the option to cancel:
Drafts can be accessed from the dashboard when you are ready to continue working on them. Click on the project to continue setup:
Review & Submit
At the end of each of the three sections, you will have a chance to review the information you entered.
If any of the section’s steps needs an update, click Edit on the step to be taken back to that step:
Optional Submission After Section 1 - Project Details
After completing section one – Project Details – you will have the option to submit the project request right away to allow Cast & Crew to begin setting up payroll for your project:
If you would like to submit now, click Review Details and then click Submit Project Details:
Otherwise, you can choose to wait to submit and click Continue with User & Permissions to move on to the next section – Users & Permissions.
If your project is not using Start+, Hours+, or DPO, you will not need to complete part three of the project request.
Add/update/delete Collaborators
You can add collaborators to help fill out the project request form. This can be helpful if multiple people need to work together on one single project request.
There are a few ways you can manage collaborators:
From the Dashboard
If you’re on the Project Onboarding Dashboard, click the three vertical dots button for the specific project, and then click Share:
While Completing Project Setup Form
- Ensure you complete ‘Section 1 – Products and services’ on the form. Click the Manage Collaborators button:
2. In the Manage Collaborators window on the right side of the screen, enter the email, name, and role of the team member you want to add. If they already exist in the system, their information will auto-populate:
3. Click Start Invite.
4. On the next screen, set their user permissions:
- View Only: Can view the form
- Edit: Can edit the form
5. If you grant the collaborator 'Edit' permission, you can also allow them to:
- Manage Collaborators: Can manage collaborator and permissions
- Submit: Can submit the form
-
Click Custom Sections to choose the form sections this collaborator can edit. This is helpful if you want to limit their editing accessibility. Choosing any digital product like PSL+ or Start+ will automatically select ‘Users for digital products.’
6. Click Invite Collaborator once you are satisfied with your selections.
7. (Optional) You'll be asked if you'd like to give the user Admin permissions, which will allow them to submit and create projects, as well as invite other admin users.
The user will receive an email invite notifying them that they have been added as a collaborator to your project request form.
To Update Collaborators
After adding a collaborator, click on their name in the 'Manage Collaborators' section to update their permissions:
This will open the edit options:
If you have Admin permissions, you can also edit their permissions in the 'Admin Users' section.
Multi-Country Support
If your project involves more than one country, the form will adjust according to reflect your selections:
This allows you to easily switch back and forth between locations to enter details for both in one step:
Admin Users
As an admin user, you can invite more admin users to create new projects at any time.
You’ll know you’re an admin user if you see this button on your dashboard:
Click the button to open the Admin Collaborators section, where you can:
- Add a new admin user by clicking + New Admin User.
-
Remove a team member or manage their permissions by clicking the 3-dot menu on a row:
- View the History log of the collaborators who have been added, removed, or updated.