| Check out all of our Hours+ courses in Learning On-Demand. |
This article shows you how to perform this task in both Classic and New experiences.
Steps for Classic Experience
After logging in to Hours+, click the Daily Timesheets tab in the top navigation bar. 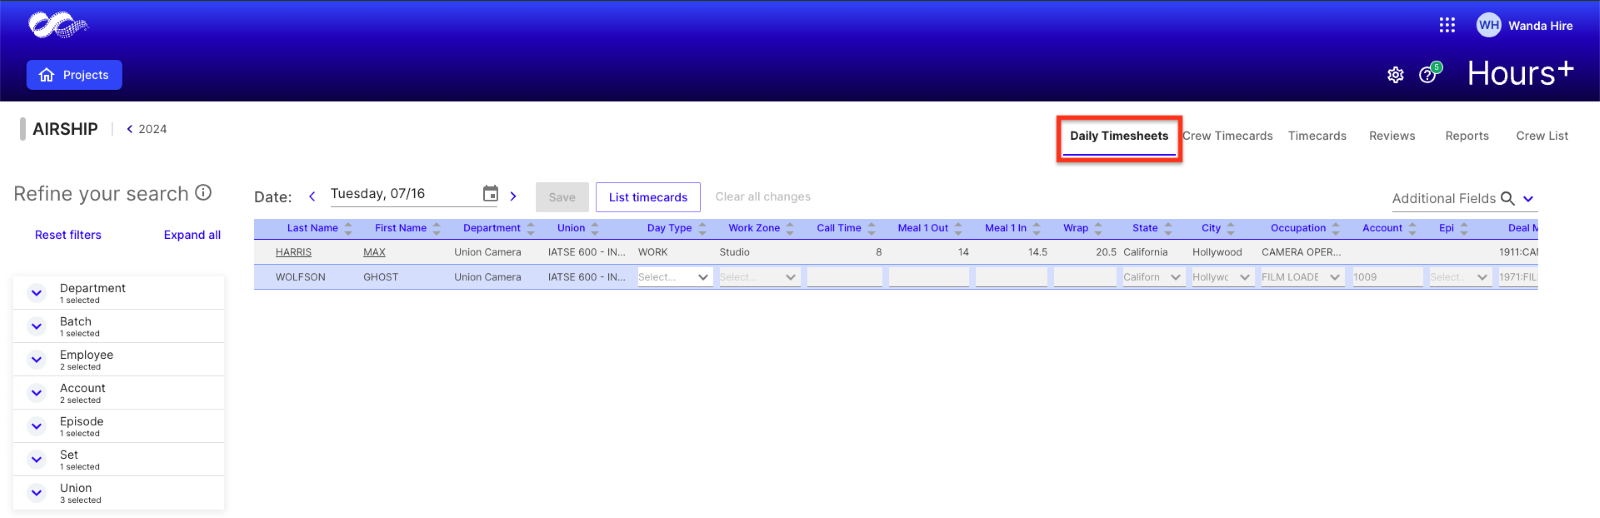
Click the Date field and select the date for which you would like to enter work times. 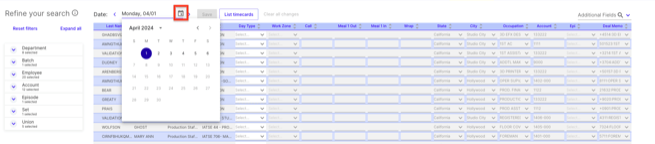
Use the filters located at the left side of the screen to refine the results. 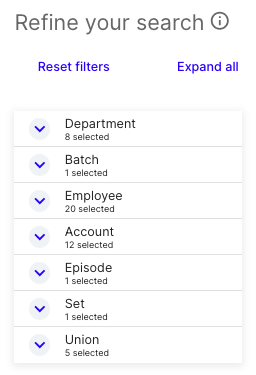
Begin by selecting the Department for which you are entering times. 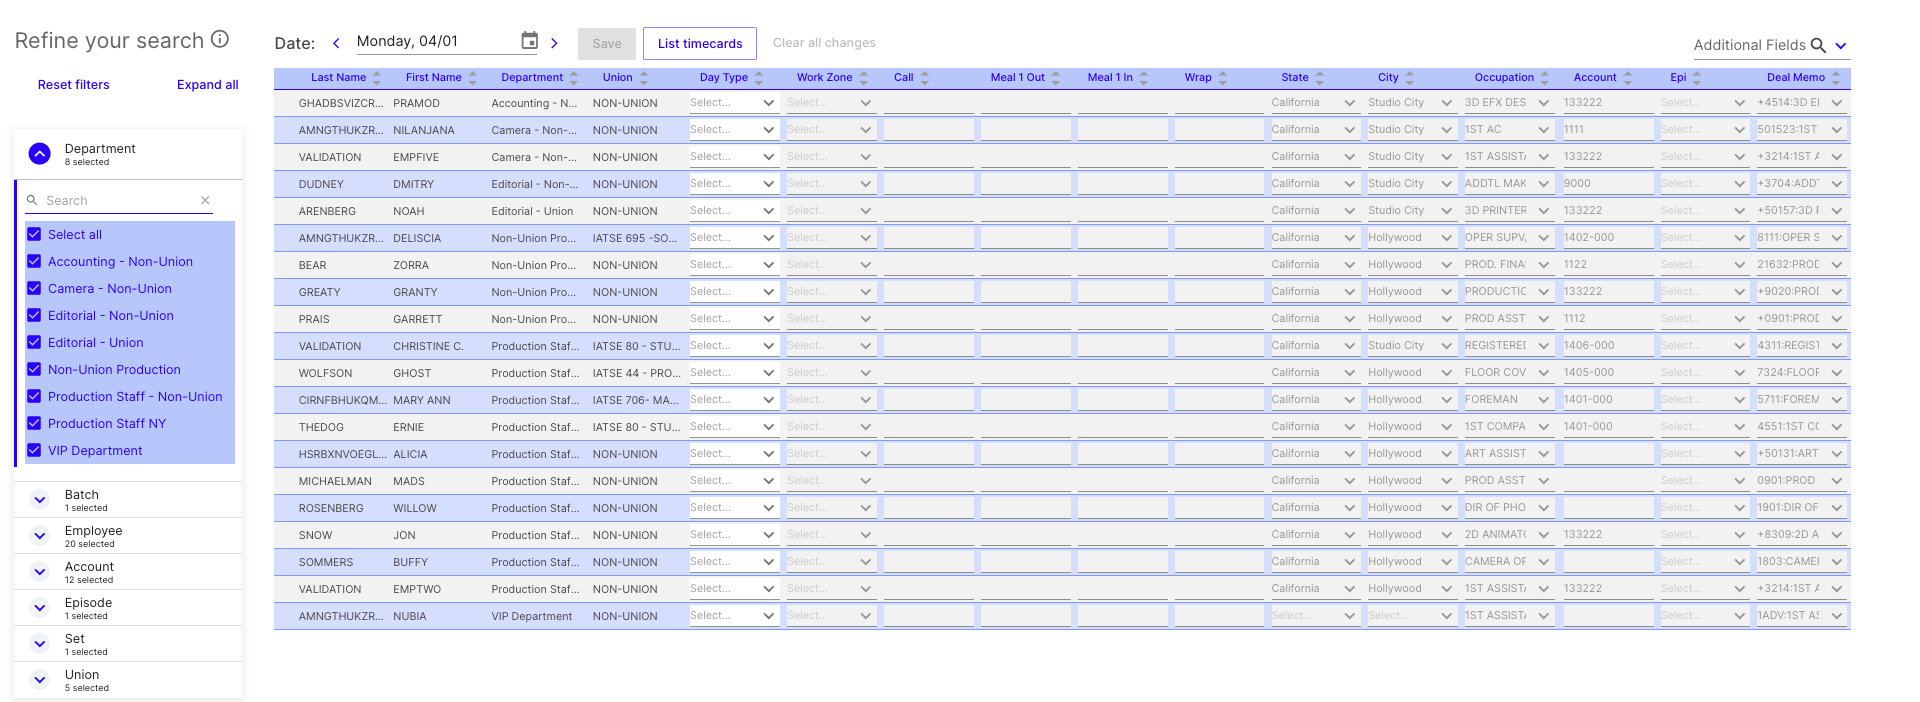
You can also filter by Batch, specific Employees, and account coding, such as Episodes or Sets.
To filter out employees who didn’t work on a given day, select Employee within the filters panel and unselect the employee. 
Once you have selected your filter criteria, click Apply in the filters panel. Your results will populate based on your filter selections. 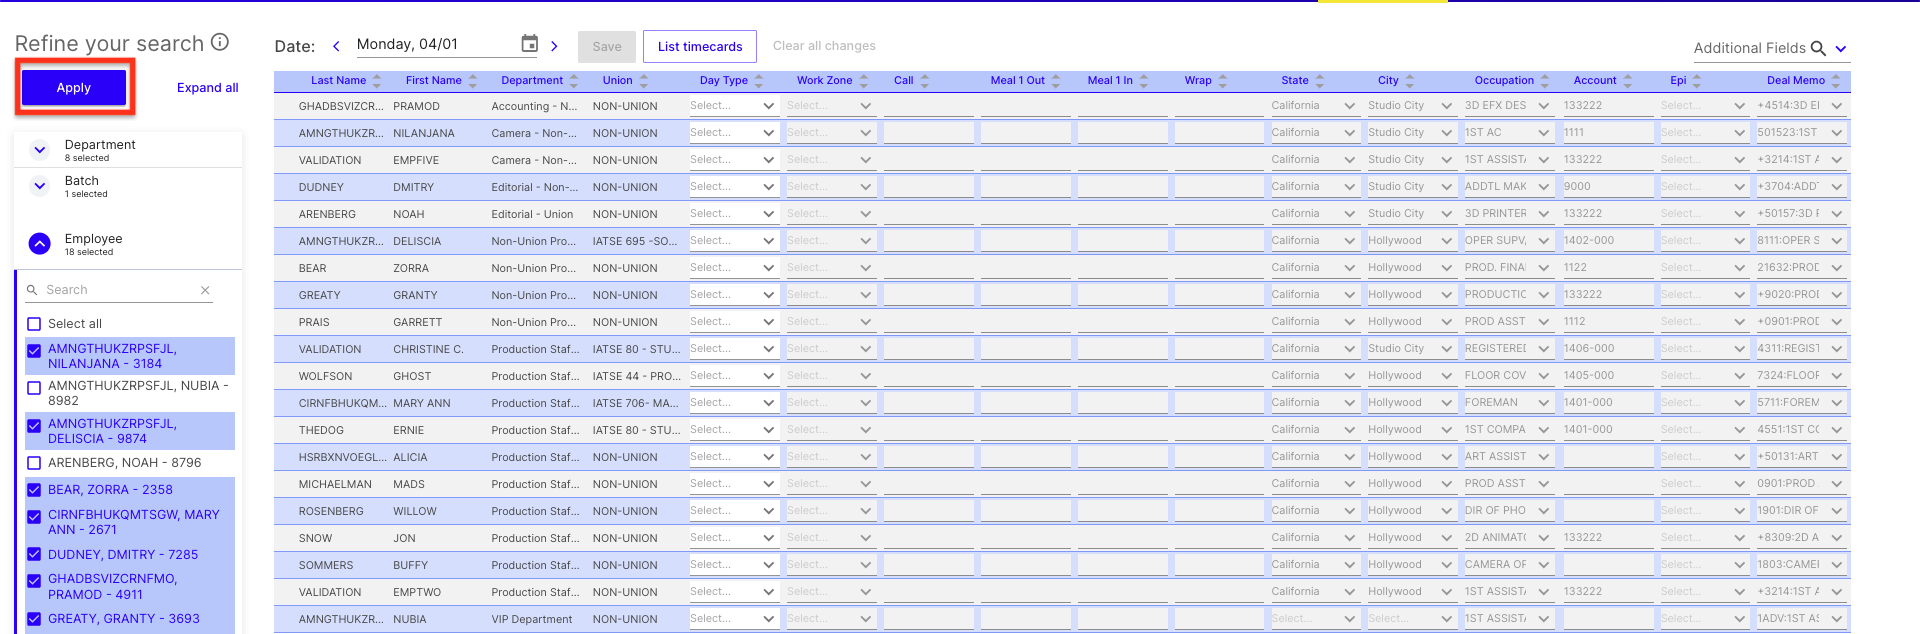
To enter times for your crew, the “Day Type” field will need to be defined and selected. Typically, if work was performed, "WORK" will be the day type selected. You may also enter the rest of the fields shown, though many of them are not required to submit the timecard. 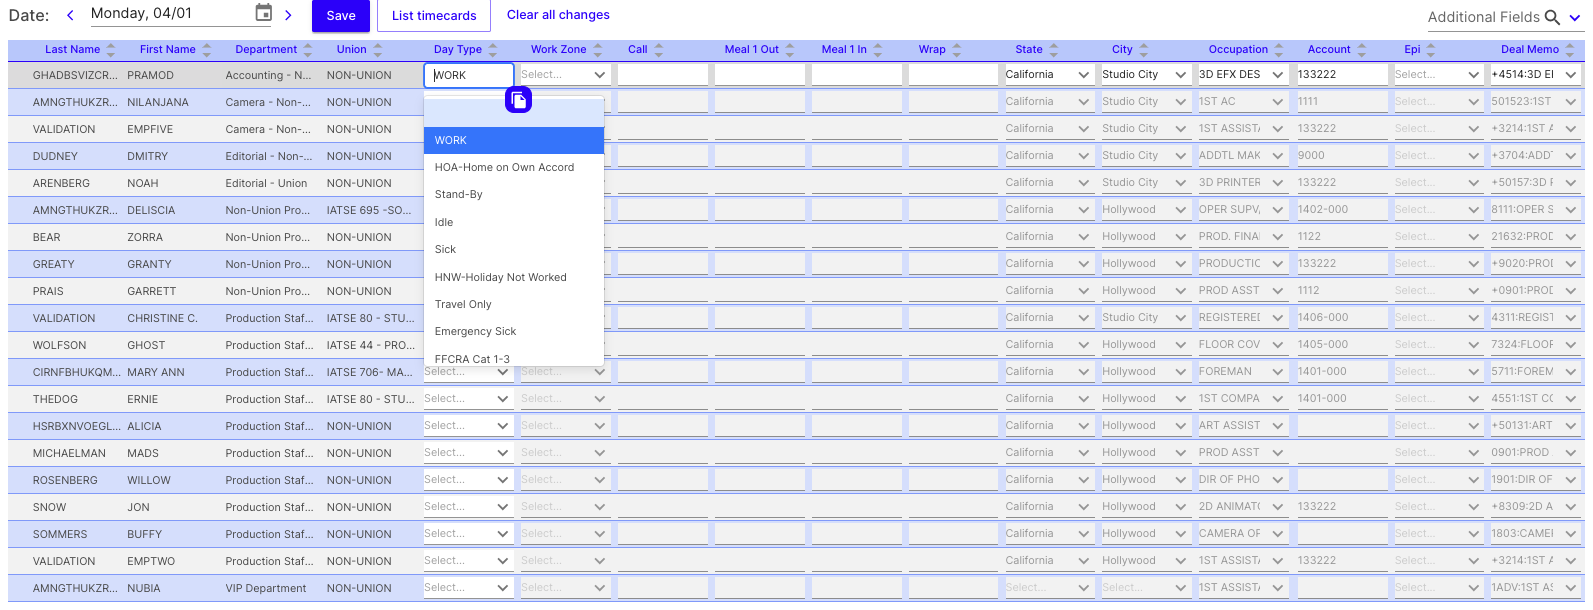
|
Note: You may come across some icons while entering times: Allowances:
Pending Approval Offer:
|
To add additional fields to the grid, click the Additional Fields drop-down located above the timecard grid and select the fields you would like to add. They will populate as additional columns on the screen. 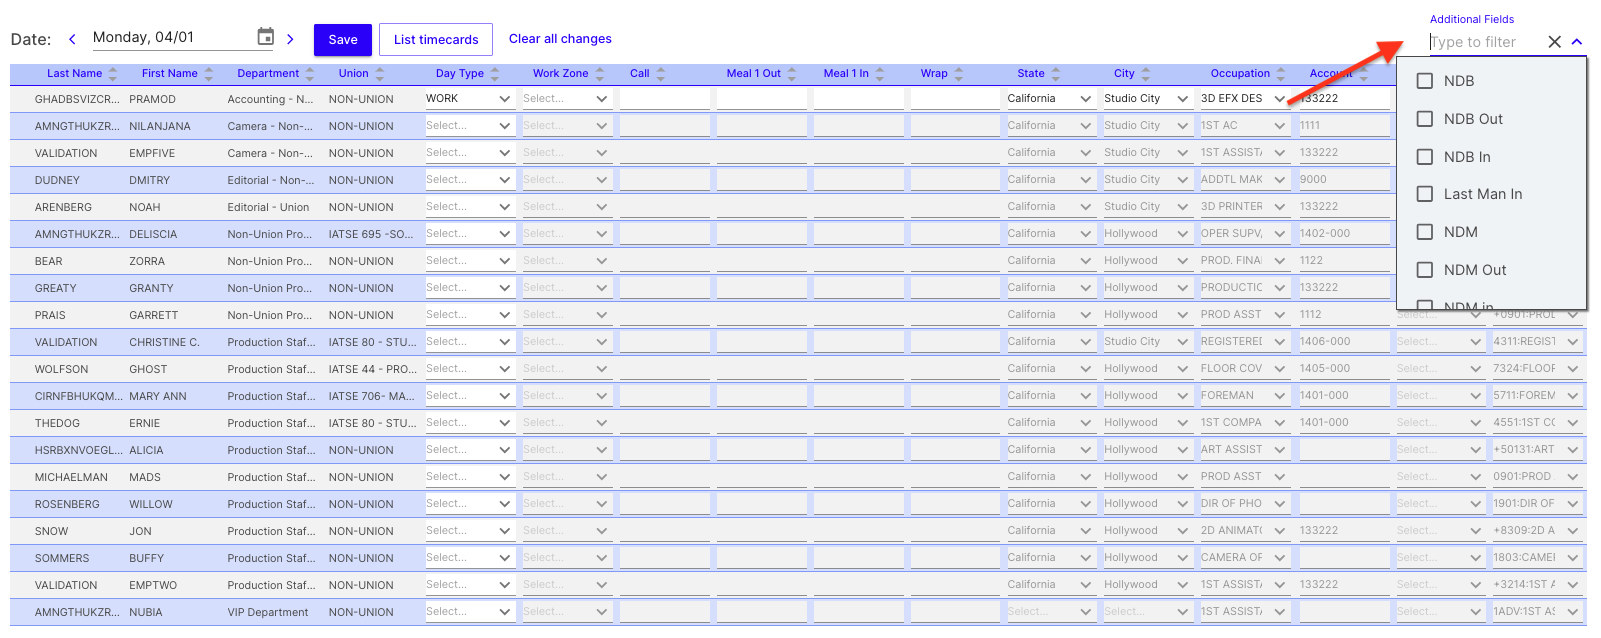
To copy the entries down to the rest of your crew members, click the Copy to All Rows button. The fields will be copied to rows that have a Day Type selected. You will need to click this for each column you would like to copy. We recommend clicking this after each applicable entry.
| 💡 Tip: To move to the next column, tap the TAB key on your keyboard. |

| Note: Times must be entered in military time (24-hour clock). You can use decimals or colons for entering times. Learn how to enter times in a timecard here. |
You can make changes to any specific employee that worked different hours by clicking the field on the crew members row and editing as needed.
Click Save once you have completed your entries and everything looks correct. 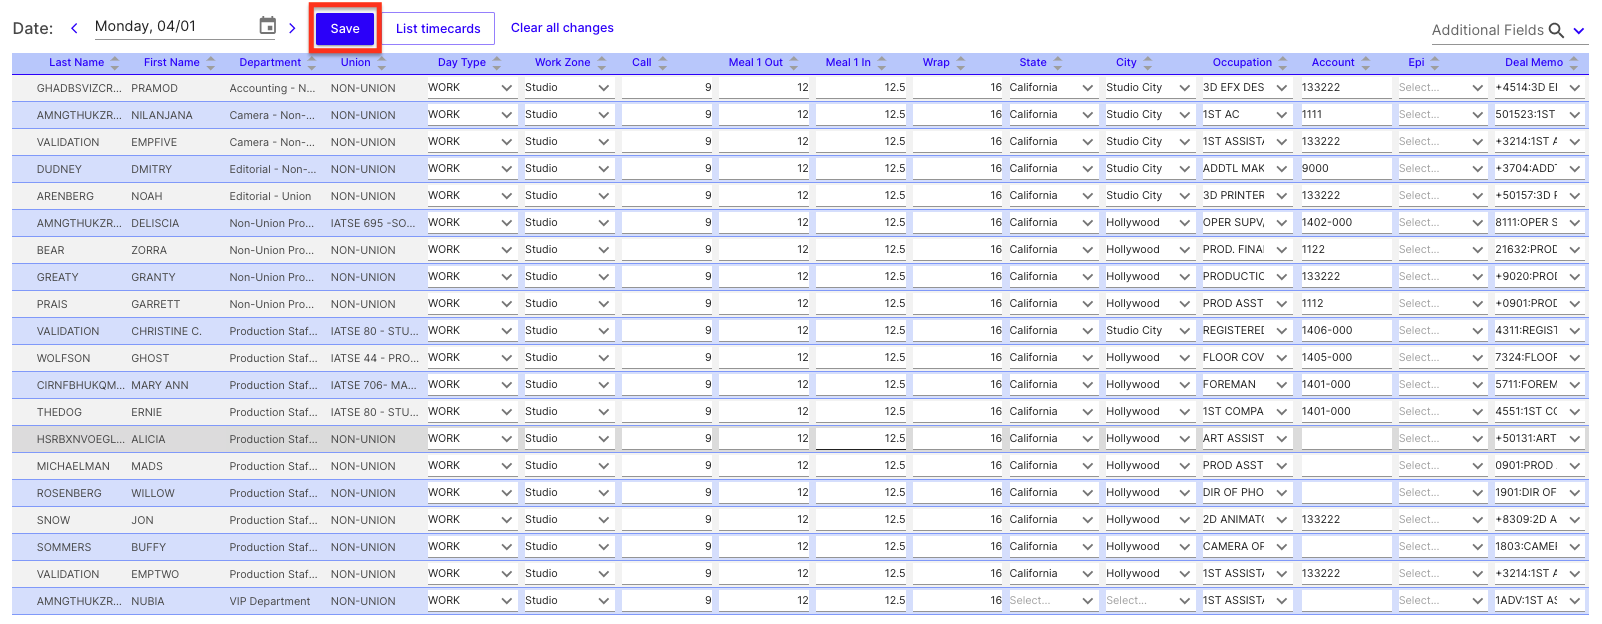
You can repeat the steps above for each workday and each department as needed.
Once all workdays in the work week have been entered and saved, and you’re ready to submit the timecards to your crew members, click List Timecards. 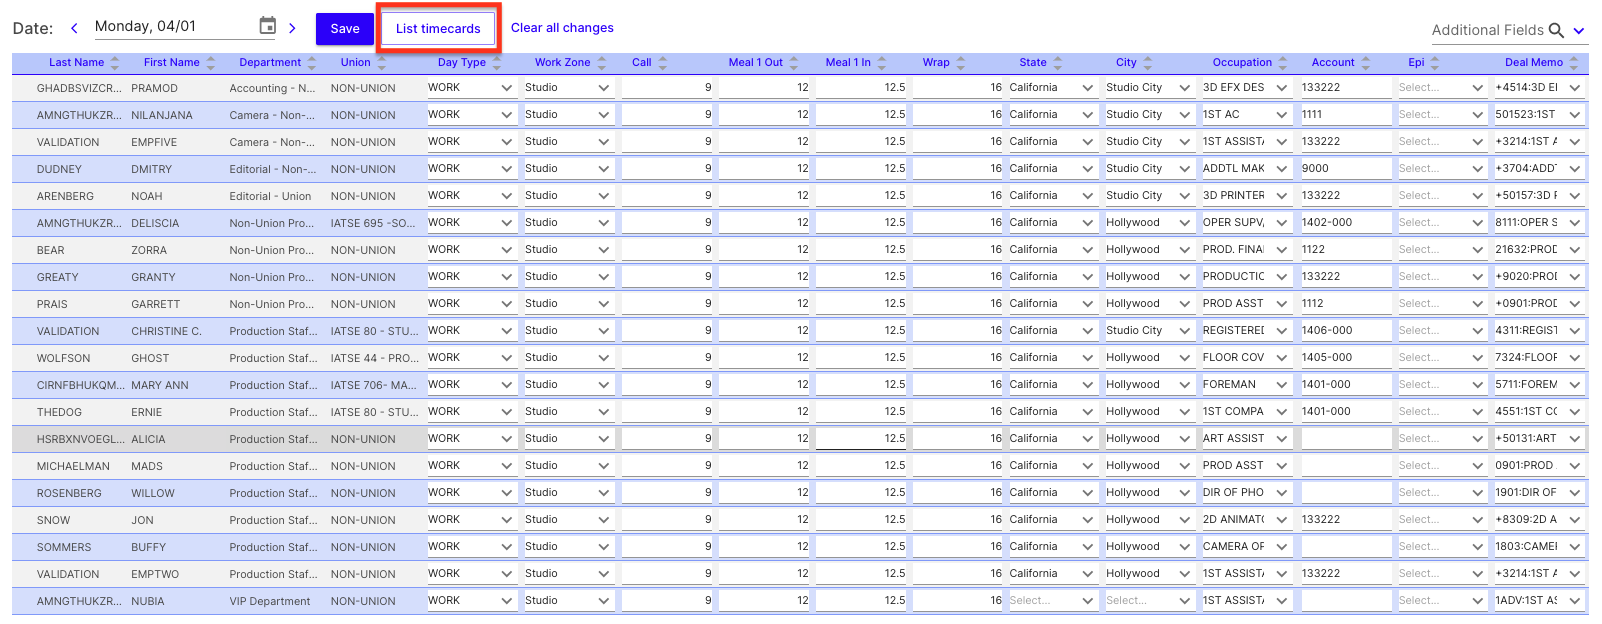
To quickly view the hours and days entered, hover your mouse over “Days Entered” for the crew member. It will display the total hours for the days that have been entered for the crew member.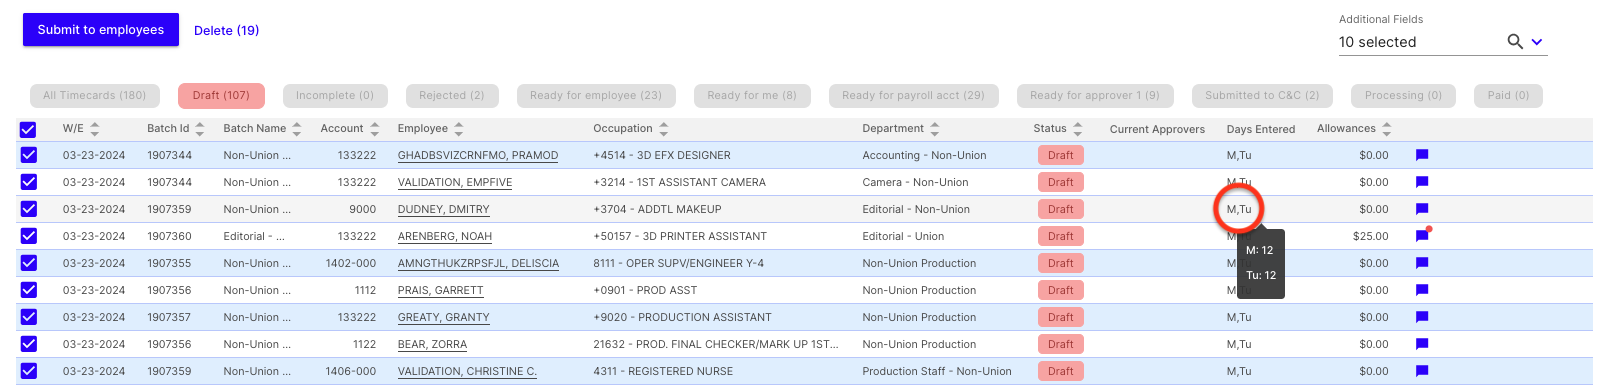
If you need to add any allowances before submitting, click on a crew member’s name. This will take you to their individual timecard. 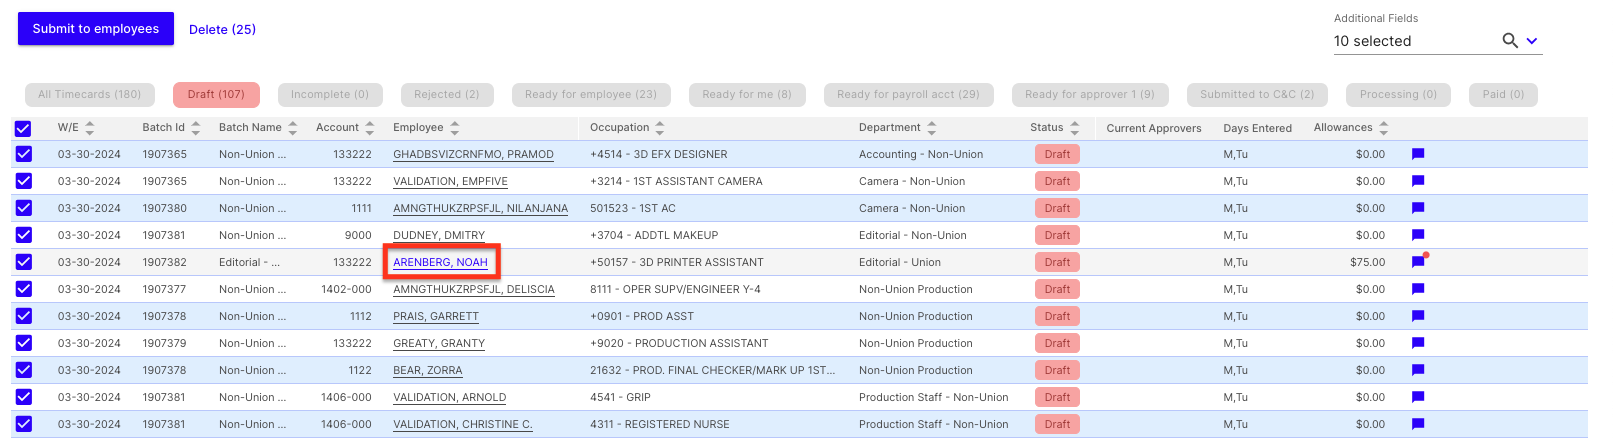
Click Edit at the bottom of the screen to add the allowance type and all required information. Click the gray checkmark when you’re done and click Save at the bottom of the screen. 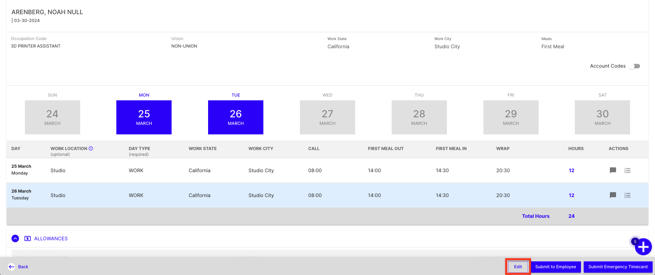
To return to the Timecards screen, click Back at the bottom left of the screen. 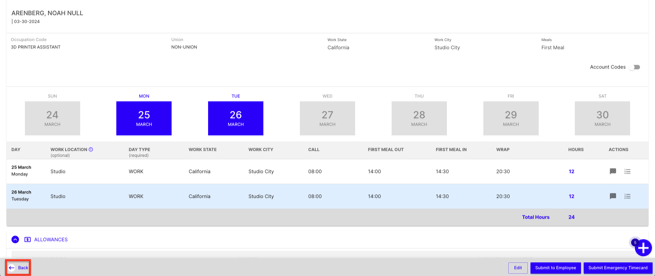
If you’d like to add a comment to an individual crew member’s timecard, click the comment icon to the right of the row. 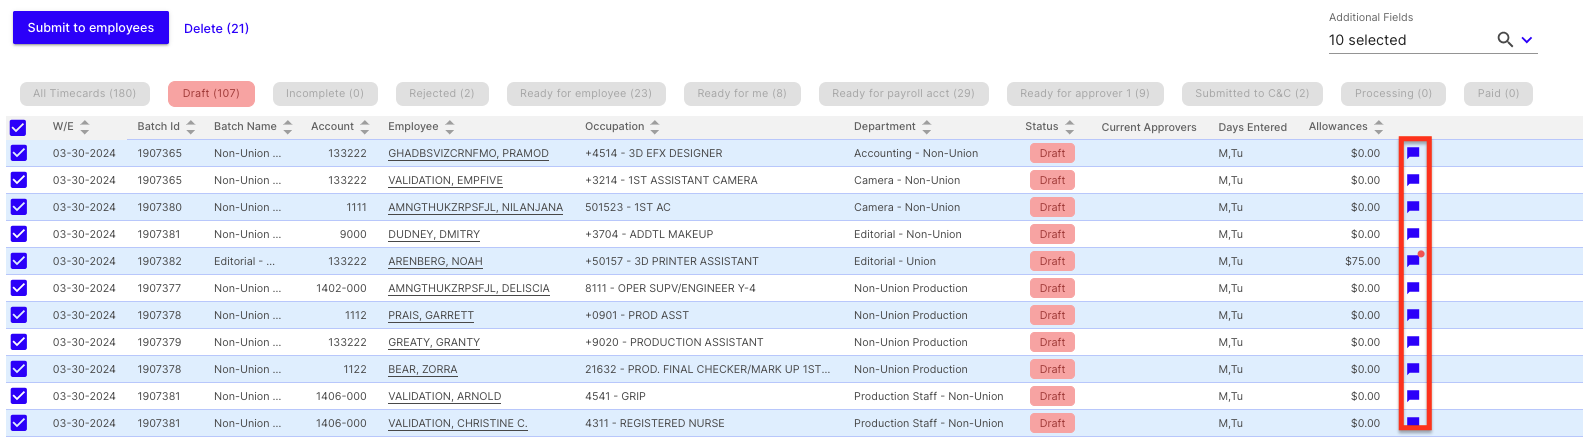
On the Timecards screen, make sure the timecards you’d like to submit are checked.
If everything looks correct and ready for submission, click Submit to employees.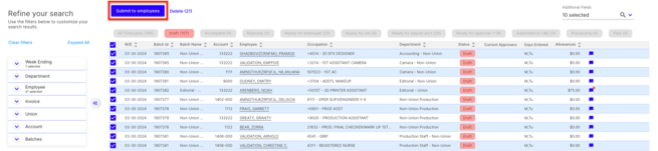
If you’d like to add a comment for all crew members you’re submitting timecards for, you can do so in the Add Comment dialog box. Click Submit to employees. 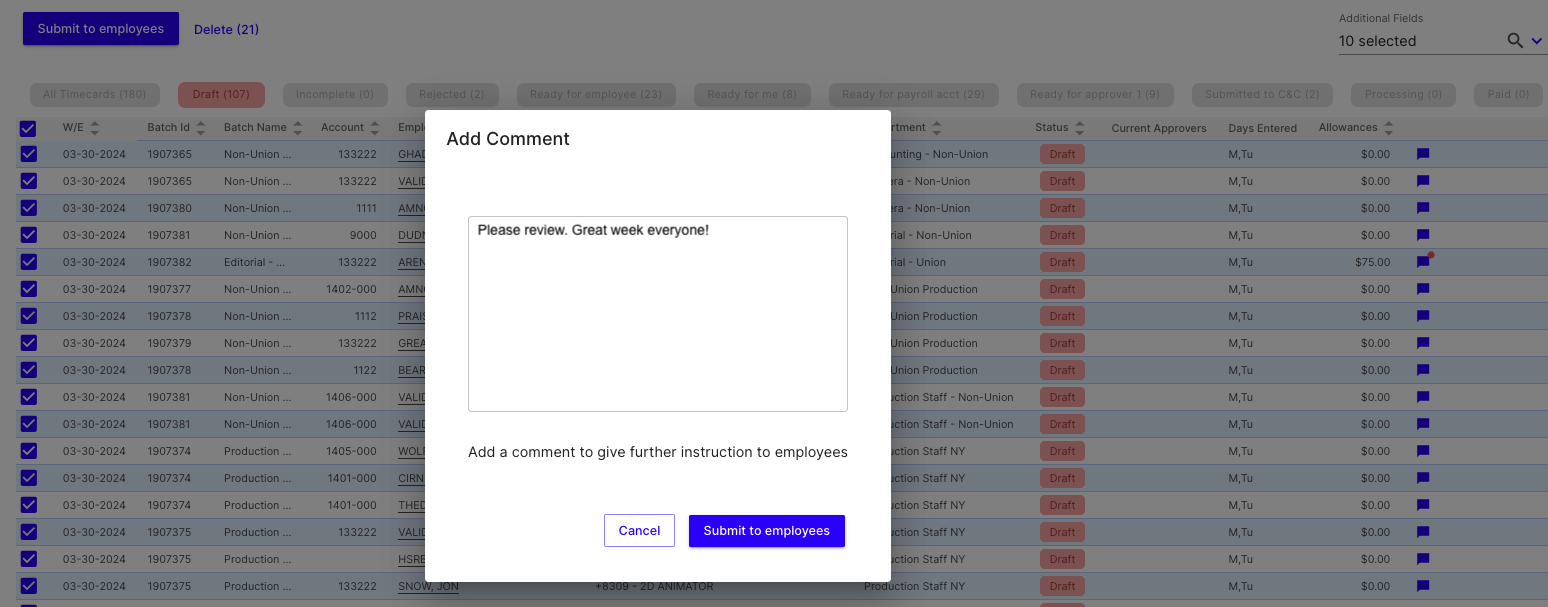
The employees will be notified that their timecard has been submitted and they’ll need to approve. Once approved, it will be sent to the payroll accountant for processing.
Steps for New Experience
After logging in to Hours+, click the Daily Timesheets tab in the top navigation bar.
Click the Date field and select the date for which you would like to enter work times.
Use the filters located at the right side of the screen to refine the results.
Begin by selecting the Department for which you are entering times.
You can also filter by Batch, specific Employees, and account coding, such as Episodes or Sets.
To filter out employees who didn’t work on a given day, select Employee within the filters panel and unselect the employee.
Once you have selected your filter criteria, click Apply in the filters panel. Your results will populate based on your filter selections.
To enter times for your crew, the “Day Type” field will need to be defined and selected. Typically, if work was performed, "WORK" will be the day type selected. You may also enter the rest of the fields shown, though many of them are not required to submit the timecard.
|
Note: You may come across some icons while entering times: Allowances:
Pending Approval Offer:
|
To add additional fields to the grid, click the Additional Fields drop-down located above the timecard grid and select the fields you would like to add. They will populate as additional columns on the screen.
To copy the entries down to the rest of your crew members, click the Copy to All Rows button. The fields will be copied to rows that have a Day Type selected. You will need to click this for each column you would like to copy. We recommend clicking this after each applicable entry.
| 💡 Tip: To move to the next column, tap the TAB key on your keyboard. |
| Note: Times must be entered in military time (24-hour clock). You can use decimals or colons for entering times. Learn how to enter times in a timecard here. |
You can make changes to any specific employee that worked different hours by clicking the field on the crew members row and editing as needed.
Click Save once you have completed your entries and everything looks correct.
You can repeat the steps above for each workday and each department as needed.
Once all workdays in the work week have been entered and saved, and you’re ready to submit the timecards to your crew members, click List Timecards.
To quickly view the hours and days entered, hover your mouse over “Days Entered” for the crew member. It will display the total hours for the days that have been entered for the crew member.
If you need to add any allowances before submitting, click on a crew member’s name. This will take you to their individual timecard.
Click Edit at the bottom of the screen to add the allowance type and all required information. Click the gray checkmark when you’re done and click Save at the bottom of the screen.
To return to the Timecards screen, click Back at the bottom left of the screen.
If you’d like to add a comment to an individual crew member’s timecard, click the comment icon to the right of the row.
On the Timecards screen, make sure the timecards you’d like to submit are checked.
If everything looks correct and ready for submission, click Submit to employees.
Add a comment for all crew members you’re submitting timecards for in the Add Comment dialog box. Click Submit to employees.
The employees will be notified that their timecard has been submitted and they’ll need to approve. Once approved, it will be sent to the payroll accountant for processing.