In ETC, copying existing employee records from project to project is possible, so you don’t have to add and set up employees from scratch every time.
There are two methods for copying employee records:
How to Copy Employee Records via "Copy Employees from Other Projects"
With this method, you will start from the new project’s Employee grid and pull employee records into the new project from an existing project.
NOTE: In order for employees to be successfully copied onto a new project from an existing project, both projects must exist under the same Client, and have the same work locations and zip codes. The copy process will be prevented if you attempt to copy employees between projects with mismatched locations.
- From the Admin dashboard under “Projects," click on the name of the project. This will take you to Project Details.
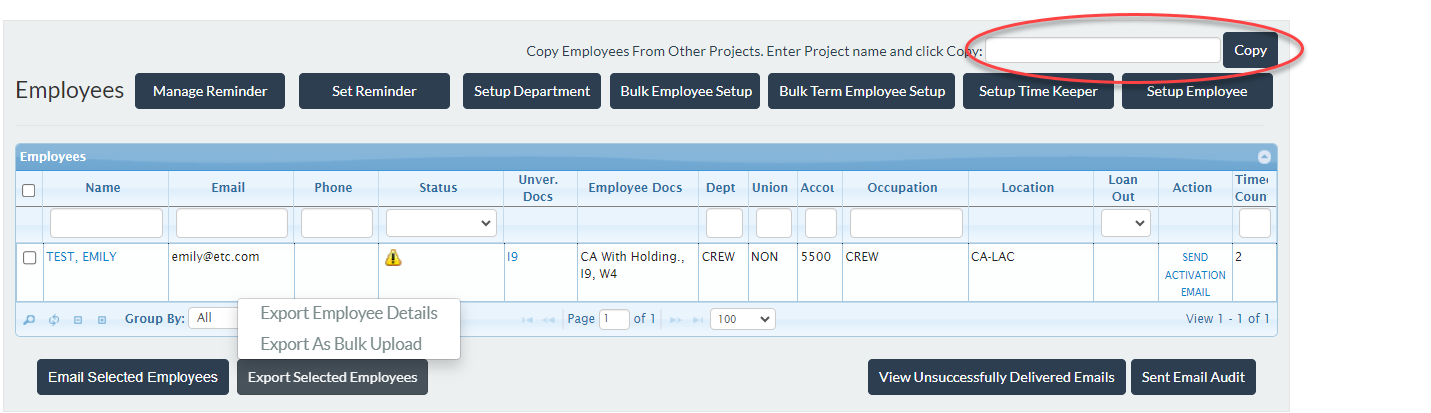
- Above the Employees grid, you will see the prompt, “Copy Employees From Other Projects." Enter the Project name and click 'Copy.'
- Enter the name of the existing project into the provided text entry field. Click 'Copy.'
- A pop-up will appear titled “Project Employees." Enter the Start Date for the employees (this can be edited later if needed).
- Select the checkbox to the left of the employee names to indicate which employees you want to copy to your new project.
- Click 'Add Selected Employees.'
- A pop-up will appear asking you to confirm your selection. Review, then click 'Confirm' to proceed.
- When the copy is complete, the employee records will appear in the Employee grid.
- 💡 Pro Tip: You can edit the employment details of each employee by clicking on the employee's name, and then selecting 'Edit' from the Employee Details.
How to Copy Employee Records via "Export as Bulk Upload"
With this method, you will navigate to the project you want to copy from, export the existing records into a templatized spreadsheet, and then upload the spreadsheet into the new project which allows ETC to ingest the information and bulk-create new employee records.
- For more information, see: How to bulk add employees to a project.
- From the Admin dashboard under “Projects," click on the name of the Project you want to copy from. This will take you to the Project Details.
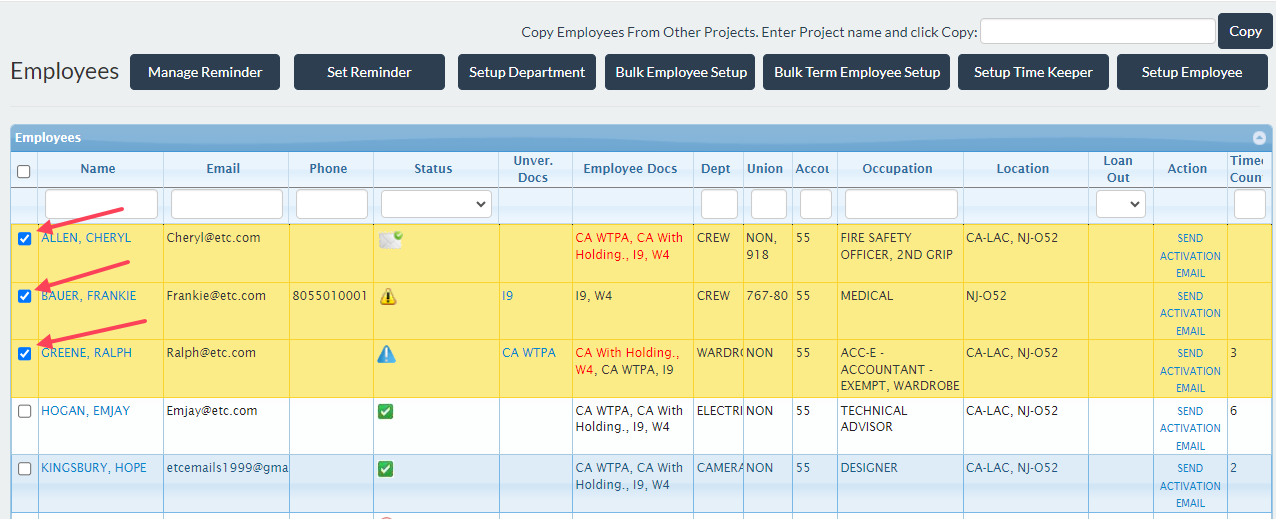
- Within the Employees grid, use the checkmarks on the left to select the employee records that you wish to export and copy to a new project.
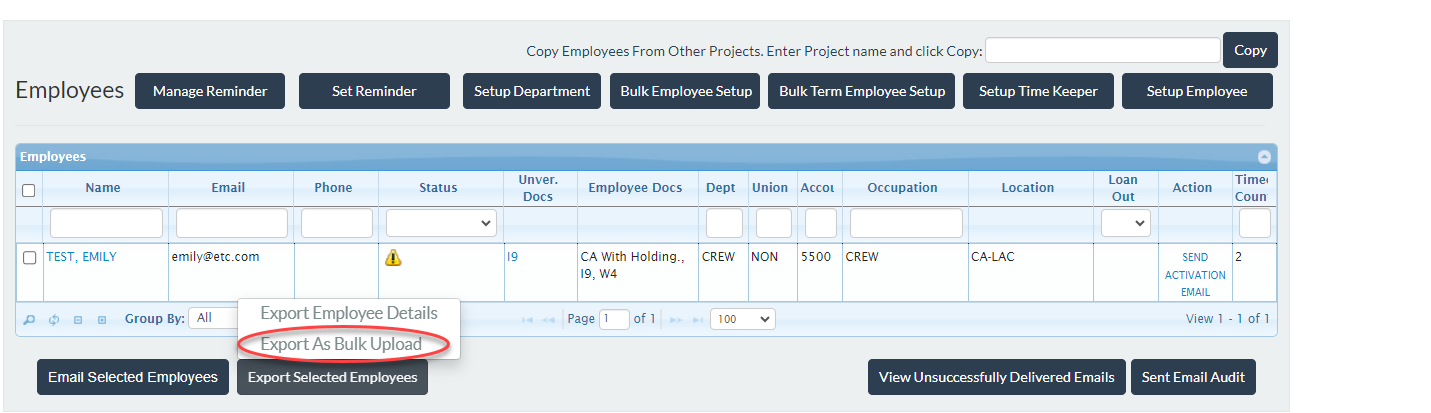
- At the bottom of the Employee grid, select 'Export Selected Employees,' then select 'Export as Bulk Upload.'
- The template will download as a .csv file named “EmployeeImportTemplate."
- 💡Pro Tip: You can rename the file to any name you like!
- Open the file in Excel or your preferred spreadsheet editor.
- Review the information for each employee and edit as needed.
- NOTE: Only FirstName, LastName, and Email are required to ensure the spreadsheet can be imported. All other details can be defined after import.
- Once the template is completed, save the spreadsheet as a .csv and return to ETC.
- In the Bulk Add Employees area, select 'Browse' to locate the file.
- Select the template file from your local device and click 'Open.'
- The name of the file will appear in the Bulk Add Employees area. Select 'Upload.'
- ETC will start uploading and ingesting the information from the spreadsheet. This could take some time if there is a lot of data on the spreadsheet.
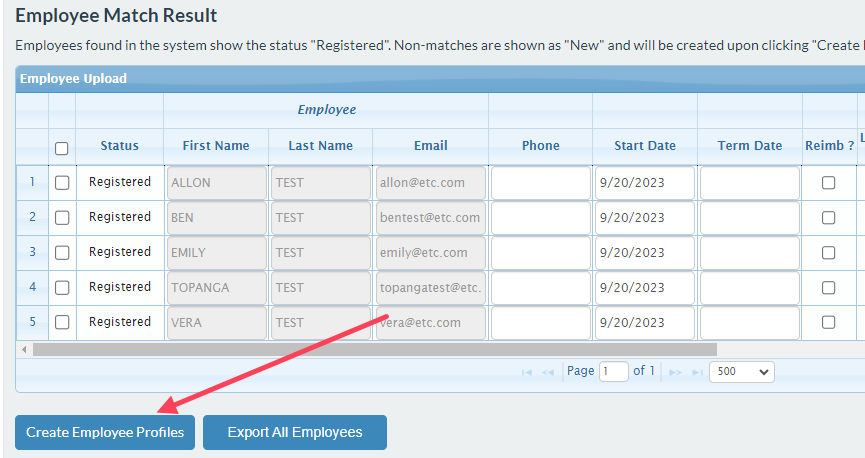
- Once uploaded, the “Employee Match Result” area will appear and display records for each employee found on the spreadsheet. Scroll right and left to view all of the information.
Match Screen (left side)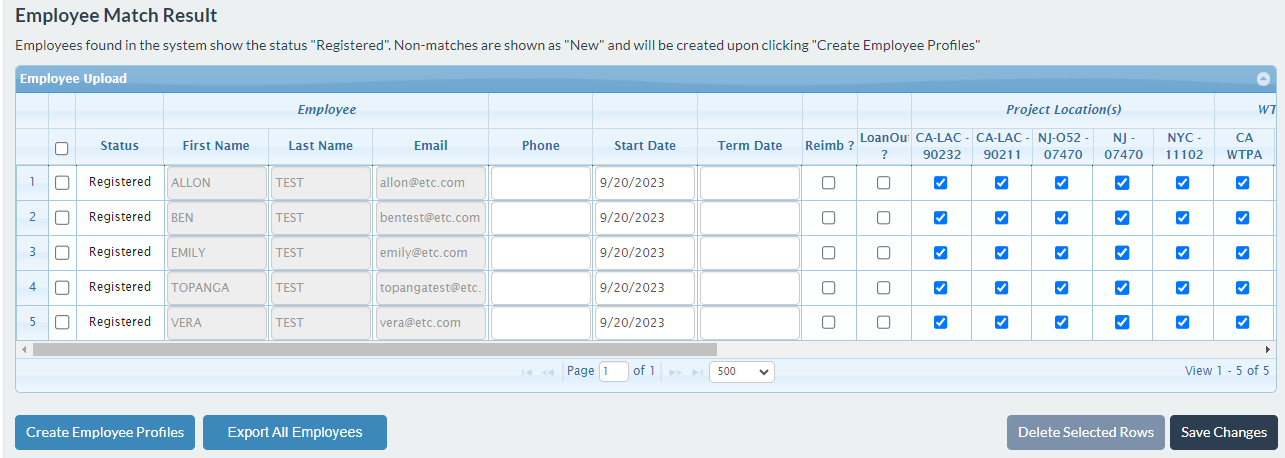
Match Screen (right side)
- Review the information for each employee and confirm everything is complete and correct. Make edits and add more information as needed.
- NOTE: If an employee already has an ETC user account, their name and email will be grayed out and locked.
- Once your review is finished, select the checkboxes on the left to indicate the employee records that need to be added to the project.
- 💡Pro Tip: Select the top-most checkbox to select all.
- Click 'Create Employee Profiles' to add all of the employees to the project.