ETC’s Bulk Employee Setup feature allows Admins to add and set up multiple employees at once.
First, a spreadsheet template is downloaded. The template prompts the Admin to enter employee details such as full name and rate. Once the spreadsheet is completed, it is uploaded back to ETC and the system ingests the information and creates individual employee records.
The same Bulk Add Employee template can be used from project to project. The Bulk Add method can save Admins a lot of time, especially for productions that work with the same or similar employees on every project.
NOTE: Only Client Admins and Project Admins have the ability to add and set up employees.
How to Bulk Add Employees
-
From the Admin dashboard under “Projects," click on the name of the Project. This will take you to Project Details.
-
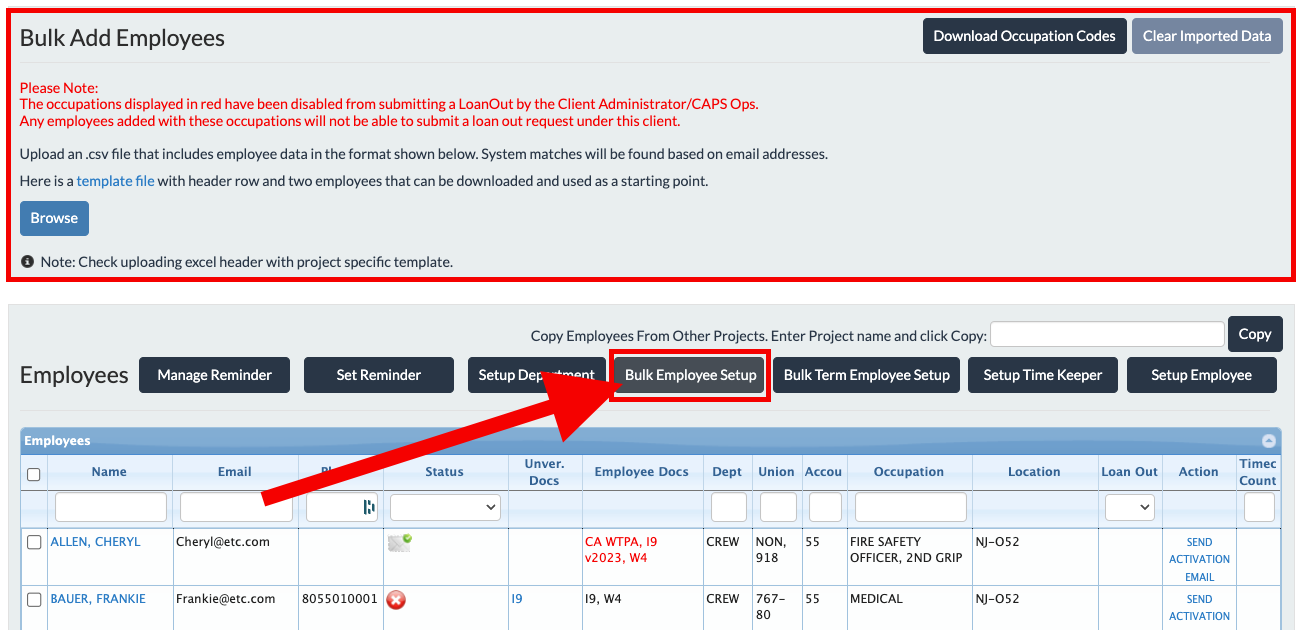
Above the Employees grid, select 'Bulk Employee Setup.' The “Bulk Add Employees” area will appear above the Employees grid.
-
Within the Bulk Add Employees area you will see the following text: “Here is a template file with header row and two employees that can be downloaded and used as a starting point.” Select the 'template file' hyperlink. This will initiate the template to download.
-
The template will download as a .csv file named "EmployeeImportTemplate."
-
💡Pro Tip: You can rename the file to anything you'd like.
-
-
Open the file in Excel or your preferred spreadsheet editor.
-
Notice that the column headers indicate the information needed for each employee, and each employee should be added per each row.
NOTE: Only FirstName, LastName, and Email are required to ensure the spreadsheet can be imported. All other details can be defined after import.
-
FirstName – The first name of the employee.
-
LastName – The last name of the employee.
-
Email – The contact email for the employee, also the email address the employee will use to log in to MyCast&Crew (ETC) and receive ETC-related notifications.
-
Phone – The employee’s phone number, also the phone number where the employee will receive SMS alerts from ETC if needed. Enter in XXX-XXX-XXXX format.
-
WorkStartDate – The employee’s first day of work. Enter in MM/DD/YYYY format.
-
TerminationDate – The employee’s last day of work. Enter in MM/DD/YYYY format.
-
Reimbursements – Enter “TRUE” if the employee will receive Reimbursements. Enter “FALSE” if the employee is not authorized to receive Reimbursements.
-
IsLoanOutEmployee – Enter “TRUE” if the employee will be paid as a Loan-Out. Enter “FALSE” if the employee is not authorized to be paid as a Loan-Out.
-
CAWTPA – Enter “TRUE” if the employee will work in California and needs to receive a WTPA notice. Enter “FALSE” if the employee will not work in California or does not need to receive a WTPA notice.
-
NYWTPA - Enter “TRUE” if the employee will work in New York and needs to receive a WTPA notice.
-
NOTE: All employees in NY will require a WTPA notice.
-
-
Department – The employee’s assigned department.
-
UnionLocal – The Union Code for the employee. Contact payroll if you are unsure of what to enter.
-
Occupation – The Occupation Code for the employee. Contact payroll if you are unsure of what to enter.
-
Pay Rate – Enter the pay rate in numerical format. Do not include the pay units, i.e., “day” or “hour” or “week” (that will be entered next).
-
Units – Enter the pay units, i.e., “day” or “hour” or “week”.
-
GuarHours – The Guaranteed Hours for the employee, if applicable.
-
GuarDays– The Guaranteed Days for the employee, if applicable.
-
ShootAccount – The AICP Code for Shoot Days for this employee.
-
NonShootAccount – The AICP Code for Non-Shoot Days for this employee (i.e.: Prep and Wrap days).
-
-
Once the template is completed, save the spreadsheet as a .csv and return to ETC.
-
In the Bulk Add Employees area, select 'Browse' to locate the file.
-
Select the template file from your local device and click 'Open.'
-
The name of the file will appear in the Bulk Add Employees area. Select 'Upload.'
-
ETC will start uploading and ingesting the information from the spreadsheet. The process can take some time if there is a lot of data on the spreadsheet.
-
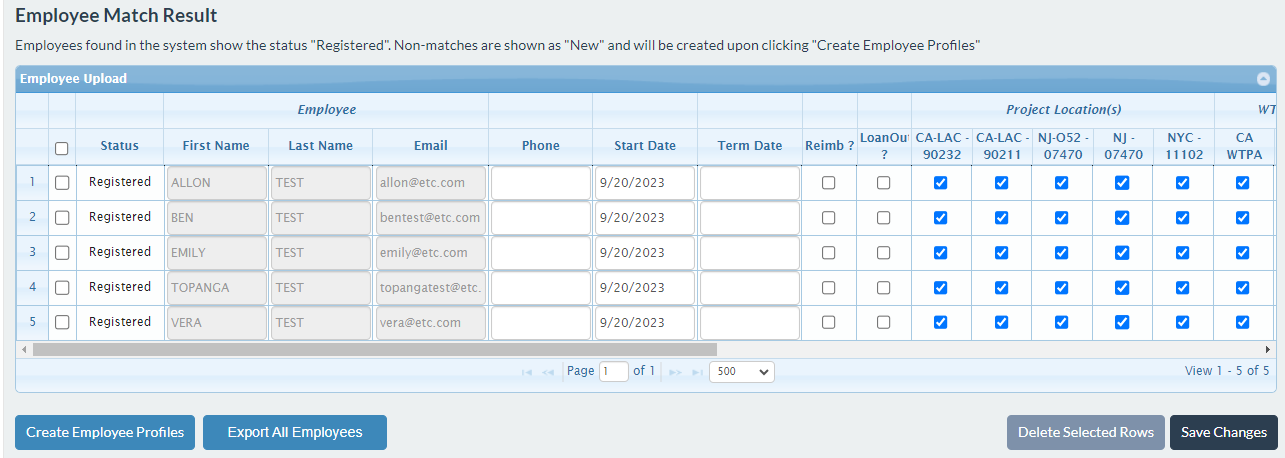
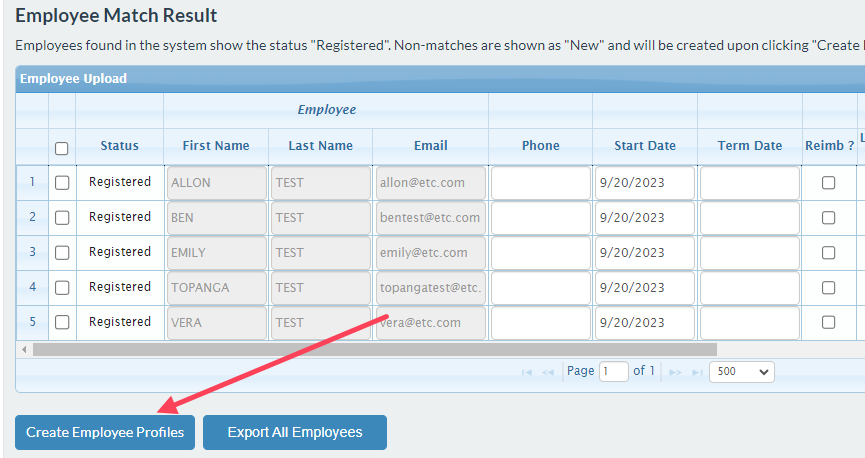
Once uploaded, the “Employee Match Result” area will appear and display records for each employee found on the spreadsheet. Scroll right and left to view all of the information.
Match Screen (left side)
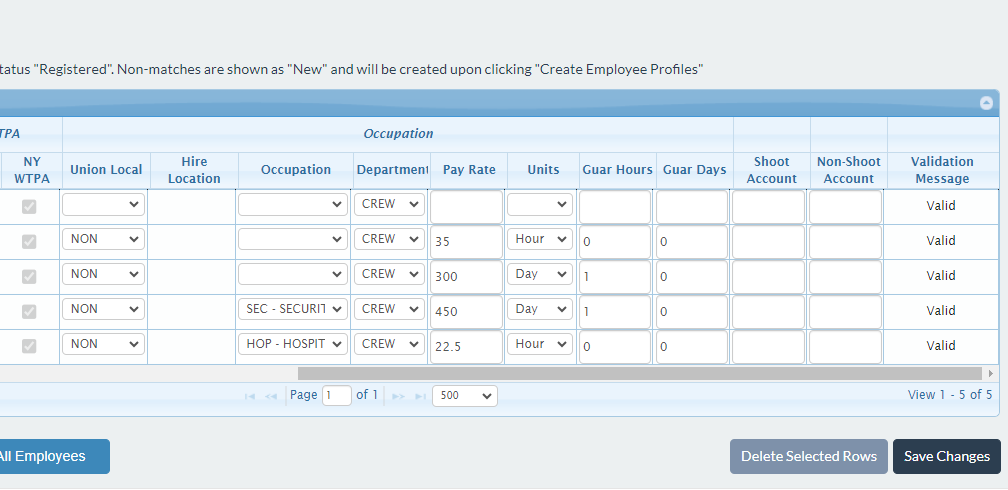
Match Screen (right side)
-
Review each employee's information and confirm everything is complete and correct. Make edits and add more information as needed.
-
NOTE: If an employee already has an ETC user account, their name and email will be greyed out and locked.
-
-
Once your review is complete, select the checkboxes on the left to indicate the employee records that need to be added to the project.
-
💡Pro Tip: Select the topmost checkbox to select all.
-
-
Click 'Create Employee Profiles' to add all of the employees to the project.
💡Pro Tips
- You can add as many team members as needed to your template file but only upload 50 to 100 employees at a time to the project.
- You can use the same template for multiple projects but be sure to edit employee information as needed per project.
- You can export existing employee records into a pre-filled Bulk Add Employee template, and upload on to a new project for even faster onboarding! To do this:
- Navigate to Project Details.
- Within the Employees grid, use the checkmarks on the left to select the employee records that you wish to export and copy to a new project.
- At the bottom of the Employee grid, select 'Export Selected Employees,' then select 'Export as a Bulk Upload.'
For more information on copying employee records from project to project, click here.
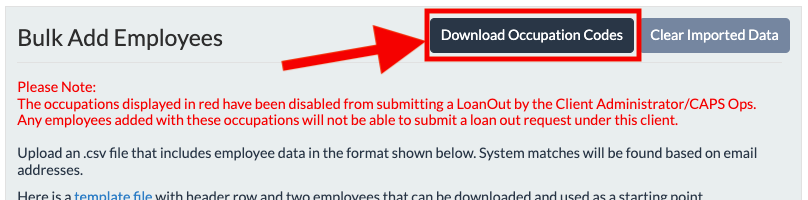
- In the Bulk Add Employees area, the 'Download Occupation Codes' button provides a spreadsheet of the abbreviations needed for the occupation column on the Bulk Add template. You can also download this report to see what occupations payroll has made available for production to use. If you notice any occupation codes are missing, contact payroll for assistance.