Digital Edits is exactly what it sounds like—it digitizes the payroll edits process. As an Invoice Approver, you can confidently and easily interact with your invoice data and request revisions for your payroll invoices without scanning through a PDF and sending an email.
This article provides an overview of the Digital Edits process and walks you through how to approve an invoice digitally or request revisions.
This article shows you how to perform this task in both Classic and New experiences.
Steps for Classic Experience
Watch: Digital Edits Overview
Who can access Digital Edits?
- Those with “Invoice Approver” permissions on the relevant project.
Accessing Digital Edits
There are a few different ways you can access the Digital Edits screen:
-
Studio+ email notifications:
You’ll receive an email notification from Studio+ alerting you that a new edit report or approved invoice has been uploaded, or a new comment has been added to an invoice. You can click the button to view the full edit report or comment, or if you prefer to review the individual invoice files, you can click on the individual invoice links to view these files in Studio+.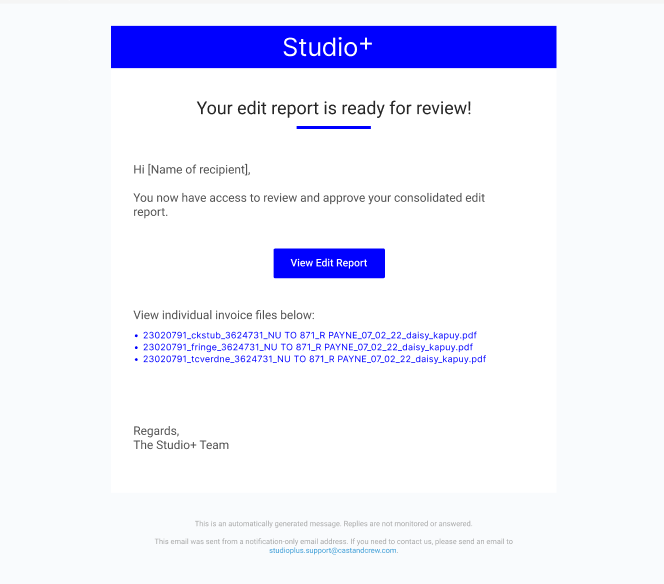
-
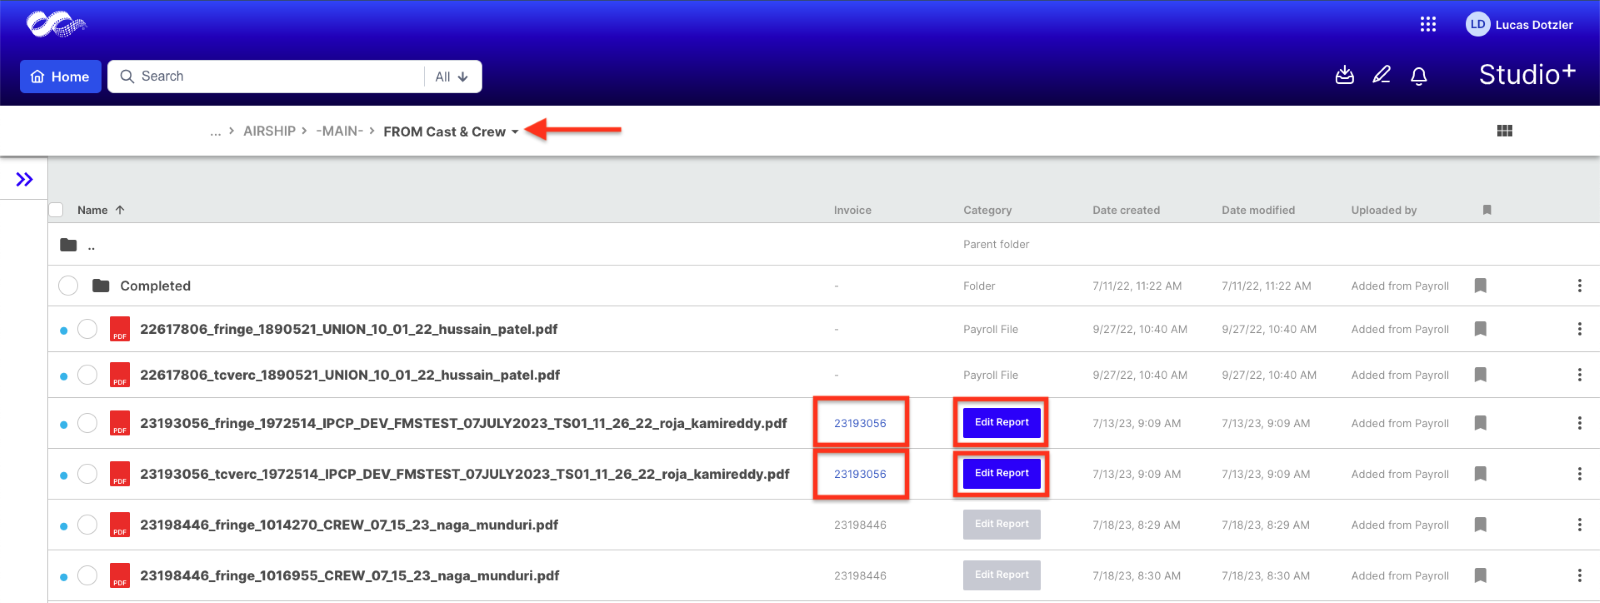
In Studio+:
- Under the “FROM Cast & Crew” folder, you’ll see your available edit reports. The latest versions will display a blue Edit Report button and a hyperlinked invoice number. Click the button or the invoice number to access the Digital Edits screen. Note that prior versions of the edit report will not have active links.
- Once an invoice has been approved, the approved versions of the invoice files will appear in Studio+. These files will display a blue “Approved Invoice” button.
- Under the “FROM Cast & Crew” folder, you’ll see your available edit reports. The latest versions will display a blue Edit Report button and a hyperlinked invoice number. Click the button or the invoice number to access the Digital Edits screen. Note that prior versions of the edit report will not have active links.
- In Hours+ (for Hours+ users only):
- If you’re already an Hours+ user with Invoice Approver permissions, you can access the Digital Edits screen from the Invoices tab.

- You can click on the invoice number with a blue hyperlink to review the invoice on the Digital Edits screen.
- 💡 Tip: The H+ icon notates the Hours+ invoices
- Any invoice that is not clickable simply means the edit report hasn’t been sent yet or you do not have permission to the invoice’s folder Studio+.
Note: We strongly advise against having multiple tabs of Hours+/Studio+ open simultaneously. Opening Hours+/Studio+ in multiple tabs can lead to unintended consequences, such as getting logged out of one tab or not having your changes saved properly.
To avoid any potential issues, we recommend keeping only one instance of Hours+/Studio+ open at a time. This will help ensure that your data is accurately saved and that you can smoothly navigate through the application without any interruptions.
Getting Help
If you need help filling out the form at any time, please use these free resources:
- Email plus.support@castandcrew.com
- Call our support team at 818-860-7770
- Press 1 for Start+ & Hours+
- Press 2 for Studio+
Digital Edits Screen Overview
The Digital Edits screen shows all your valuable information completely digitized.
Search, sort, and filter
On the left side of the screen, you’ll see the Records sidebar. Here is where you’ll find the list of crew members within the invoice.
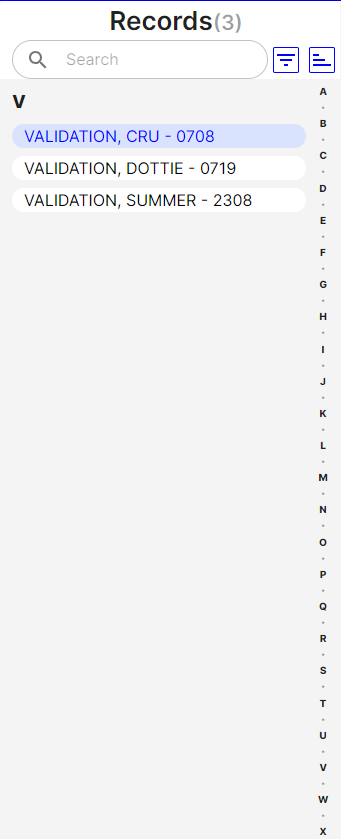
You can search for any crew member by typing their name in the search bar.
By clicking on a letter, you'll instantly jump to the corresponding section that starts with that letter.
You can click on the buttons to filter and sort.
-
 Filter: Filters are a great way to narrow down your search for a specific crew member. You can filter by Department, Union, Pay Code, or by specific record properties including Direct Deposit, Large Payment, Loan-Out, and Duplicate Timecards.
- 💡 Double-click this button to clear all filters
-
 Sort: Sorting options allow you to order the records in whichever order you prefer. This is helpful when you’re trying to locate a specific record or a set of records. You can sort by Name, Department, Union, and Account Code, in either ascending (A-Z, 0-9) or descending (Z-A, 9-0) order.
|
Note: If you're looking to review loan-out companies on invoices, you can filter employees who are paid as a Loan-Out:
Alternatively, you can review the loan-out company on the PDF invoice in Studio+: And on the Fringe Report: |
Digitized data
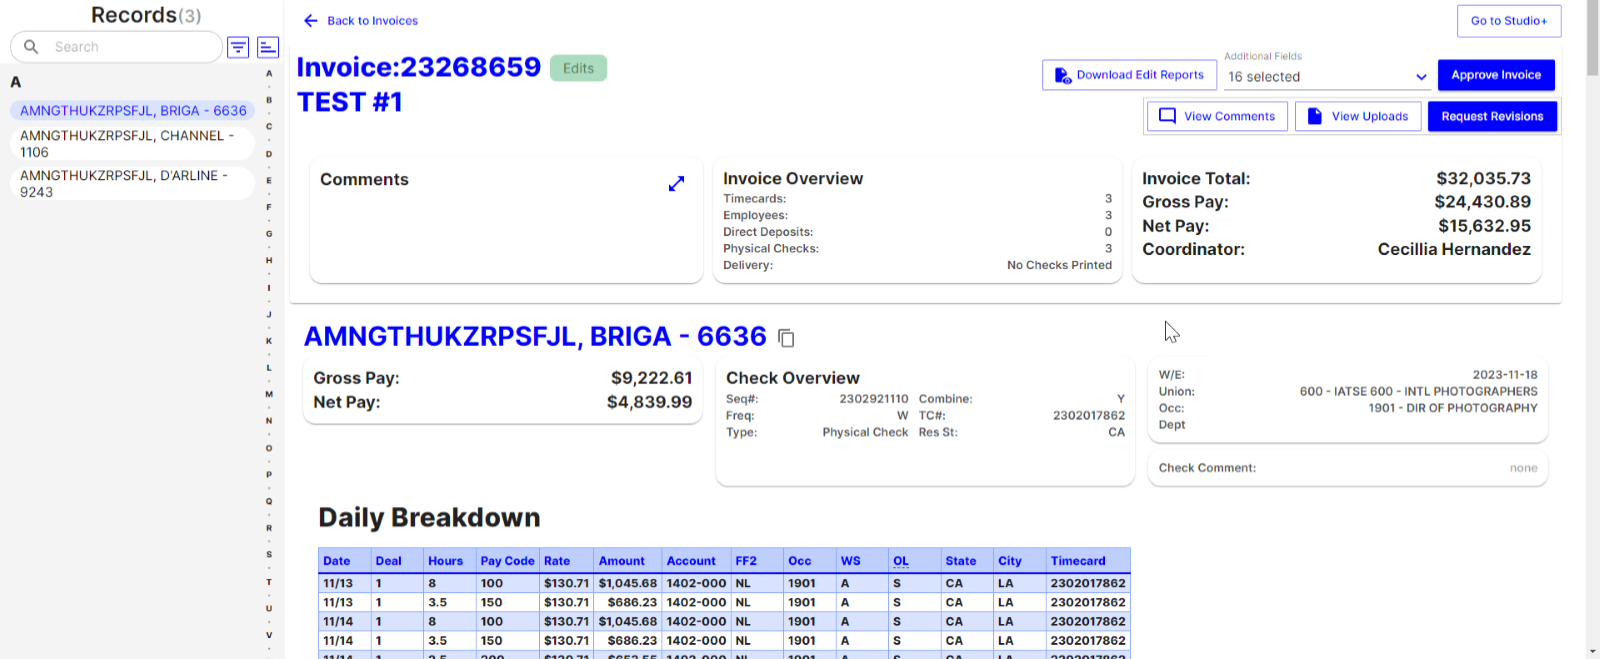
The main screen shows all the data of the invoice. Here you can interact with the data and take additional action on the invoice. Let’s go over the type of data that you can see.
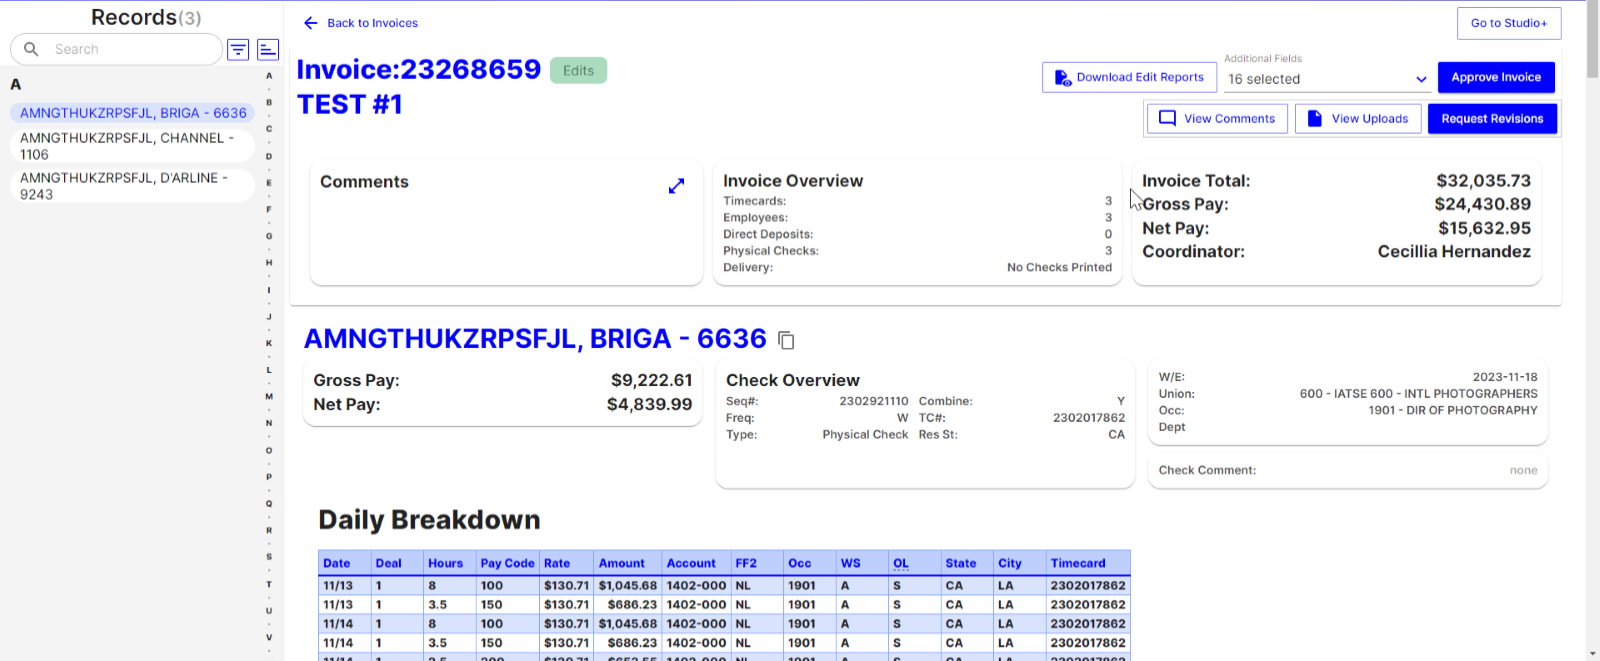
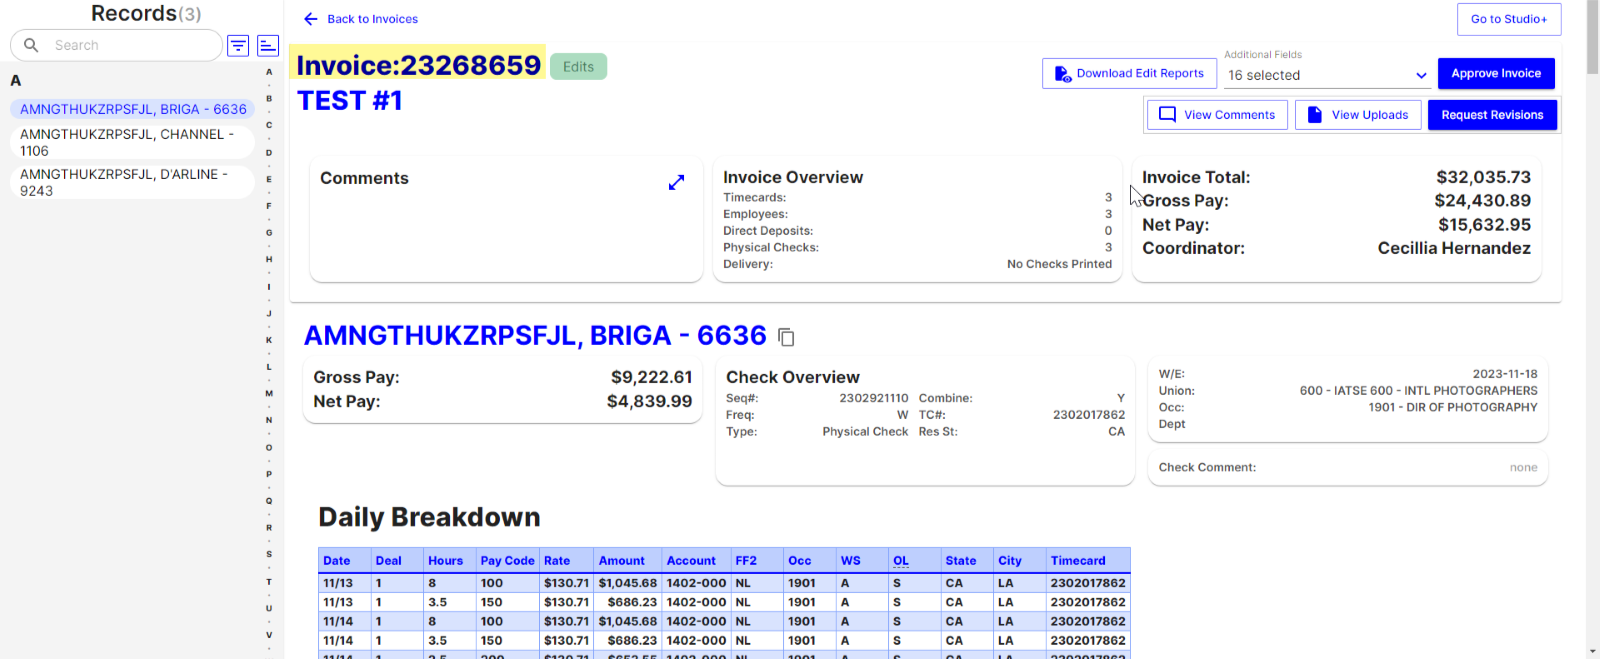
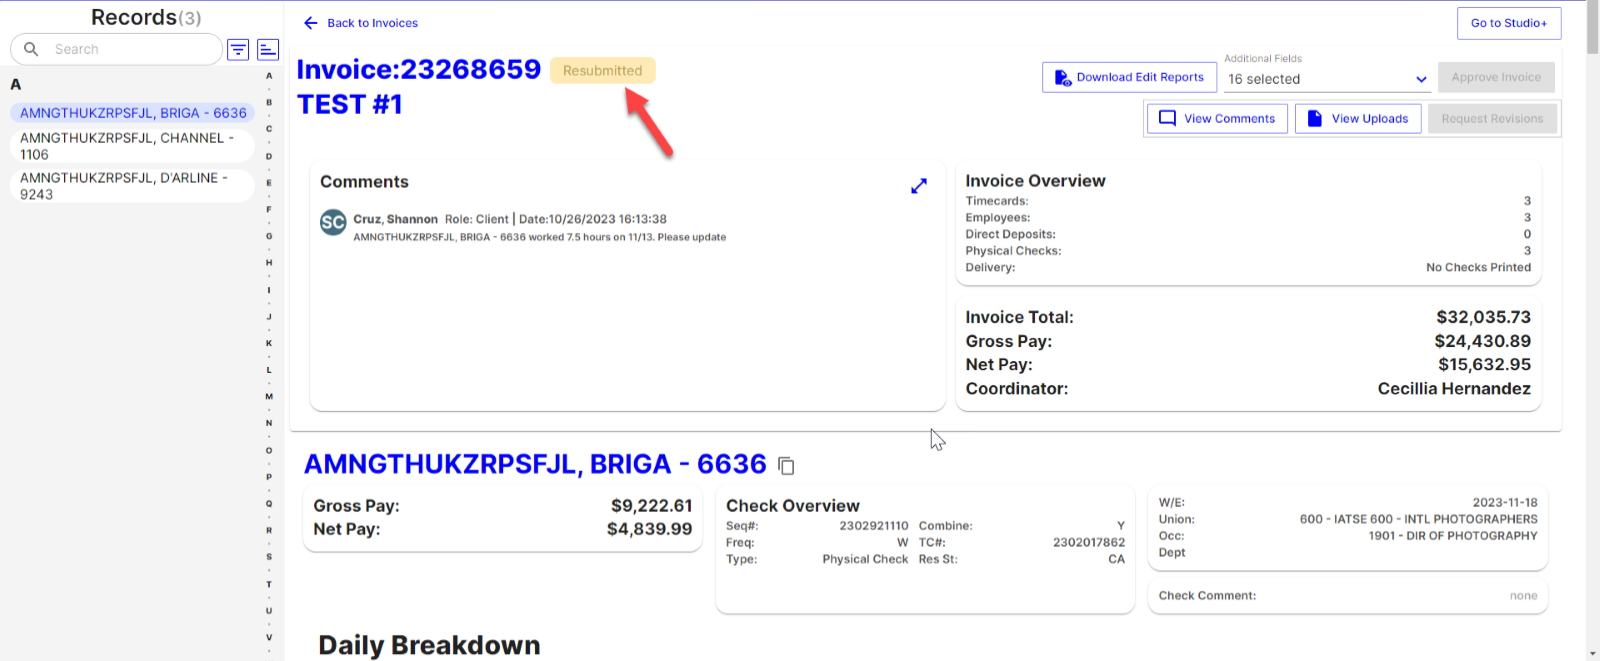
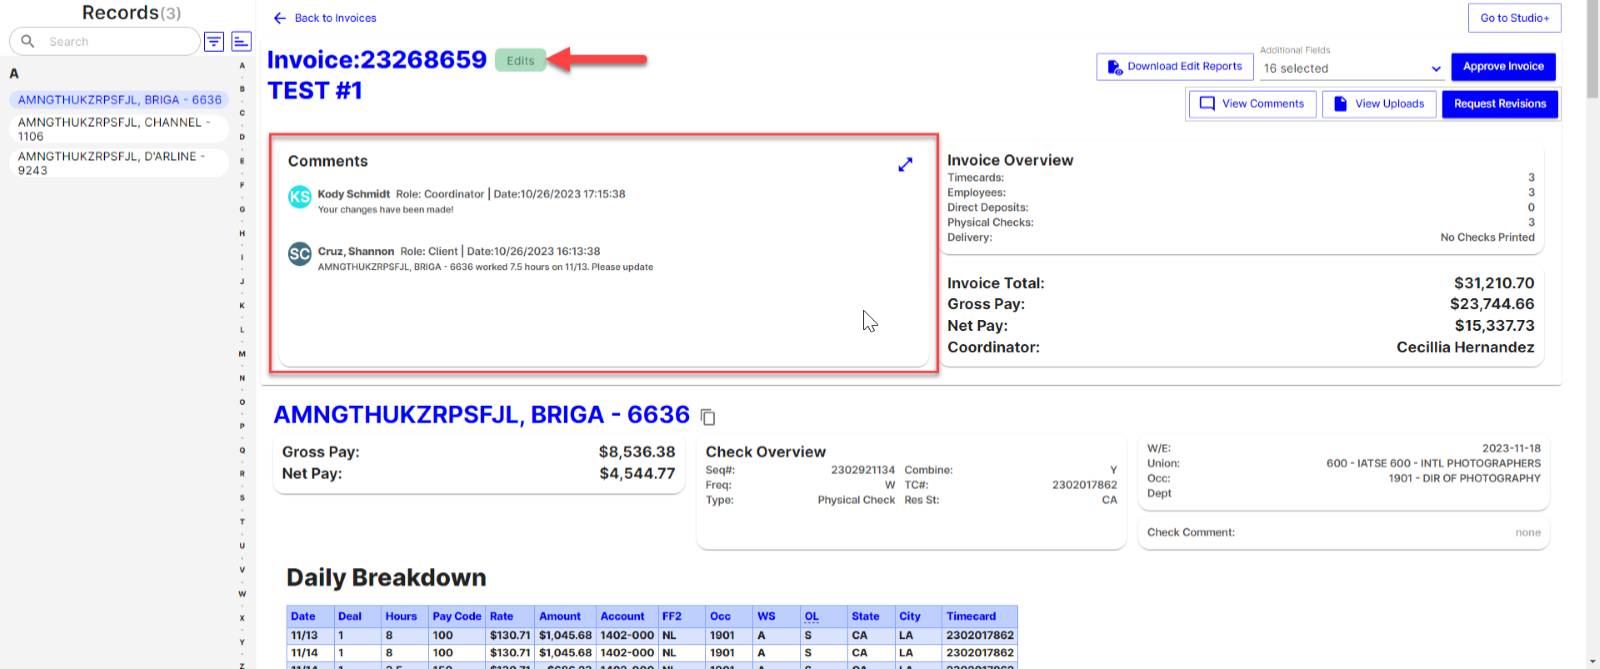
The invoice number will show on the right side of this screen next to the invoice's status. Learn more about what each status means here.
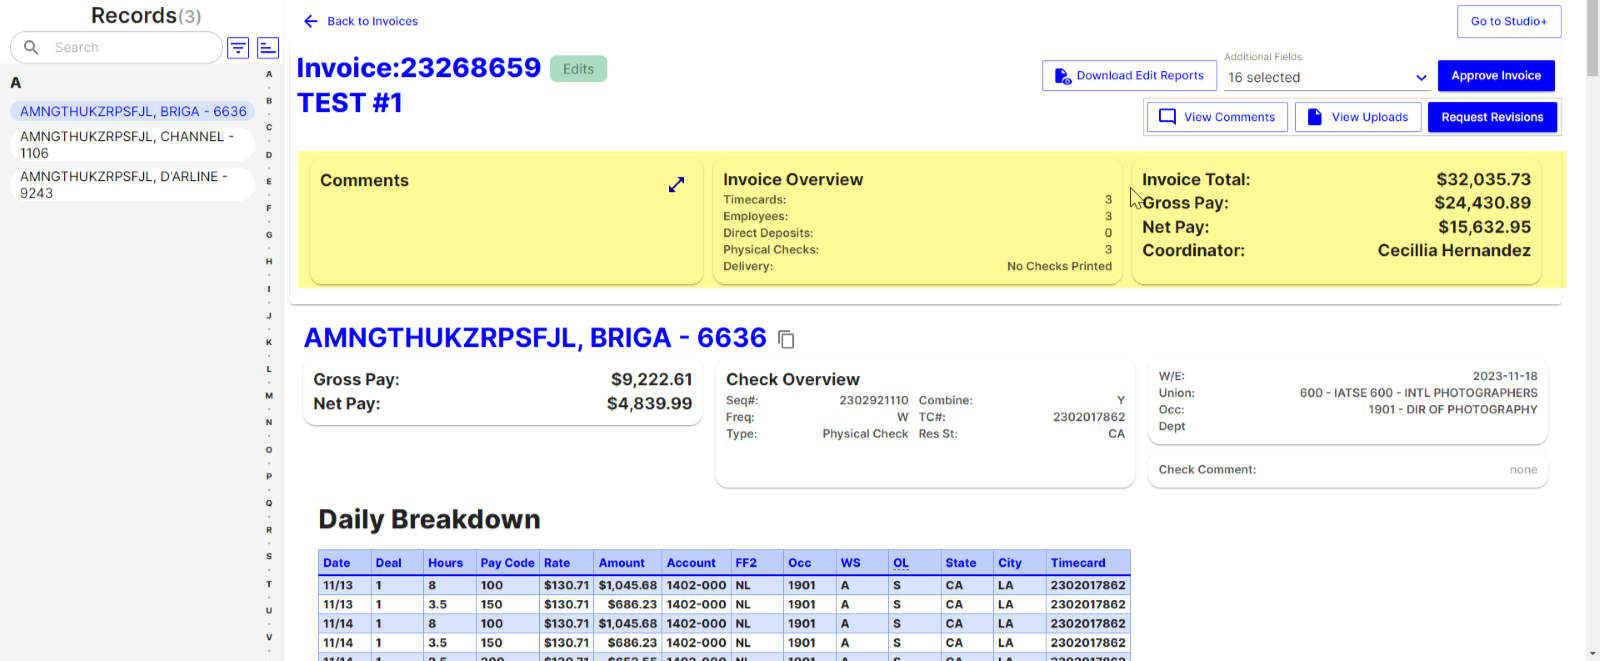
You’ll find the summary of the invoice at the top of the page, including:
- Comments left by you and your coordinator.
- The invoice overview includes the number of timecards, employees, direct deposits, and physical checks included. The delivery method of the physical checks may also display.
- The last card shows the gross pay, net pay, and the name of your payroll coordinator.
Above these cards, you’ll see some important buttons:
-
This takes you to the FROM Cast & Crew folder in Studio+ where the individual invoice files are stored
-
Allows you to download the PDF reports directly from
-
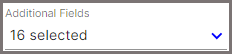 Refers to additional fields that the Digital Edits screen shows for each employee. You can check and uncheck these options based on the information you wish to see for the timecards
 -
Allows you to approve the invoice and customize the details of how and when you want the physical checks to release
-
Shows all the comments left on the invoice
-
Shows all documents that have been uploaded and attached to the invoice. You can download these files from this window
-
Begins the digital edits process allowing you to request any revisions to the invoice
- Once you click this button, you can add comments by clicking
- Upload files to the invoice by clicking
- Once you click this button, you can add comments by clicking
Below this section, you’ll see the details for each of the employees within the invoice, including:
- The employee’s name
- The copy icon next to their name allows you to quickly copy their name to the clipboard, facilitating seamless pasting into your revision comments.
- Breakdown of their timecard, account code summary, and payout
Edits Dashboard Overview
All your available invoices will be listed under the “Invoices” tab.
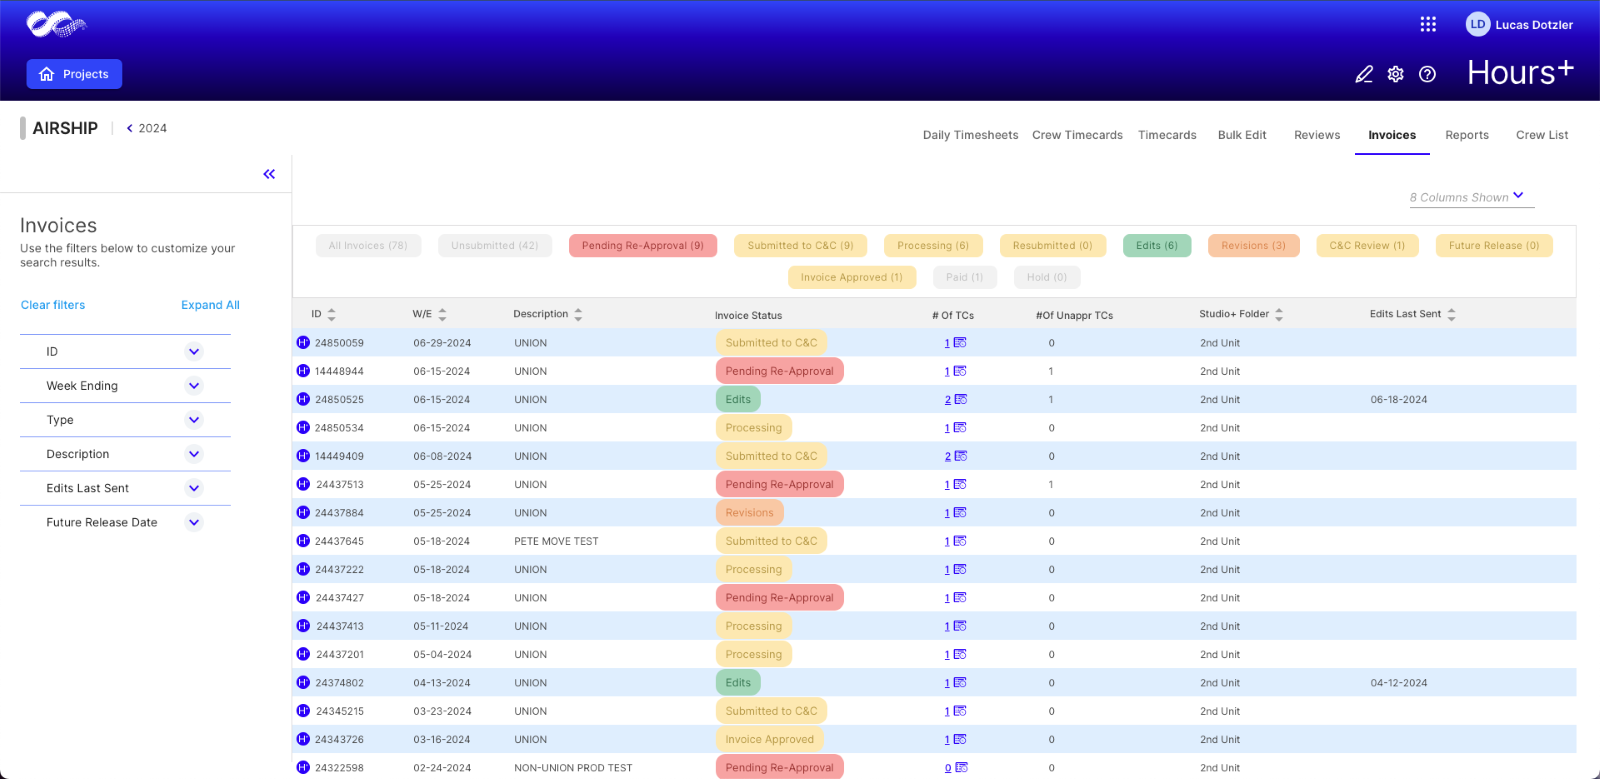
By default, this screen shows all invoices that haven’t been paid yet. Hours+ invoices will have the H+ logo next to the invoice number.
You can click the status badges at the top of the page to hide and show invoices within those statuses.
Status definitions
- All Invoices: Enables all statuses for you to view all invoices
- Unsubmitted: These invoices have timecards still going through the approval flow. New timecards will be automatically added to Unsubmitted invoices. (Hours+ only)
- Pending Re-Approval: One or more timecards have been rejected by your coordinator and need to be reapproved. (Hours+ only)
- Submitted to C&C: All timecards on this invoice have been approved. (Hours+ only)
- Processing: The edit is being worked on by your coordinator.
- Resubmitted: Your requested changes have been sent back to your coordinator.
- Edits: The edit has been sent to you.
- Revisions: The invoice is being commented on by you.
- C&C Review: The invoice’s approval has been received. Your coordinator will process it during regular business hours.
- Future Release: The invoice has been approved by the coordinator, and payments will be released automatically at a specified date
- Hover over the information icon to see when the invoice will be released
- Invoice Approved: The coordinator has received your approval and has marked the invoice accordingly.
- Paid: The invoice has been paid.
- Hold: The coordinator is still waiting for some information from you in order to proceed.
Requesting Revisions
- If you need to make changes to your invoice, click Request Revisions.
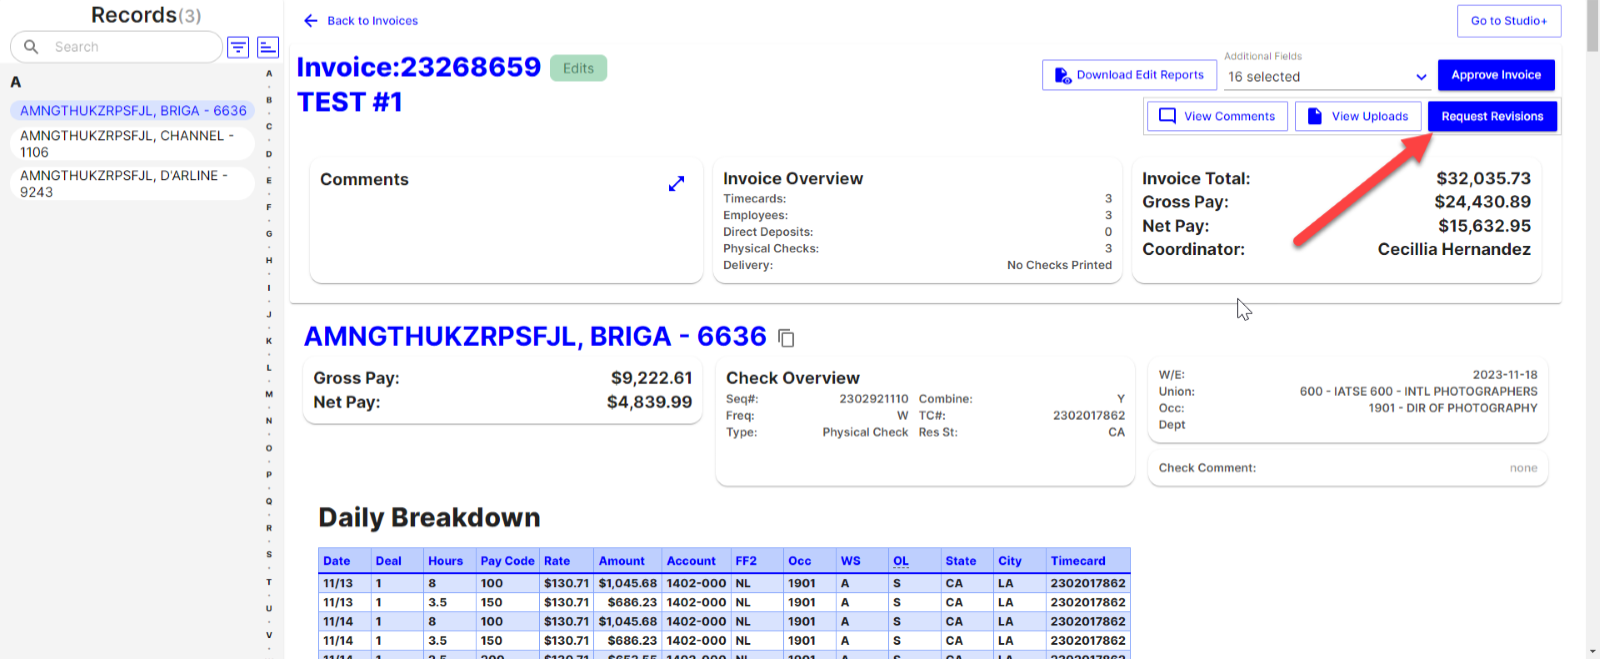
- The invoice status will change to ‘Revisions.’
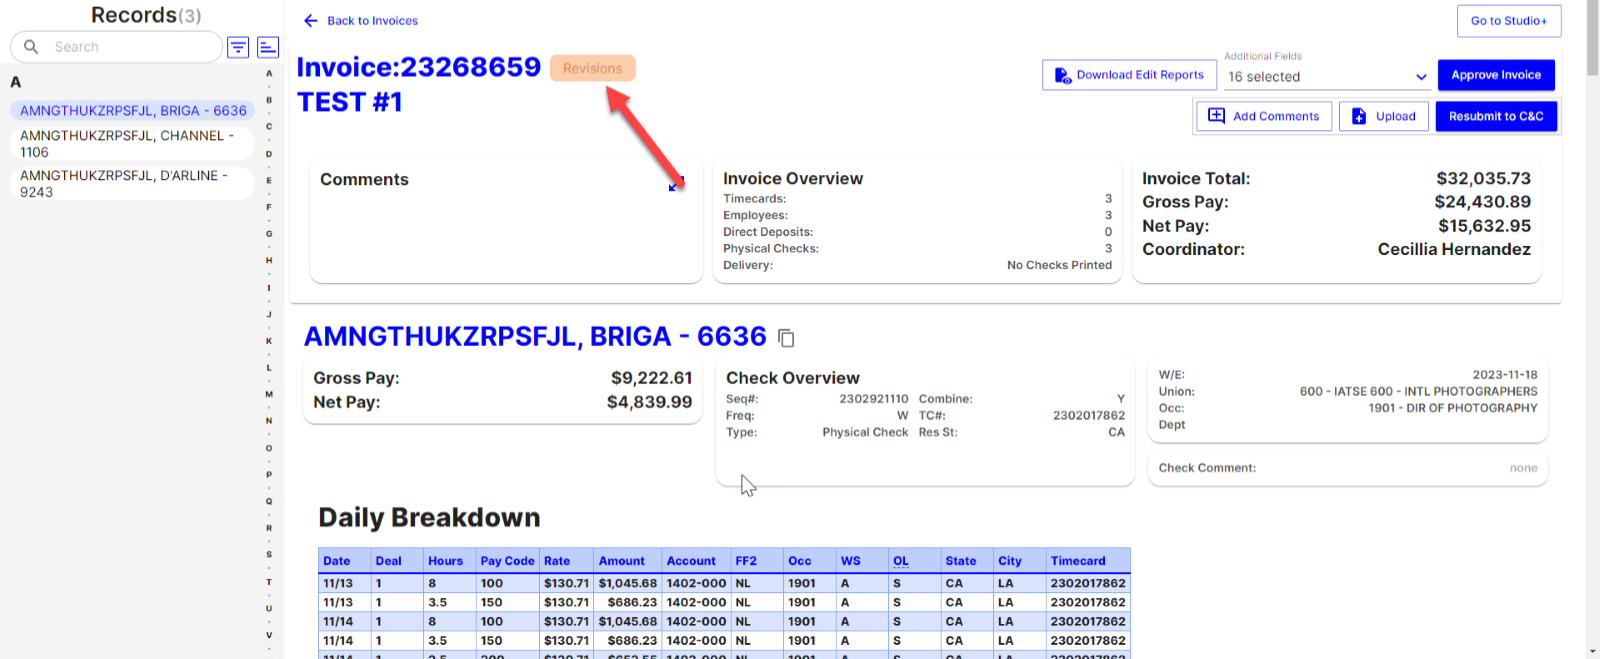
- Click Add Comments to notify your coordinator what changes need to be made.
- Click the Insert at Cursor icon to quickly add the employee’s name in the comment box.
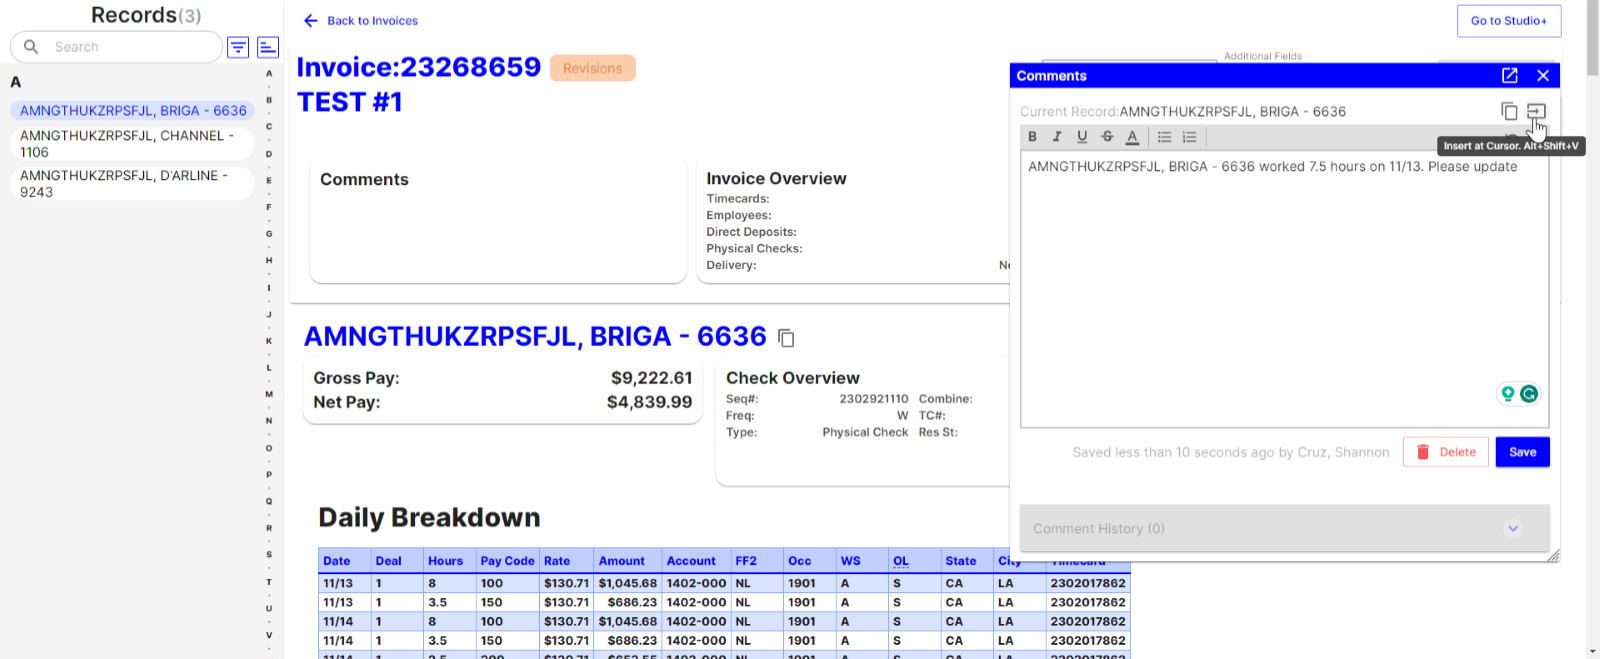
- Click the Insert at Cursor icon to quickly add the employee’s name in the comment box.
- Comments autosave, or you can click Save to save your comment.
- If your comment is not saved, your coordinator cannot receive it.
- Click Upload to upload additional timecards, revised timecards, or supporting documents, such as an image with annotations of what needs to be changed on the invoice.
- Only .pdf, .jpg, and .png files are accepted. 25 MB max file size
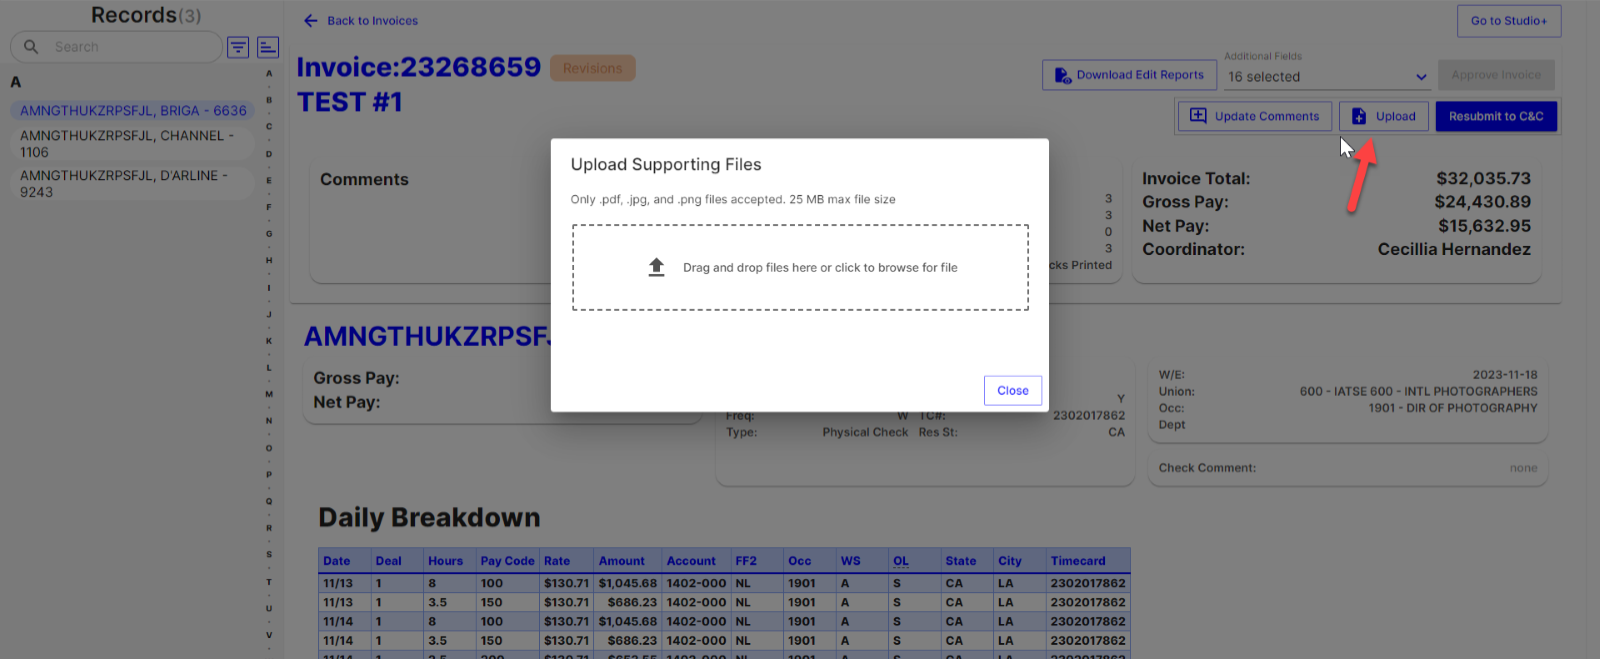
- Only .pdf, .jpg, and .png files are accepted. 25 MB max file size
- Drag and drop files or click the box to browse for a file on your computer.
- To remove the file, click the remove icon.
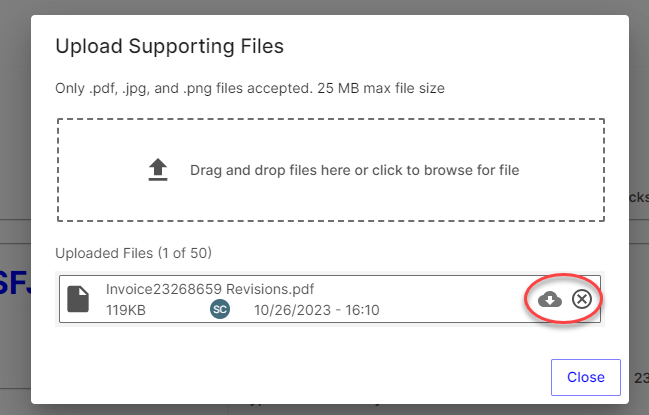
- To remove the file, click the remove icon.
- Click Close to continue the Edits process.
- Once you’ve included your changes, click Resubmit to C&C.
- You’ll need to click Resubmit to C&C in order for your payroll coordinator to receive your comment and uploaded files.
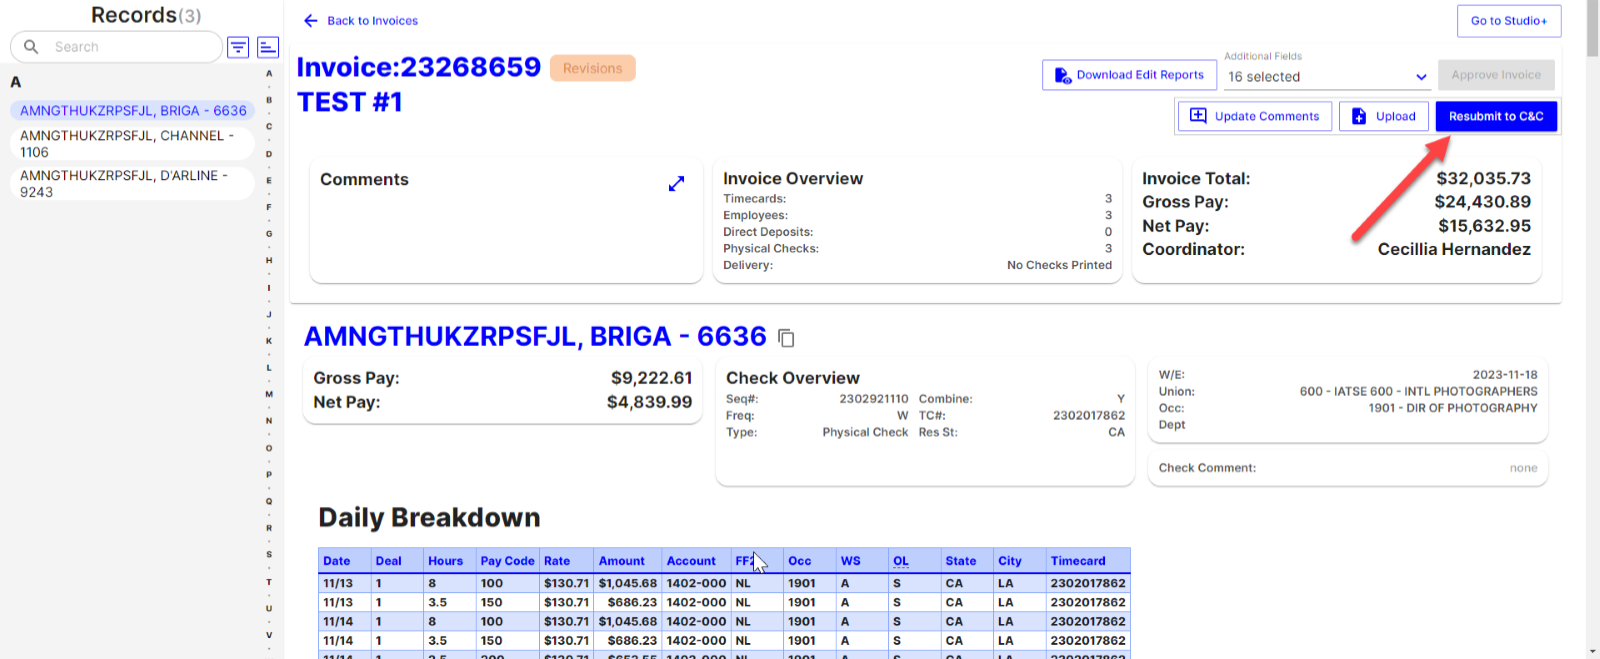
- You’ll need to click Resubmit to C&C in order for your payroll coordinator to receive your comment and uploaded files.
- Review your edits and click Resubmit to submit.
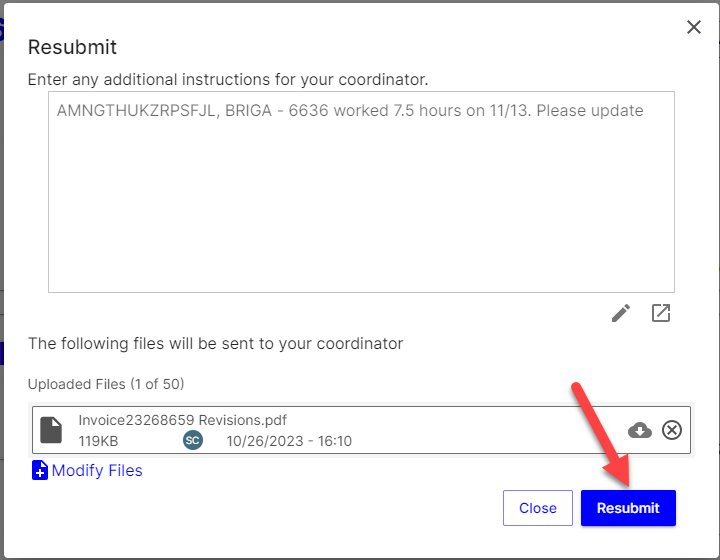
- The invoice status will change to ‘Resubmitted.’
- After your coordinator receives your edits and makes the appropriate changes to the invoice, you’ll receive the updated file with the ‘Edits’ status. Make sure to look for comments left by your coordinator in the ‘Comments’ section.
Approving an Edit
Digital Edits makes approving an invoice and requesting revisions a breeze by automating the process, so you can focus on the data that matters most to you.
- When you’re ready to approve your invoice, click Approve Invoice.

- A modal will pop up with the invoice summary for you to confirm how and when you want the physical checks to be released.
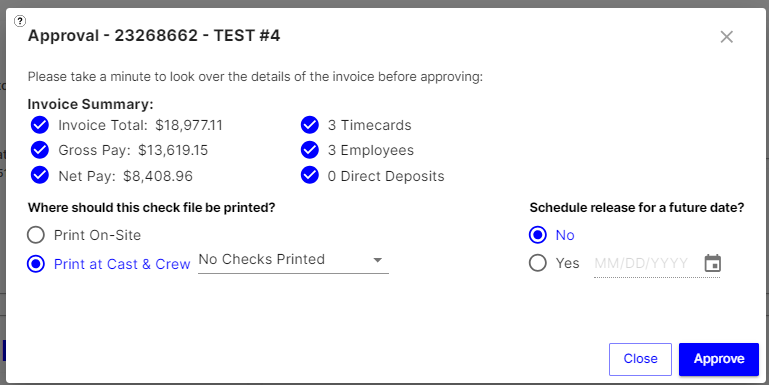
- Choose where you want checks to be printed:
- Print On-Site: This option allows you to print the checks at your location (project must already be set up for on-site printing).
-
Print at Cast & Crew: This option allows Cast & Crew to print checks. You can select how Cast & Crew sends the physical check to the employee. Note: Some options will require you to provide your payroll coordinator with specific instructions.
- (optional) Add delivery instructions:
- Depending on your delivery preferences, you may want to leave additional information for your coordinator to see.
- If needed, you can download the appropriate delivery instruction form and upload it in the box below.
- Your comment will be automatically saved once you click ‘Approve’ and will be shown in the Comments section. Click the comments box to view all comments.
- Depending on your delivery preferences, you may want to leave additional information for your coordinator to see.
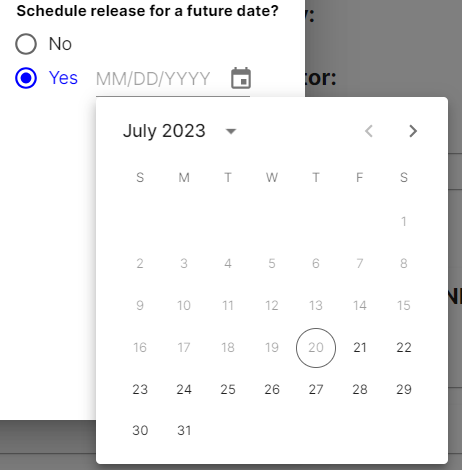
- Choose if you want to schedule the checks to be released for a future date:
- No: The invoice will be released the same day
-
Yes: The invoice will be released on the day you choose from the dropdown date picker
- Note: Direct deposits will appear the day following the release date.
-
Note: Choosing a weekend date will notify you that the invoice may not be released until the following business day if further review is needed from Cast & Crew
- Review your invoice summary to ensure accuracy.
- Once everything looks good, click Approve.
-
Once an invoice is approved, it cannot be undone.
-
Once an invoice is approved, it cannot be undone.
- The invoice status will change to one of the following:
- Invoice Approved if the invoice is approved and good to go
- C&C review if additional review from your coordinator is needed
- Future Release Date if you picked to release the checks on a future release date.
- Learn more about statuses here
So, next time you need to request revisions to your edits, embrace Digital Edits, the ultimate solution for requesting revisions and approving invoices in a convenient, seamless, and digital way.
Steps for New Experience
Watch: Digital Edits Overview
Who can access Digital Edits?
- Those with “Invoice Approver” permissions on the relevant project.
Accessing Digital Edits
There are a few different ways you can access the Digital Edits screen:
-
Studio+ email notifications:
You’ll receive an email notification from Studio+ alerting you that a new edit report or approved invoice has been uploaded, or a new comment has been added to an invoice. You can click the button to view the full edit report or comment, or if you prefer to review the individual invoice files, you can click on the individual invoice links to view these files in Studio+.
-
In Studio+:
- Under the “FROM Cast & Crew” folder, you’ll see your available edit reports. The latest versions will display a blue Edit Report button and a hyperlinked invoice number. Click the button or the invoice number to access the Digital Edits screen. Note that prior versions of the edit report will not have active links.
- Once an invoice has been approved, the approved versions of the invoice files will appear in Studio+. These files will display a blue “Approved Invoice” button.
- Under the “FROM Cast & Crew” folder, you’ll see your available edit reports. The latest versions will display a blue Edit Report button and a hyperlinked invoice number. Click the button or the invoice number to access the Digital Edits screen. Note that prior versions of the edit report will not have active links.
- In Hours+ (for Hours+ users only):
- If you’re already an Hours+ user with Invoice Approver permissions, you can access the Digital Edits screen from the Invoices tab.
- You can click on the invoice number with a blue hyperlink to review the invoice on the Digital Edits screen.
- 💡 Tip: The H+ icon notates the Hours+ invoices
- Any invoice that is not clickable simply means the edit report hasn’t been sent yet or you do not have permission to the invoice’s folder Studio+.
Note: We strongly advise against having multiple tabs of Hours+/Studio+ open simultaneously. Opening Hours+/Studio+ in multiple tabs can lead to unintended consequences, such as getting logged out of one tab or not having your changes saved properly.
To avoid any potential issues, we recommend keeping only one instance of Hours+/Studio+ open at a time. This will help ensure that your data is accurately saved and that you can smoothly navigate through the application without any interruptions.
Getting Help
If you need help filling out the form at any time, please use these free resources:
- Email plus.support@castandcrew.com
- Call our support team at 818-860-7770
- Press 1 for Start+ & Hours+
- Press 2 for Studio+
Digital Edits Screen Overview
The Digital Edits screen shows all your valuable information completely digitized.
Search, sort, and filter
On the left side of the screen, you’ll see the Records sidebar. Here is where you’ll find the list of crew members within the invoice.
You can search for any crew member by typing their name in the search bar.
By clicking on a letter, you'll instantly jump to the corresponding section that starts with that letter.
You can click on the buttons to filter and sort.
-
Filter: Filters are a great way to narrow down your search for a specific crew member. You can filter by Department, Union, Pay Code, or by specific record properties including Direct Deposit, Large Payment, Loan-Out, and Duplicate Timecards.
- 💡 Double-click this button to clear all filters
-
Sort: Sorting options allow you to order the records in whichever order you prefer. This is helpful when you’re trying to locate a specific record or a set of records. You can sort by Name, Department, Union, and Account Code, in either ascending (A-Z, 0-9) or descending (Z-A, 9-0) order.
|
Note: If you're looking to review loan-out companies on invoices, you can filter employees who are paid as a Loan-Out:
Alternatively, you can review the loan-out company on the PDF invoice in Studio+: And on the Fringe Report: |
Digitized data
The main screen shows all the data of the invoice. Here you can interact with the data and take additional action on the invoice. Let’s go over the type of data that you can see.
The invoice number will show on the right side of this screen next to the invoice's status. Learn more about what each status means here.
You’ll find the summary of the invoice at the top of the page, including:
- Comments left by you and your coordinator.
- The invoice overview includes the number of timecards, employees, direct deposits, and physical checks included. The delivery method of the physical checks may also display.
- The last card shows the gross pay, net pay, and the name of your payroll coordinator.
Above these cards, you’ll see some important buttons:
-
This takes you to the FROM Cast & Crew folder in Studio+ where the individual invoice files are stored
-
Allows you to download the PDF reports directly from
-
Refers to additional fields that the Digital Edits screen shows for each employee. You can check and uncheck these options based on the information you wish to see for the timecards
-
Allows you to approve the invoice and customize the details of how and when you want the physical checks to release
-
Shows all the comments left on the invoice
-
Shows all documents that have been uploaded and attached to the invoice. You can download these files from this window
-
Begins the digital edits process allowing you to request any revisions to the invoice
- Once you click this button, you can add comments by clicking
- Upload files to the invoice by clicking
- Once you click this button, you can add comments by clicking
Below this section, you’ll see the details for each of the employees within the invoice, including:
- The employee’s name
- The copy icon next to their name allows you to quickly copy their name to the clipboard, facilitating seamless pasting into your revision comments.
- Breakdown of their timecard, account code summary, and payout
Edits Dashboard Overview
All your available invoices will be listed under the “Invoices” tab.
By default, this screen shows all invoices that haven’t been paid yet. Hours+ invoices will have the H+ logo next to the invoice number.
You can click the status badges at the top of the page to hide and show invoices within those statuses.
Status definitions
- All Invoices: Enables all statuses for you to view all invoices
- Unsubmitted: These invoices have timecards still going through the approval flow. New timecards will be automatically added to Unsubmitted invoices. (Hours+ only)
- Pending Re-Approval: One or more timecards have been rejected by your coordinator and need to be reapproved. (Hours+ only)
- Submitted to C&C: All timecards on this invoice have been approved. (Hours+ only)
- Processing: The edit is being worked on by your coordinator.
- Resubmitted: Your requested changes have been sent back to your coordinator.
- Edits: The edit has been sent to you.
- Revisions: The invoice is being commented on by you.
- C&C Review: The invoice’s approval has been received. Your coordinator will process it during regular business hours.
- Future Release: The invoice has been approved by the coordinator, and payments will be released automatically at a specified date
- Hover over the information icon to see when the invoice will be released
- Invoice Approved: The coordinator has received your approval and has marked the invoice accordingly.
- Paid: The invoice has been paid.
- Hold: The coordinator is still waiting for some information from you in order to proceed.
Requesting Revisions
- If you need to make changes to your invoice, click Request Revisions.
- The invoice status will change to ‘Revisions.’
- Click Add Comments to notify your coordinator what changes need to be made.
- Click the Insert at Cursor icon to quickly add the employee’s name in the comment box.
- Click the Insert at Cursor icon to quickly add the employee’s name in the comment box.
- Comments autosave, or you can click Save to save your comment.
- If your comment is not saved, your coordinator cannot receive it.
- Click Upload to upload additional timecards, revised timecards, or supporting documents, such as an image with annotations of what needs to be changed on the invoice.
- Only .pdf, .jpg, and .png files are accepted. 25 MB max file size
- Only .pdf, .jpg, and .png files are accepted. 25 MB max file size
- Drag and drop files or click the box to browse for a file on your computer.
- To remove the file, click the remove icon.
- To remove the file, click the remove icon.
- Click Close to continue the Edits process.
- Once you’ve included your changes, click Resubmit to C&C.
- You’ll need to click Resubmit to C&C in order for your payroll coordinator to receive your comment and uploaded files.
- You’ll need to click Resubmit to C&C in order for your payroll coordinator to receive your comment and uploaded files.
- Review your edits and click Resubmit to submit.
- The invoice status will change to ‘Resubmitted.’
- After your coordinator receives your edits and makes the appropriate changes to the invoice, you’ll receive the updated file with the ‘Edits’ status. Make sure to look for comments left by your coordinator in the ‘Comments’ section.
Approving an Edit
Digital Edits makes approving an invoice and requesting revisions a breeze by automating the process, so you can focus on the data that matters most to you.
- When you’re ready to approve your invoice, click Approve Invoice.
- A modal will pop up with the invoice summary for you to confirm how and when you want the physical checks to be released.
- Choose where you want checks to be printed:
- Print On-Site: This option allows you to print the checks at your location (project must already be set up for on-site printing).
-
Print at Cast & Crew: This option allows Cast & Crew to print checks. You can select how Cast & Crew sends the physical check to the employee. Note: Some options will require you to provide your payroll coordinator with specific instructions.
- (optional) Add delivery instructions:
- Depending on your delivery preferences, you may want to leave additional information for your coordinator to see.
- If needed, you can download the appropriate delivery instruction form and upload it in the box below.
- Your comment will be automatically saved once you click ‘Approve’ and will be shown in the Comments section. Click the comments box to view all comments.
- Depending on your delivery preferences, you may want to leave additional information for your coordinator to see.
- Choose if you want to schedule the checks to be released for a future date:
- No: The invoice will be released the same day
-
Yes: The invoice will be released on the day you choose from the dropdown date picker
- Note: Direct deposits will appear the day following the release date.
-
Note: Choosing a weekend date will notify you that the invoice may not be released until the following business day if further review is needed from Cast & Crew
- Review your invoice summary to ensure accuracy.
- Once everything looks good, click Approve.
-
Once an invoice is approved, it cannot be undone.
-
Once an invoice is approved, it cannot be undone.
- The invoice status will change to one of the following:
- Invoice Approved if the invoice is approved and good to go
- C&C review if additional review from your coordinator is needed
- Future Release Date if you picked to release the checks on a future release date.
- Learn more about statuses here
So, next time you need to request revisions to your edits, embrace Digital Edits, the ultimate solution for requesting revisions and approving invoices in a convenient, seamless, and digital way.