Discover how to submit a new Vendor Payment request in TTC V-Pay.
To submit a new Vendor Payment request, click the +ADD VENDOR PAYMENT REQUEST button within the Vendor Payment Requests module.
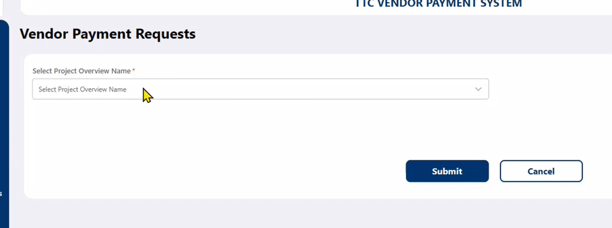
If multiple Project Overviews exist, you will be required to select which Project Overview you want this Vendor Payment Request to be housed under. Then click Submit.
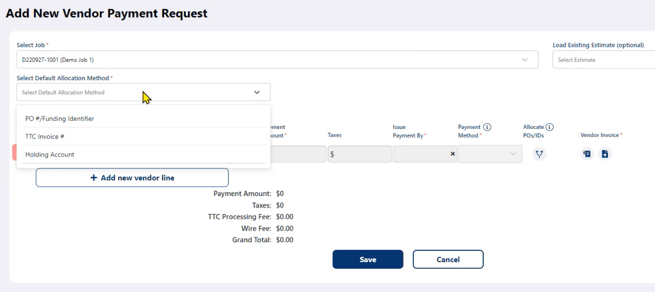
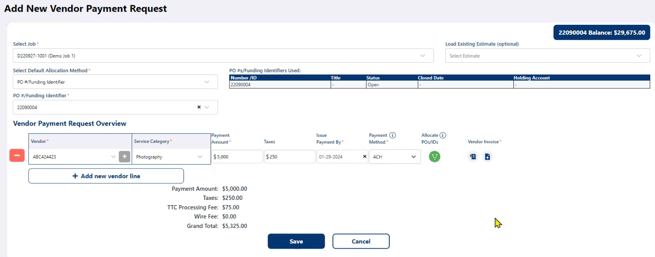
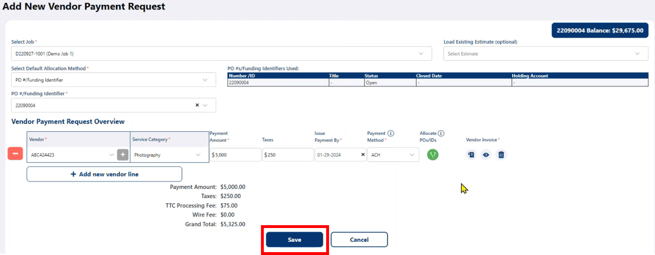
Required fields are marked with a red asterisk. After selecting the Job associated with the Vendor Payment, select the Default Allocation Method. In most cases, the correct choice will be PO #/Funding Identifier.
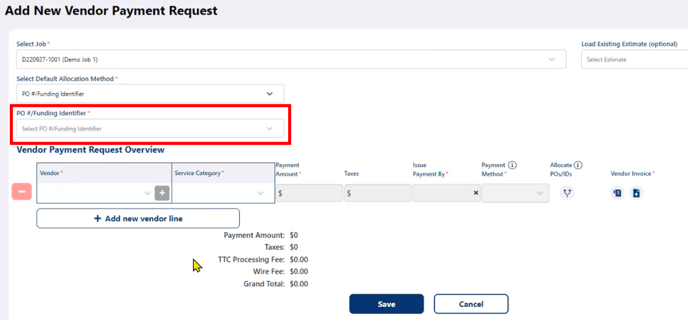
Selecting PO #/Funding Identifier as the 'Default Allocation Method' will cause an additional 'PO #/Funding Identifier' field to appear. Select the PO you want to associate with the payment you're making to the vendor.
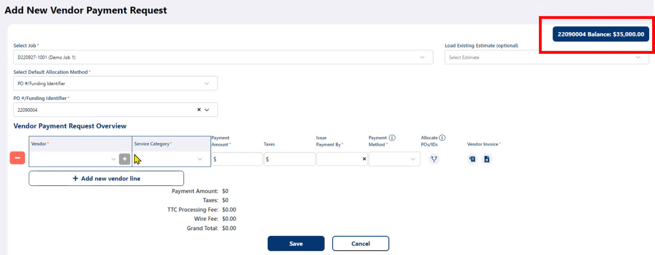
Once the 'PO #/Funding Identifier' is chosen, the current PO balance will be automatically displayed in the top right corner.
Complete all required fields within each row of the Vendor Payment Request Overview section. Selecting from the extensive list in the Vendor dropdown will auto-populate the 'Service Category' and you can adjust as needed. The fees listed below the overview will dynamically update as needed.
For example, if Wire is selected as the ‘Payment Method,’ the appropriate Wire Fee will appear below. Note that the green icon indicates that the PO has sufficient funds to cover the vendor payment.
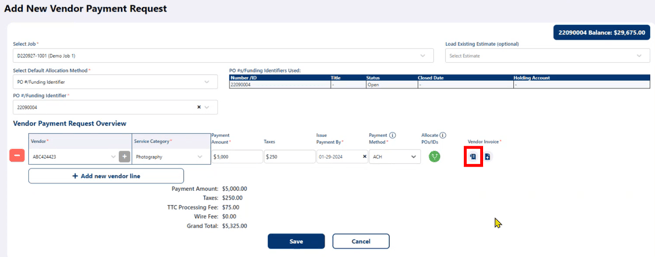
Click the Vendor Invoice icon to add information about the vendor invoice.
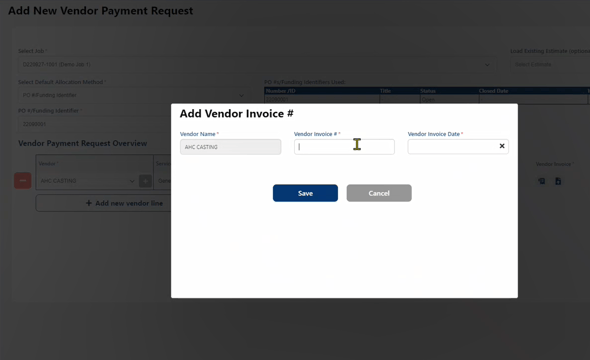
Enter the required information in the Add Vendor Invoice # popup window and click Save. This information should be taken directly from the invoice sent to you by the vendor.
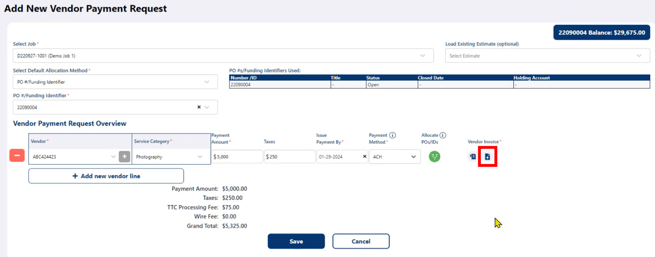
Finally, click the Upload icon to upload a copy of the vendor invoice.
To save your progress and submit the vendor payment request later, click Save.
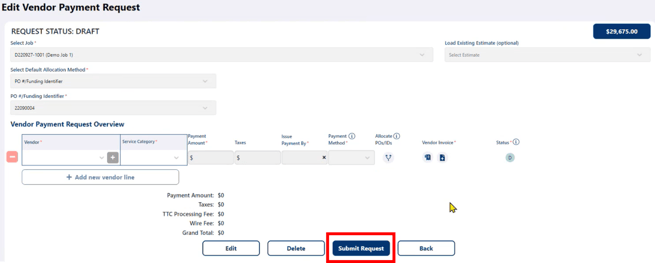
Once you’re ready to submit, click Submit Request.
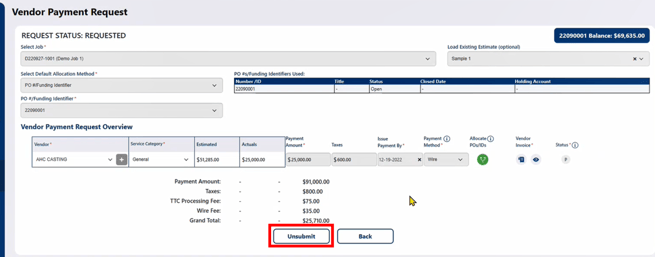
Once you have submitted the Vendor Payment Request, its status will automatically change from Draft to Submitted. At that point, if you need to make changes to the request, select the Vendor Payment Request listing and click Unsubmit, make any necessary changes, and resubmit the request.