Automatically send an EFT file from PSL+ to Cashet.
Jump to a section in this guide:
Before a file can be successfully sent, PSL Support will need to activate the option and provide info to CASHet. Please send a request for activation to PSL.support@castandcrew.com
Bank Setup
Before you begin, CASHetPay will need to be set up as a bank in PSL+. You can do this in the Bank Entry setup module.
- Create a CASHet specific bank called "CP."
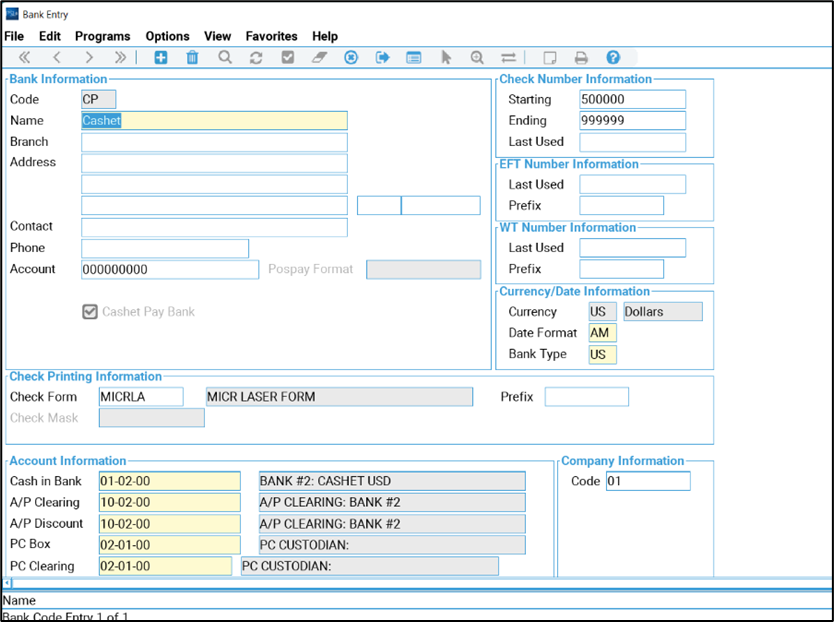
- Email support@castandcrew.com and advise you will be sending files to CASHét via PSL and request a License number to provide to CASHét.
- PSL support will activate the automated send option and email back with the License Number.
Vendor Setup
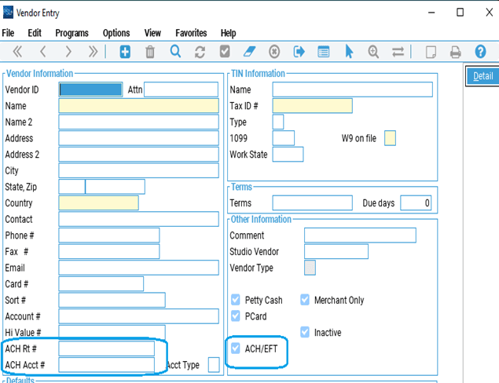
All vendors who will be receiving an EFT will need to be set up with all the vendor details, including the ACH Rt # and ACH Acct #. APVEN > DETAIL > EFT FIELD
The vendor records will also be sent automatically to CASHet daily.
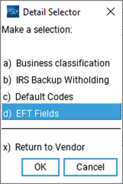
- You can do this in the Vendor Setup Module and by clicking Detail.
- Select EFT Fields.
Creating EFT Transactions
Create AP Entry: AP Menu > A/P Entry
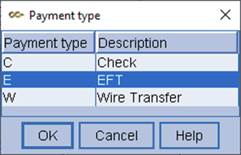
Payment Types: Choose
-
The Check Type will automatically default to "E" (EFT) instead of "C" (Check) when using the CASHétPay Bank.
-
After creating the AP, Verify Payment Type "E" is selected.
-
"E" EFT: These types of transactions will also be available to print in the Check printing program and will print with a ‘non-negotiable’ / ‘void’ flag on the check copy. A PDF option is available for this payment type.
Post the AP in the AP Posting Program: AP Menu > A/P Entry > Post [appost].
OPTIONS: Print Computer checks or Manual checks using Payment Type "E"
Option 1: Manual Check - If you will not be printing checks, and instead will have PSL+ auto-assign the check number, at this time, enter a check number manually inter the "number" field under "Check Information."
Once you post the AP, PSL+ will post this transaction as a "PAID" AP referencing the check number that was manually entered.
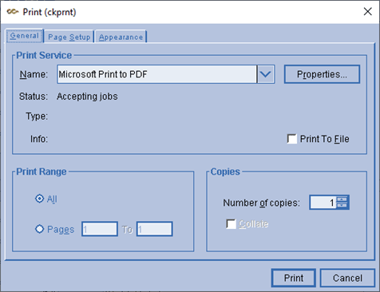
- Go to Print Checks [ckprnt] and select CASHet Pay Bank
- Verify payment type is "E"
- If you're printing on plain paper, choose your local printer
- If you're printing to PDF, choose “Microsoft Print to PDF”
- A Non- Negotiable check "VOID" will be printed on all “E” payment type records
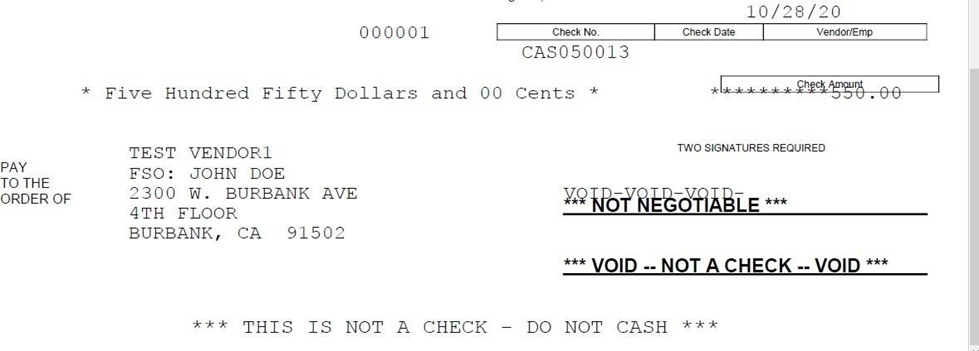
Example of EFT and Wire Transfer Payment type - check
-
- Close out the check printing program to finalize the print check register
Create EFT Export File:
Checks Menu > Electronic File Transfer Report [eftexp]
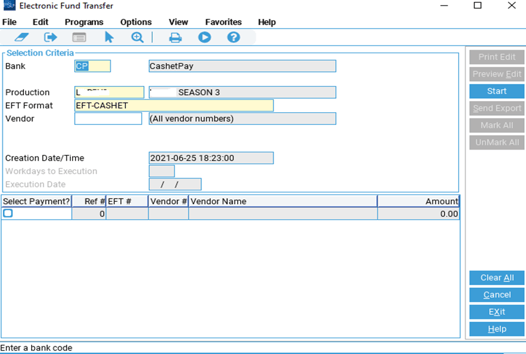
- Populate Bank code with the CASHetPay Bank.
- In the vendor field:
- If left blank, ALL vendors will be picked up
- Or select specific vendor/s for payment export
-
Once you have specified the bank and chosen the vendor/s that should be on the EFT/ CASHét Pay export you will now have the option to narrow down further by picking the transaction/s that should be included in the export file:
- Click Start.
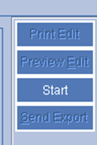
- Check mark the transactions that should be included in the export.
- Click Print Edit to print or Preview Edit to preview in PDF format.
EFT Export Edit List
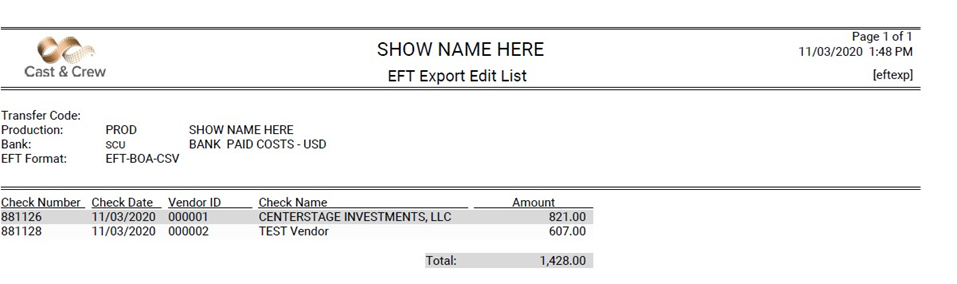
- If the file contains errors, review the last page of the Edit list which will detail all errors. Once any errors are corrected start again from Step 4.
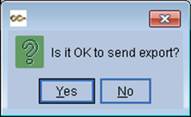
- Once you have reviewed the edit list and are ready to create the CASHét export file, click Send Export.
- A Printer box will appear for you to click Print’which will print the Export Report. This is the same information as the Edit List but the header will say "EFT Export Register." This is the final report prior to export.
- Next prompt will be: "Is it OK to send export?" Clicking Yes will initiate the file transfer directly to CASHet.