Load DPO File (EZYPO) provides a fast and efficient way to import purchase orders by batch from an .xml file.
Jump to a section in this guide:
Watch: How To Import From DPO
To get started, make sure "Export PSL" is an option in your DPO Book. Contact DPO Support to add this option if needed.
Step 1: Export from DPO
1. Log in to DPO.
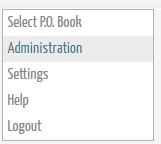
2. Click on your name in the top right.
3. Select Administration.
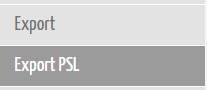
4. Click Export PSL.
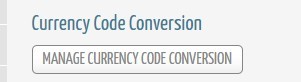
5. Click Manage Currency Code Conversion. This is where you will set the currency code to match what is set up in PSL+ and ensure the currency code will export in a way PSL+ can recognize.
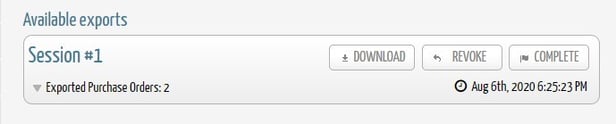
6. Click Download and Save. (Do NOT open the file)
Note: (Supplier = Vendor)
The supplier code in the DPO book cannot be blank. A supplier code is needed whether it is an existing or new supplier record. If the record does not exist, then the supplier will be added to the database when imported.
To add the supplier codes, go to Admin > Suppliers > and click on the pencil icon next to the supplier.
Step 2: Import into PSL+
7. Log into PSL+.
8. From the PO Menu, click Load DPO File.
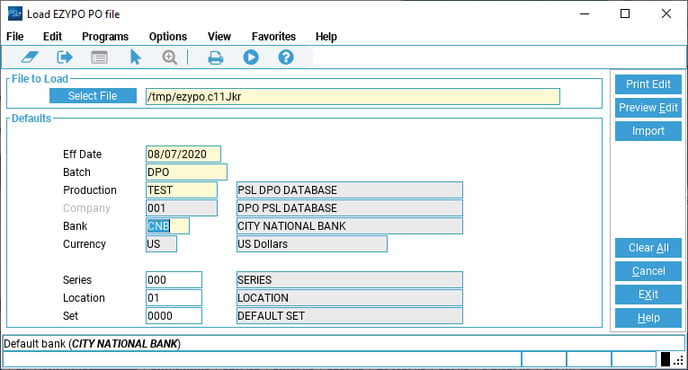
9. Input the Effective Date, Batch Number, Production Code, Bank Code, and Currency.
10. Input a Default for the Series, Location, and Set codes.
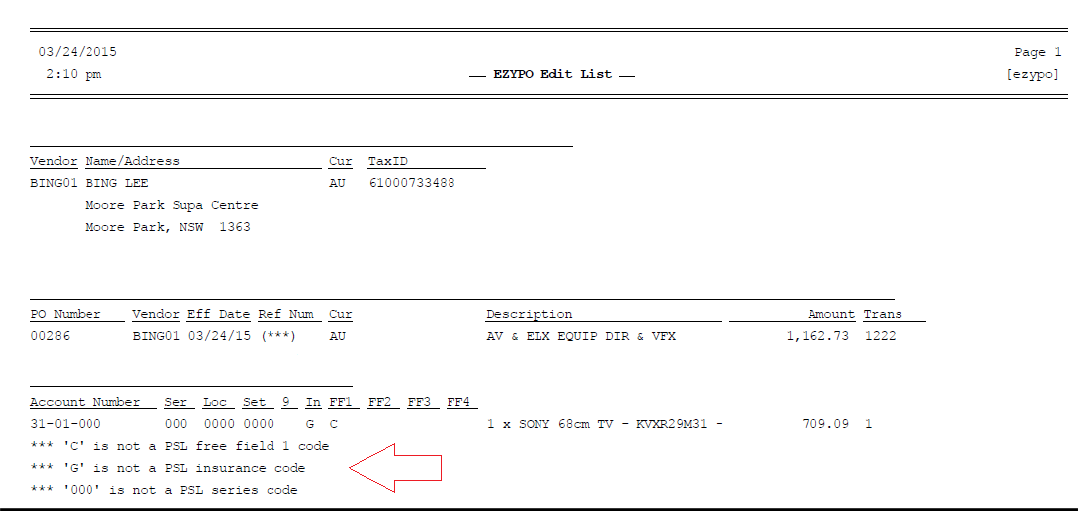
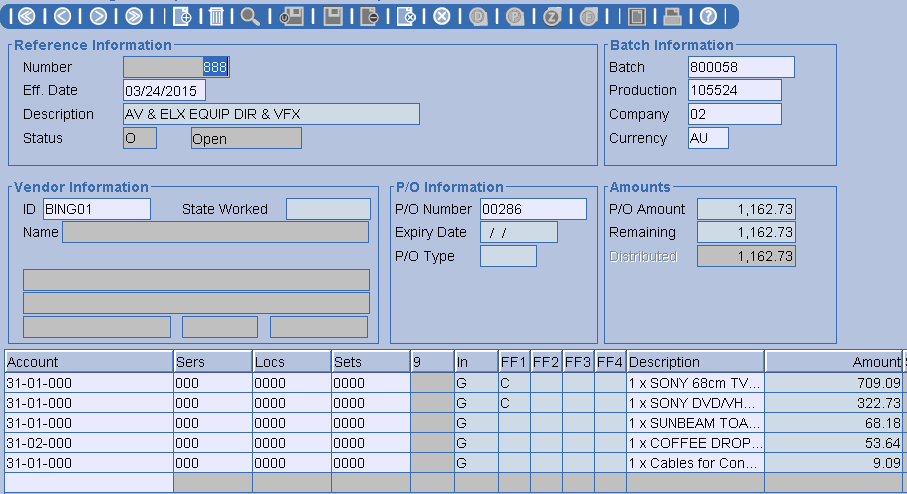
11. Click Preview Edit or Print Edit. The Edit list will display all the Vendors that will be created and the P.O. distribution information that will be imported from this file.
12. If any errors exist, the report will detail them.
a. For example: If a free field, insurance code, series, location, set, account number, etc. is used in the file but does not exist in PSL+, then you will need to add those values in order to load the file (i.e., account number, free field, series code, etc.).
Edit List Examples
- With Errors: Missing codes can be added within PSL or corrected within DPO before the import can process. Note that changes in DPO must include the process of revoking the batch. Click here for more details.
- Without Errors:
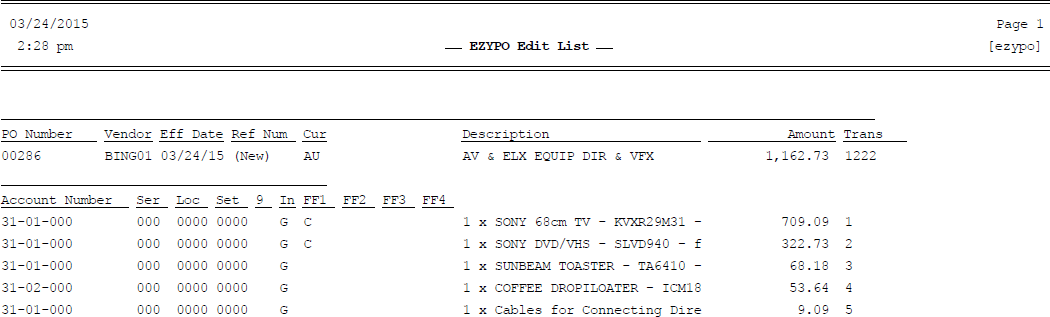
13. Once you have reviewed the edit list and are ready to import the file, click Import.
14. A pop-up window will allow you to print the Import Register.
15. An “Information” dialog box will display once all data has been loaded successfully.
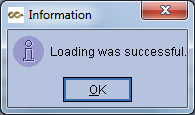
Example of a successful import load
Things to keep in mind
- When choosing the account number, make sure the number/code is populated, not the account description.
- While DPO has more than a 30-character description allowance, PSL+ will load the first 30 characters of the description.
- Always keep the DPO App updated. If you log in and do not see all your DPO Books, it’s most likely because the APP needs to be updated. Contact DPO support if you’re still experiencing issues.
- DPO will prepare a batch file at midnight, nightly. This file will contain all the PO's that have completed the approval cycle since the last export.
Check out our FAQ to find answers to commonly asked questions.