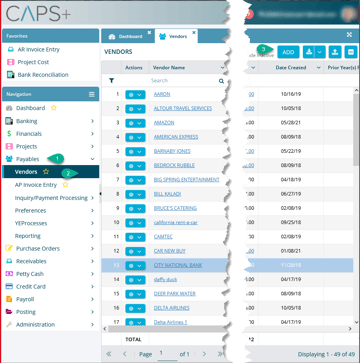
- In CAPS+, click Payables in the left navigation column.
- Select Vendors.
- Click Add in the top-right corner.
- This will open the "Create Vendor" window. Fill in each field to create a new vendor. The descriptions for each field in the "General" tab are provided below this screenshot.
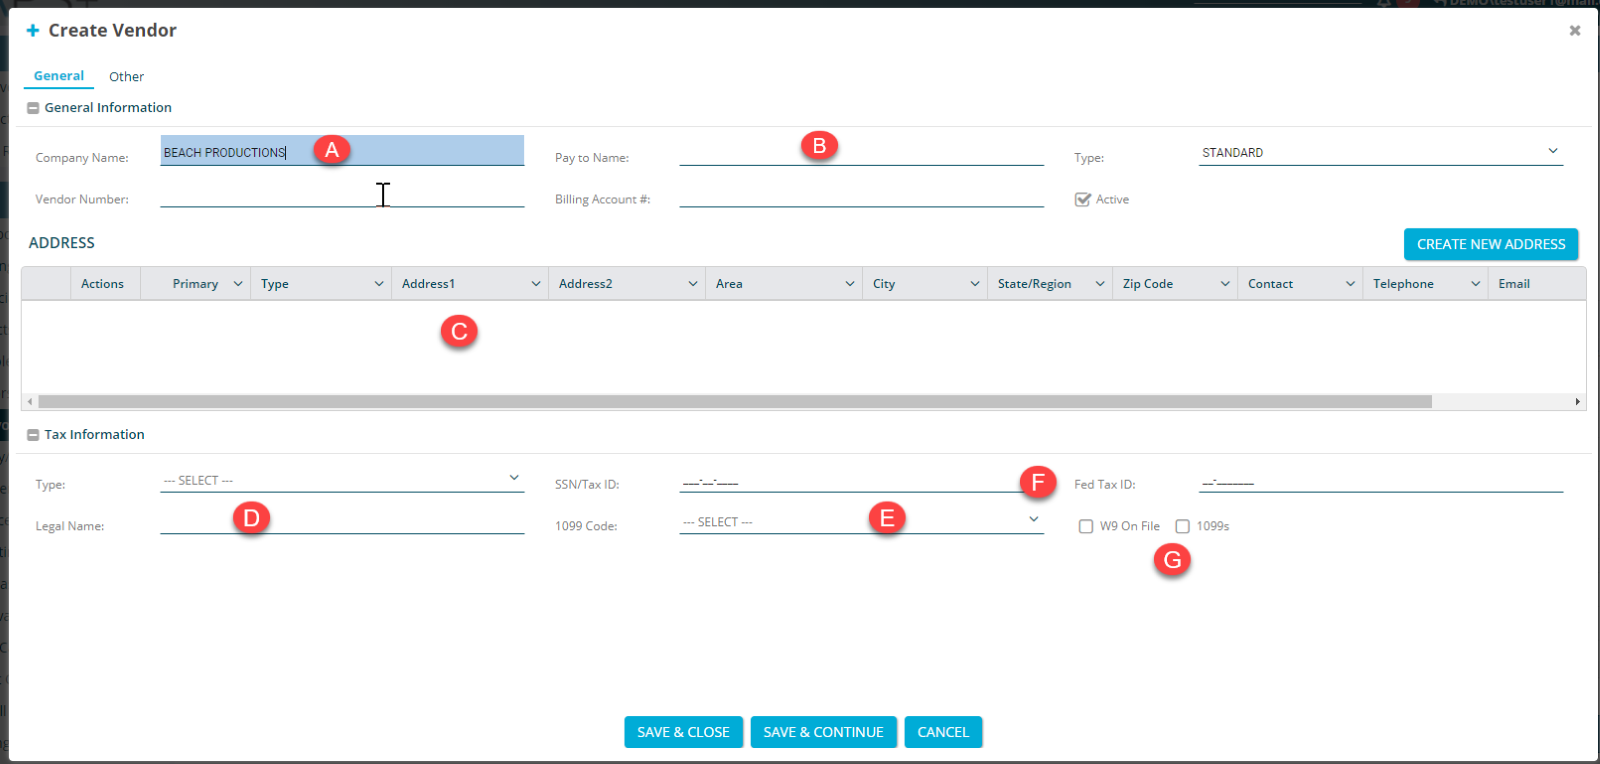
- Company Name: New vendor name (mandatory field)
- Pay to Name: Used when the name on a check is different from the Company Name
- Address: Enter address information by clicking Create New Address
- As you type into "Address 1," Google Search will perform an address match
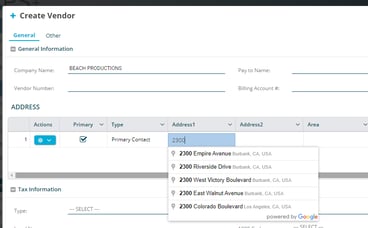
- As you type into "Address 1," Google Search will perform an address match
- Legal Name: Legal name will change how the name appears on 1099s
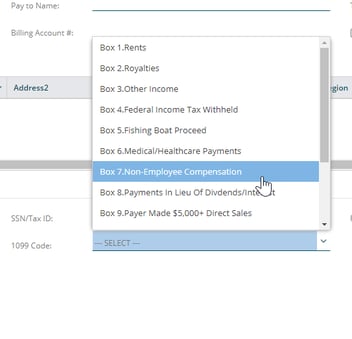
- 1099 Code: Select the appropriate 1099 code (if applicable)
- If the 1099 information is entered, it will show up in distribution rows when that vendor is used. Even though it enters by default, it can be updated as needed in the distribution rows.
- If the 1099 information is entered, it will show up in distribution rows when that vendor is used. Even though it enters by default, it can be updated as needed in the distribution rows.
- SSN/Tax ID: Social Security Number/Federal Tax ID information will flow through to 1099s
- Optional checkboxes for W9 on file and 1099
- Descriptions for each field in the "Other" tab are provided below this screenshot.

- Payment Terms: When selected, payment terms will default to those that are set up in the system.
- GL Account: When selected, GL account will autofill in the AP
- Vendor Alias: Click Create Vendor Alias to create a new alias for the vendor
- Notes: Add in notes for a vendor (optional)
- Click Save to save the vendor information, Save & Close to close the window, Save & Continue to continue where you left off, or Cancel.
In AP Invoice Entry
You can add a new vendor directly from the AP Invoice Entry window.
- In CAPS+, click Payables in the left navigation column and select AP Invoice Entry.
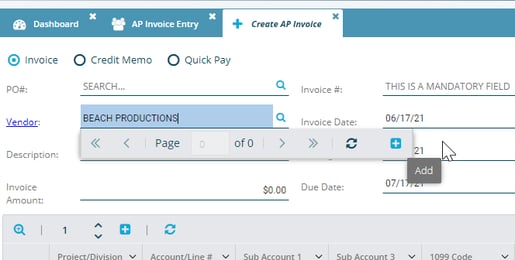
- Click Add. This will open the "Create AP Invoice" page.
- Begin entering a vendor name in the "Vendor" field to populate existing vendors.
- If the vendor does not exist, click the blue + icon to add a new vendor.
- If the vendor does not exist, click the blue + icon to add a new vendor.
- The "Create Vendor" window will open. Follow the steps above to create a new vendor.
Adding multiple vendors
You can add multiple vendors into the system using excel.
- Next to the Add button in the top-right corner, click the down arrow and select Download Template. This will open a new window with a template you can fill in.

- Once filled in, save the file to your computer.
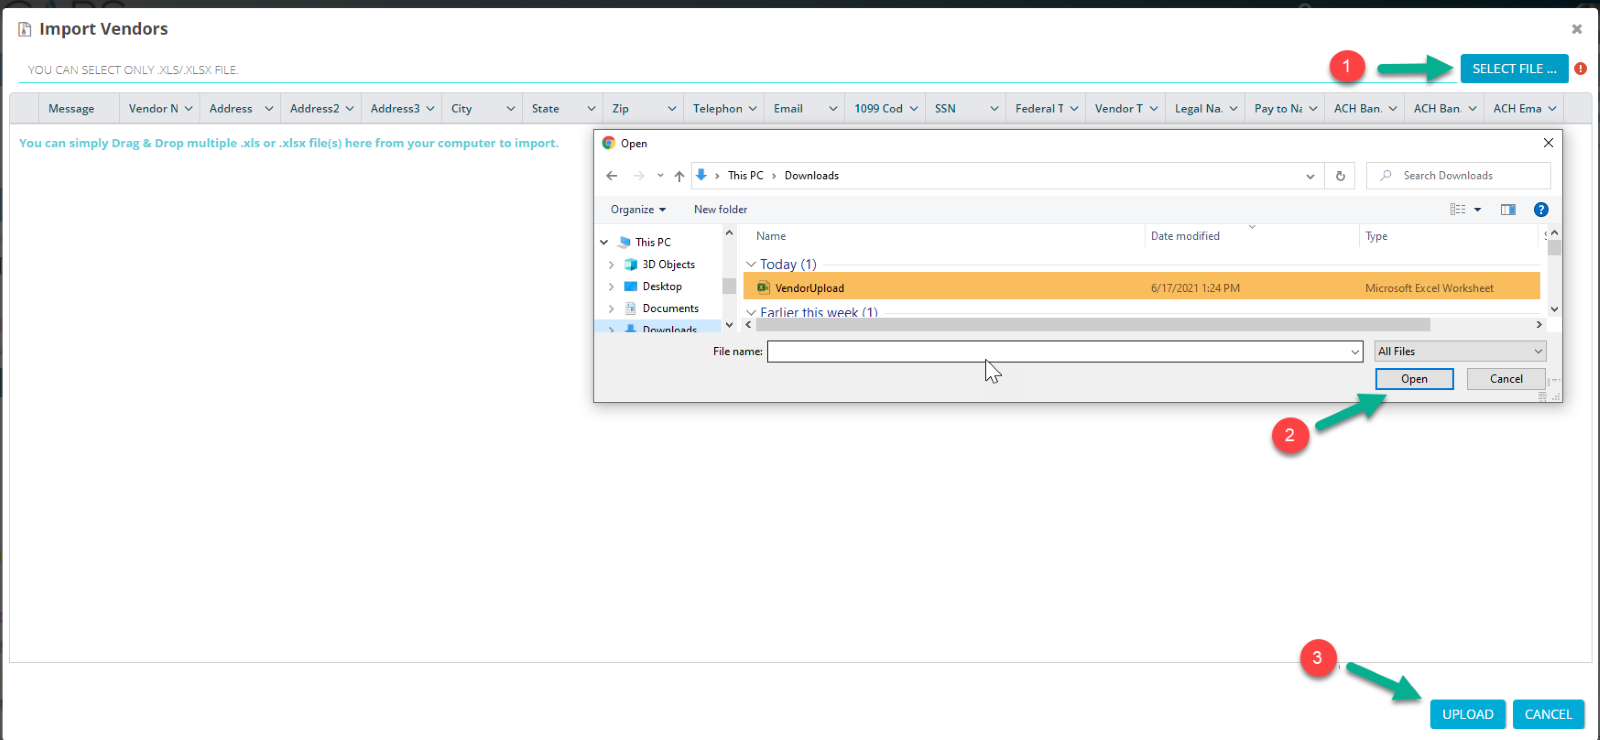
- Back in CAPS+, click the third button in the top-right corner (up arrow icon). This will open an "Import Vendors" window.
- Click Select File...
- Select the excel file you just saved, and click Open.
- Click Upload to upload the vendor contacts into CAPS+.