Check out all of our Payroll Accountant Hours+ courses in Learning On-Demand. |
This article shows you how to perform this task in both Classic and New experiences.
Steps for Classic Experience
Actions
The various actions you can take in Hours+ include:
- Create and submit a personal timecard
- View batches of timecards by week ending date
- Review details of timecards that have been approved by employees
- Review, approve, and reject timecards prior to sending to Cast & Crew
Visit https://hoursplus.castandcrew.com/ to go to the login page.
Navigating Hours+
After signing in and selecting your project, you'll land on the "Timecards" screen. Here is where you can search and filter for specific timecards that need your attention.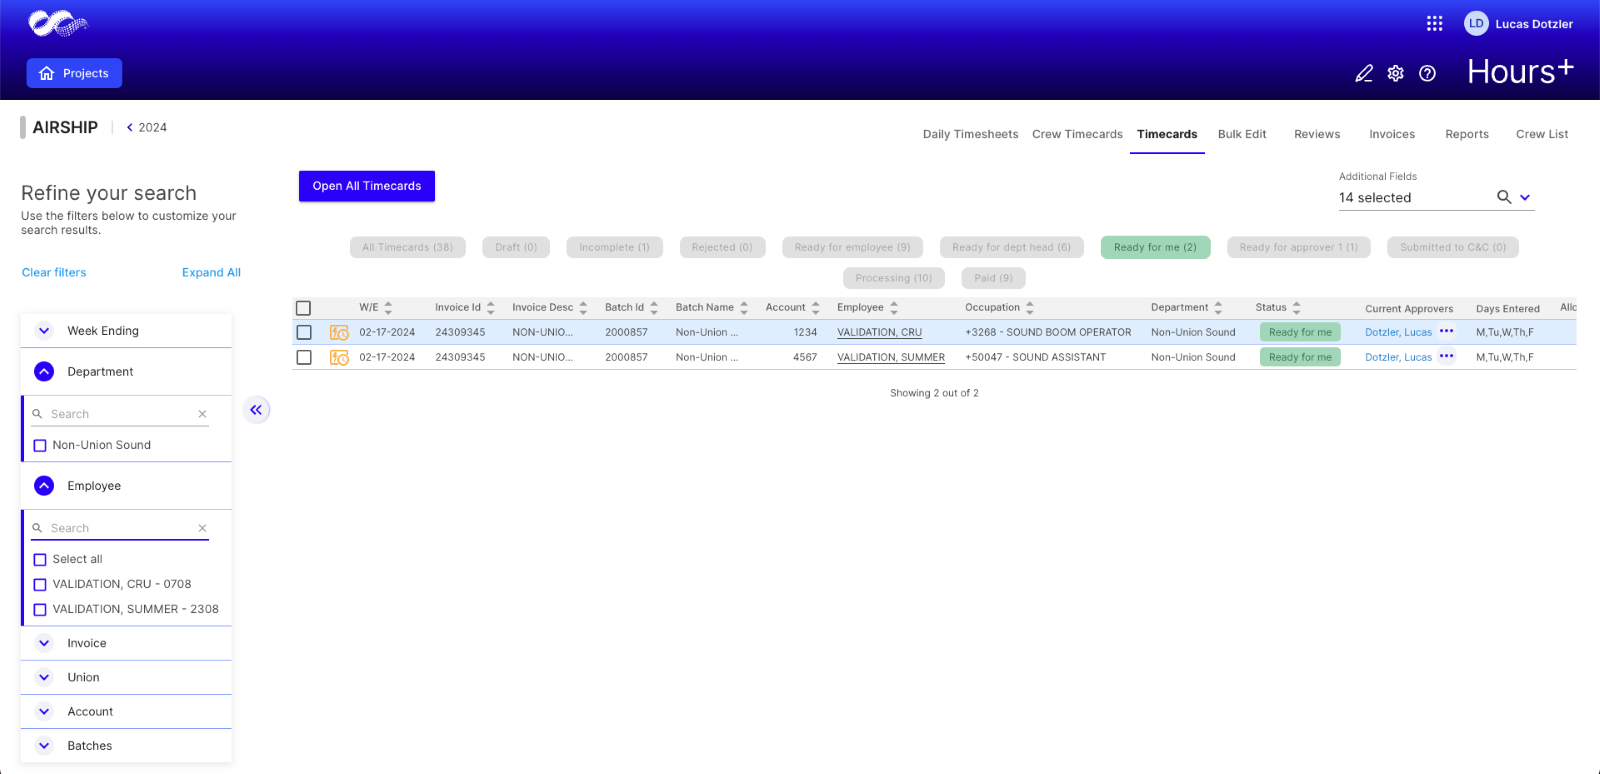
You'll use the top navigation bar to jump to different screens in Hours+, which include:
-
Daily Timesheet
This is where you can create and submit timecards for crew members. -
Crew Timecards
This is where you can select crew members to make timecards for an entire week at a time. -
Timecards
This is the default screen where you can search and filter for timecards that need your attention. -
Bulk edit
This page allows you to edit timecards in bulk and take necessary action. -
Reviews
This screen gives you a glance at timecards that need your attention. -
Invoices
Once a coordinator creates an invoice, that invoice will appear on this screen, giving you the ability to track where the edit is in its process. -
Reports
Here is where you can run reports based on your Hours+ data. Learn how to generate reports here. -
Crew List
Shows a list of your crew by invite status and departments. You can also view more information such as loan-out entities tied to the employee, their role, occupation, and start date.
Reviewing and Approving Timecards
- To begin a review session, go to the Timecards screen. It will default to show timecards that are ready for your review.
- Use the filters at the top of the screen to filter the timecards that are ready for your review.
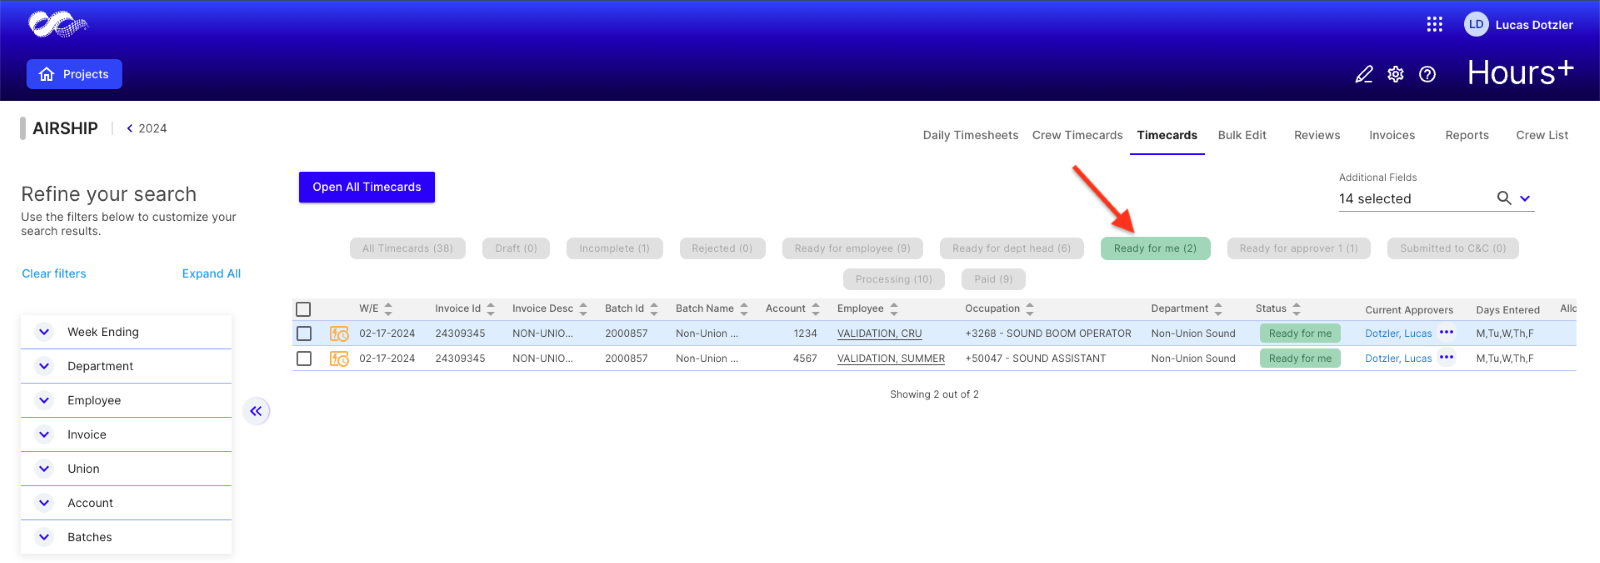
- Click on an employee's name in the list to view their timecard.
- If you need to modify days or times on behalf of an employee, you can edit the days and times on a timecard with the Edit Days/Times button. Simply make your changes and click Save/Calculate. Your changes will be shown in the Comments and History sections.
- Select the work location from the dropdown menu, review hours keyed, and assign the account number if it has not been entered into the timecard.
- Add any allowances/reimbursements for the week.
- Press Save/Calculate at the top of the timecard to update the timecard.
- Once you have reviewed the timecard, press Submit for Approval to send the timecard to Cast & Crew or Reject to send the timecard back to the employee for modification.
- If you already submitted a timecard and realized you forgot to add an allowance or noticed a discrepancy, you can use the Recall button to bring the timecard back to the “Ready for Payroll Accountant” status.
Note: If you reject a timecard, you must enter a reason for the rejection. This reason will be forwarded to the employee via email to assist them in correcting the error.
Adding Allowances
- Scroll below the timecard grid to add allowances.
- Enter the amount being paid to the employee.
- Enter or modify the account coding for the payment.
- Press the Save at the top of the screen. Repeat these steps for any additional allowances or reimbursements.
Creating a Timecard for Employee(s)
It may be necessary for you to create a timecard for an employee who is not able to access the Hours+ application. Once his or her timecard is created, the employee will need to sign off on it before the timecard can be submitted for approval.
- To create a timecard for an individual or multiple employees, click the Crew timecards tab from the top navigation menu.
- Select the department from the drop-down.
- Click on the correct week ending you want to use.
- Locate the employee(s) and click the checkmark next to their name(s).
- Click Create Timecard.
- Make sure the information looks correct in the dialogue.
- Enter any allowances/reimbursements to be paid and click Submit to Employee(s) to send the timecard to the employee(s) for approval. The employee(s) will receive an email prompt to sign the timecard. Once signed, the timecard will be routed through the approval flow.
Steps for New Experience
Actions
The various actions you can take in Hours+ include:
- Create and submit a personal timecard
- View batches of timecards by week ending date
- Review details of timecards that have been approved by employees
- Review, approve, and reject timecards prior to sending to Cast & Crew
Visit https://hoursplus.castandcrew.com/ to go to the login page.
Navigating Hours+
After signing in and selecting your project, you'll land on the "Timecards" screen. Here is where you can search and filter for specific timecards that need your attention.
You'll use the top navigation bar to jump to different screens in Hours+, which include:
-
Daily Timesheet
This is where you can create and submit timecards for crew members. -
Crew Timecards
This is where you can select crew members to make timecards for an entire week at a time. -
Timecards
This is the default screen where you can search and filter for timecards that need your attention. -
Bulk edit
This page allows you to edit timecards in bulk and take necessary action. -
Reviews
This screen gives you a glance at timecards that need your attention. -
Invoices
Once a coordinator creates an invoice, that invoice will appear on this screen, giving you the ability to track where the edit is in its process. -
Reports
Here is where you can run reports based on your Hours+ data. Learn how to generate reports here. -
Crew List
Shows a list of your crew by invite status and departments. You can also view more information such as loan-out entities tied to the employee, their role, occupation, and start date. -
Preferences
Used to access and manage your notification preferences.
Reviewing and Approving Timecards
- To begin a review session, go to the Timecards screen. It will default to show timecards that are ready for your review.
- Use the filters at the top of the screen to filter the timecards that are ready for your review.
- Click on an employee's name in the list to view their timecard.
- If you need to modify days or times on behalf of an employee, you can edit the days and times on a timecard with the Edit Days/Times button. Simply make your changes and click Save/Calculate. Your changes will be shown in the Comments and History sections.
- Select the work location from the dropdown menu, review hours keyed, and assign the account number if it has not been entered into the timecard.
- Add any allowances/reimbursements for the week.
- Press Save/Calculate at the top of the timecard to update the timecard.
- Once you have reviewed the timecard, press Submit for Approval to send the timecard to Cast & Crew or Reject to send the timecard back to the employee for modification.
- If you already submitted a timecard and realized you forgot to add an allowance or noticed a discrepancy, you can use the Recall button to bring the timecard back to the “Ready for Payroll Accountant” status.
Note: If you reject a timecard, you must enter a reason for the rejection. This reason will be forwarded to the employee via email to assist them in correcting the error.
Adding Allowances
- Scroll below the timecard grid to add allowances.
- Enter the amount being paid to the employee.
- Enter or modify the account coding for the payment.
- Press the Save at the top of the screen. Repeat these steps for any additional allowances or reimbursements.
Creating a Timecard for Employee(s)
It may be necessary for you to create a timecard for an employee who is not able to access the Hours+ application. Once his or her timecard is created, the employee will need to sign off on it before the timecard can be submitted for approval.
- To create a timecard for an individual or multiple employees, click the Crew timecards tab from the top navigation menu.
- Select the department from the drop-down.
- Click on the correct week ending you want to use.
- Locate the employee(s) and click the checkmark next to their name(s).
- Click Create Timecard.
- Make sure the information looks correct in the dialogue.
- Enter any allowances/reimbursements to be paid and click Submit to Employee(s) to send the timecard to the employee(s) for approval. The employee(s) will receive an email prompt to sign the timecard. Once signed, the timecard will be routed through the approval flow.