- Support Center
- Digital Purchase Order (DPO)
- Purchase Orders
DPO: How to Add Invoice Information
To add invoice information to a PO:
1. Click the second icon ($) in the toolbar at the top of the “View PO” screen. Here you can add an invoice number, an invoice date, and an order number, which is usually your PO number.
2. You can then record how much of the PO has been invoiced and add any notes.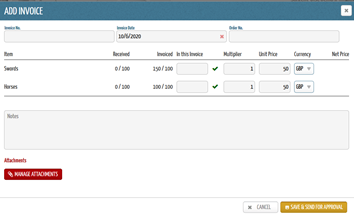
- Choosing Save allows you to save the invoice detail and attachment for the PO.
- Choosing Save & Send for Approval allows you to send the invoice detail and attachment through the approval chain. The invoice will then go through the same approval chain as the PO.
Note: Although the PO and invoice go through the same approval chain, they do not have to be approved together. Instead, they can be approved separately and go through the approval chain at different stages.
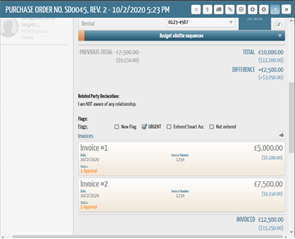
4. Once the invoice detail has been added to the PO, it will appear in the PO detail when you open the PO, as shown below.
5. You can add more than one invoice to a PO.
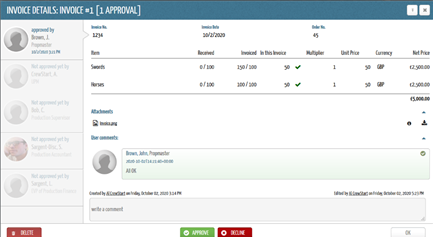
6. You can click on the invoice detail shown in yellow to view its details, which shows the status of approval, the approval chain on the left-hand side, and any approval comments.
7. You can delete the invoice information at any time without affecting the PO.