| Check out all of our Reporting+ courses in EDGE On-Demand. |
Before You Begin
You can only set up a schedule for reports that have already been created and are saved to your “My Reports” list. To learn how to create a report, see How to Create a Report guide.
Scheduling a Report
Follow the steps below to set up a schedule for a report:
- Log in to Reporting+ and ensure you are on the “My Reports” tab.
- Click the 3-dot menu on the right of the report row and select Schedule.
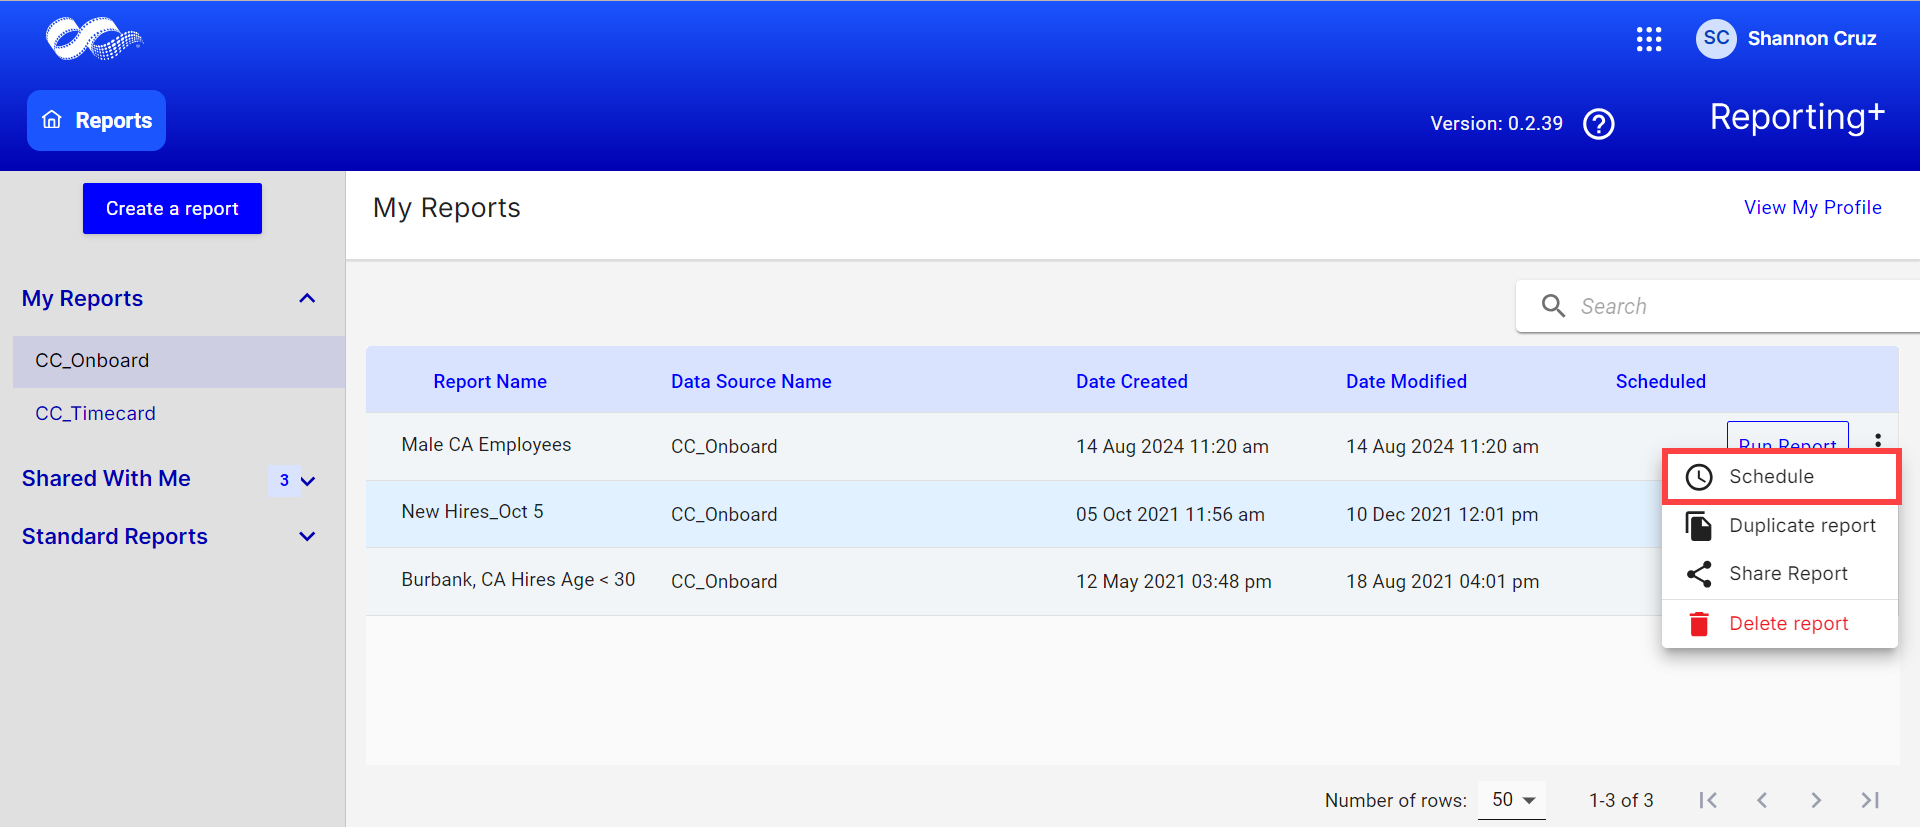
- The "Create Schedule" modal will show. Here is where you’ll set the criteria for your schedule.
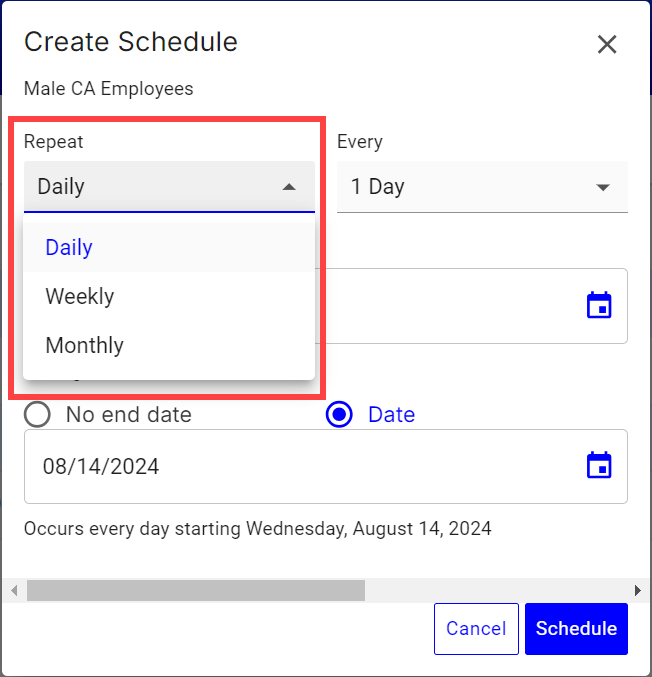
- In the ‘Repeat’ field, select Daily, Weekly, or Monthly.
-
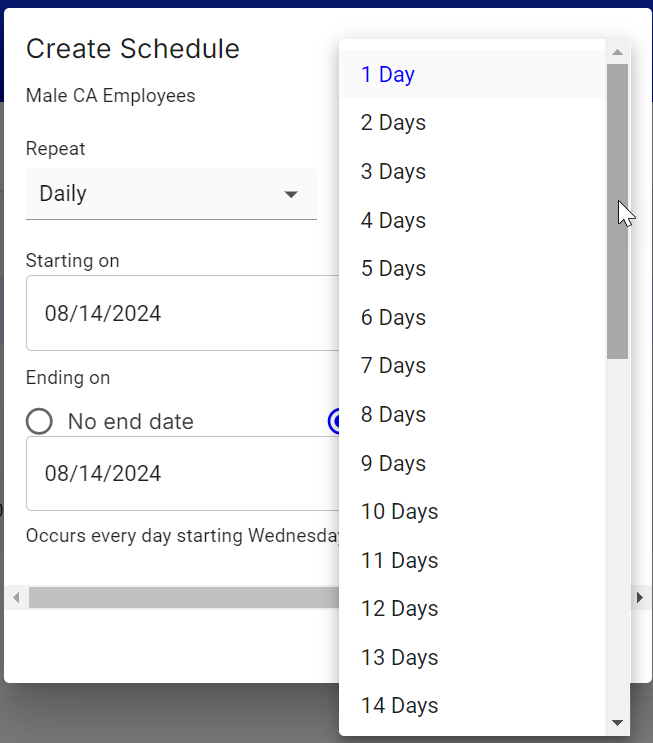
Daily: In the ‘Every’ field, select the number of days for when you want the report to run. (E.g., select 10 days if you want the report to run and be made available to you once every 10 days.)
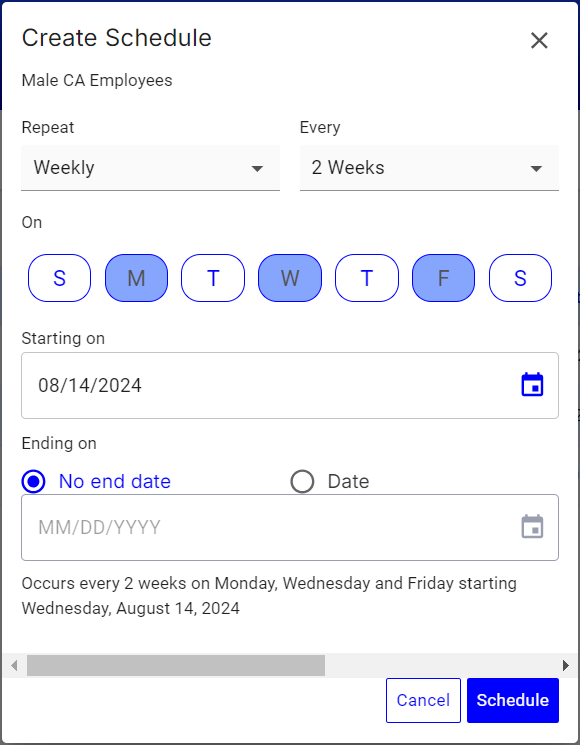
- Weekly: In the ‘Every’ field, select the week intervals for when you want the report to run. (E.g., select 2 weeks if you want the report to run and be made available to you once every 2 weeks.)
- Under ‘On,’ select the day(s) for when you’d like the report to run with the selected frequency. (E.g., select M, W, F if you want the report to run Monday, Wednesday, and Friday every two weeks (when ‘Every’ is set to 2 Weeks, as per example above).
-
Note: You can select one or more days when applying a weekly-based schedule
-
Note: You can select one or more days when applying a weekly-based schedule
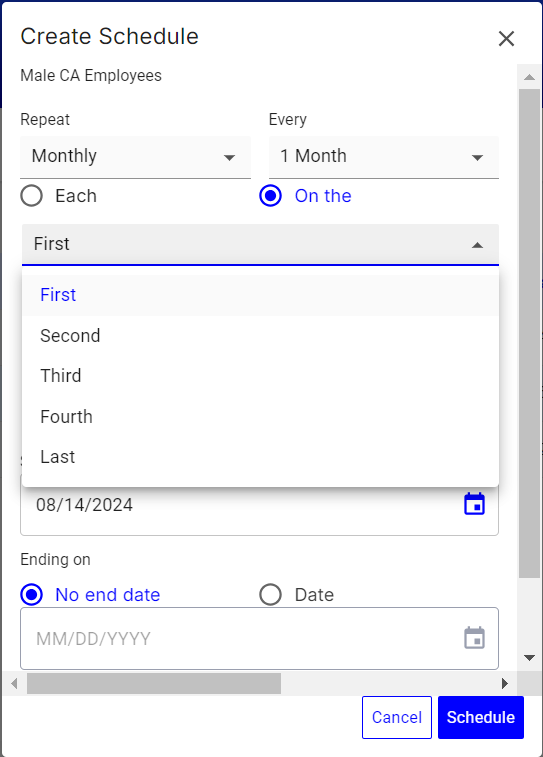
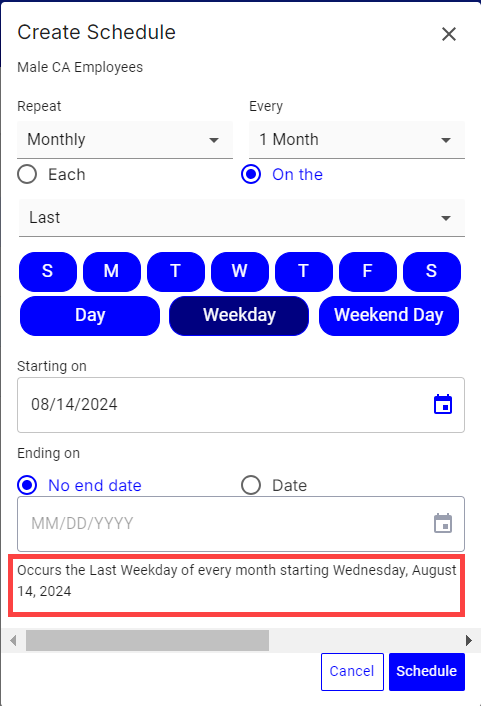
- Monthly: In the ‘Every’ field, select the monthly intervals for when you want the report to run. (E.g., select 1 Month if you want the report to run and be made available to you every one month.)
- Select “Each” option if you’d like to choose a specific date within the given month the report will run. Then, select the calendar date.
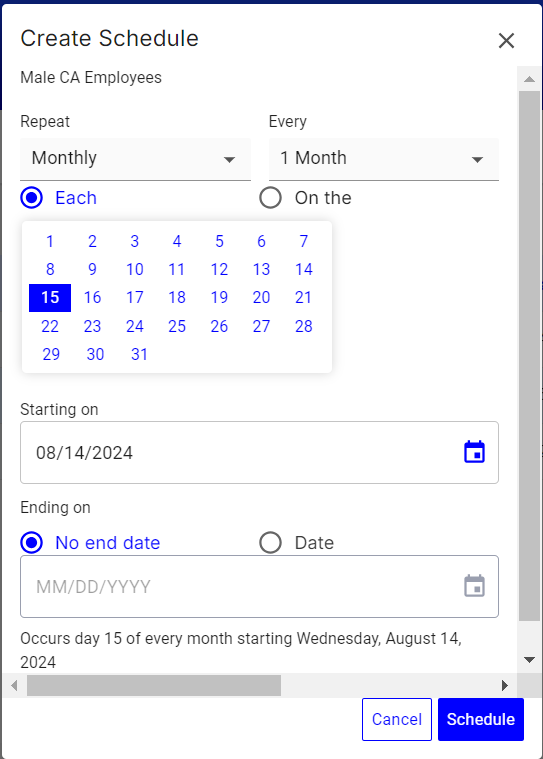
Note: Since the total number of days varies by month, if you select days 29, 30, or 31, your report may not generate for a given month if that month does not include the specific day selected (E.g., if you select 31, the report will not be generated in the months of April, June, September or November as those months only contain 30 days).
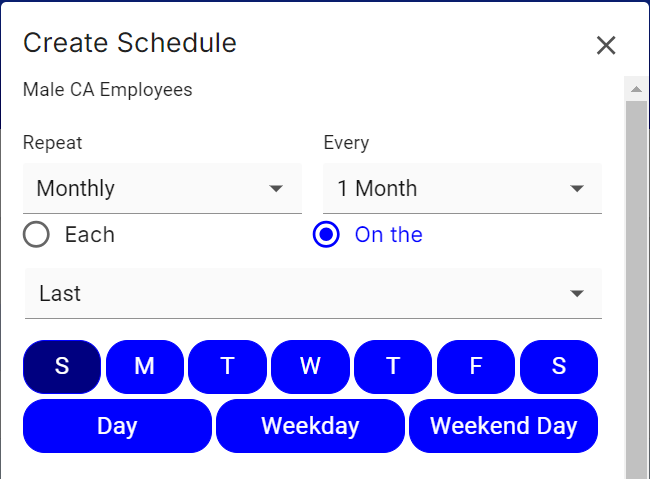
- Select “On the” option if you’d like to schedule the report to run on a specific day of the week or month within the specified monthly interval.
- Click the dropdown to select which day of the month you’d like the report to run (First, Second, Third, Fourth, or Last)
- Next, select the day or day type of the week you’d like the report to run (E.g., select Weekday if you’d like the report to run on the first, second, third, fourth, or last Weekday of the month or select “W” if you’d like the report to run on the first, second, third, fourth, or last Wednesday of the month, depending on what frequency you choose for the monthly interval value.)
-
Daily: In the ‘Every’ field, select the number of days for when you want the report to run. (E.g., select 10 days if you want the report to run and be made available to you once every 10 days.)
- Using the ‘Starting on’ and ‘Ending on’ fields, specify the dates during which you want to schedule the report. If you want the report to continuously run without an end date, select No end date.
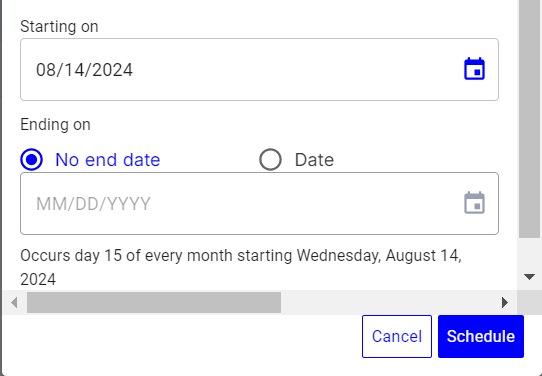
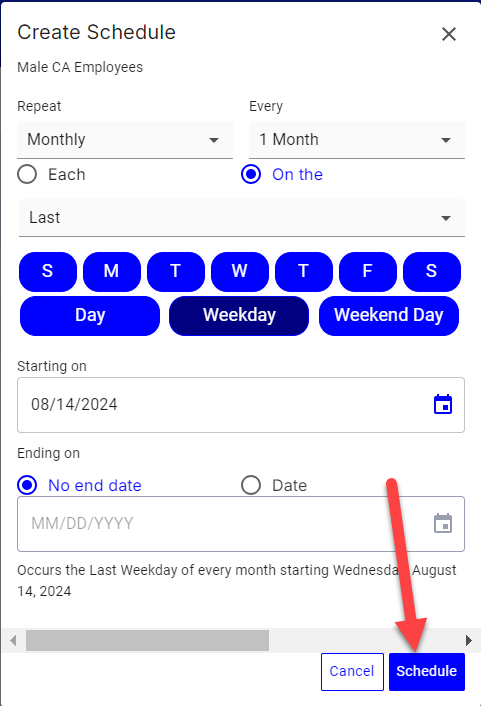
- Once all your preferences have been applied, the resulting schedule will be displayed below the ‘End date’ field for you to review.
- When you’re satisfied with the criteria, click Schedule.
- A notification will show that your schedule was saved successfully, and you will see a clock icon on the report row.
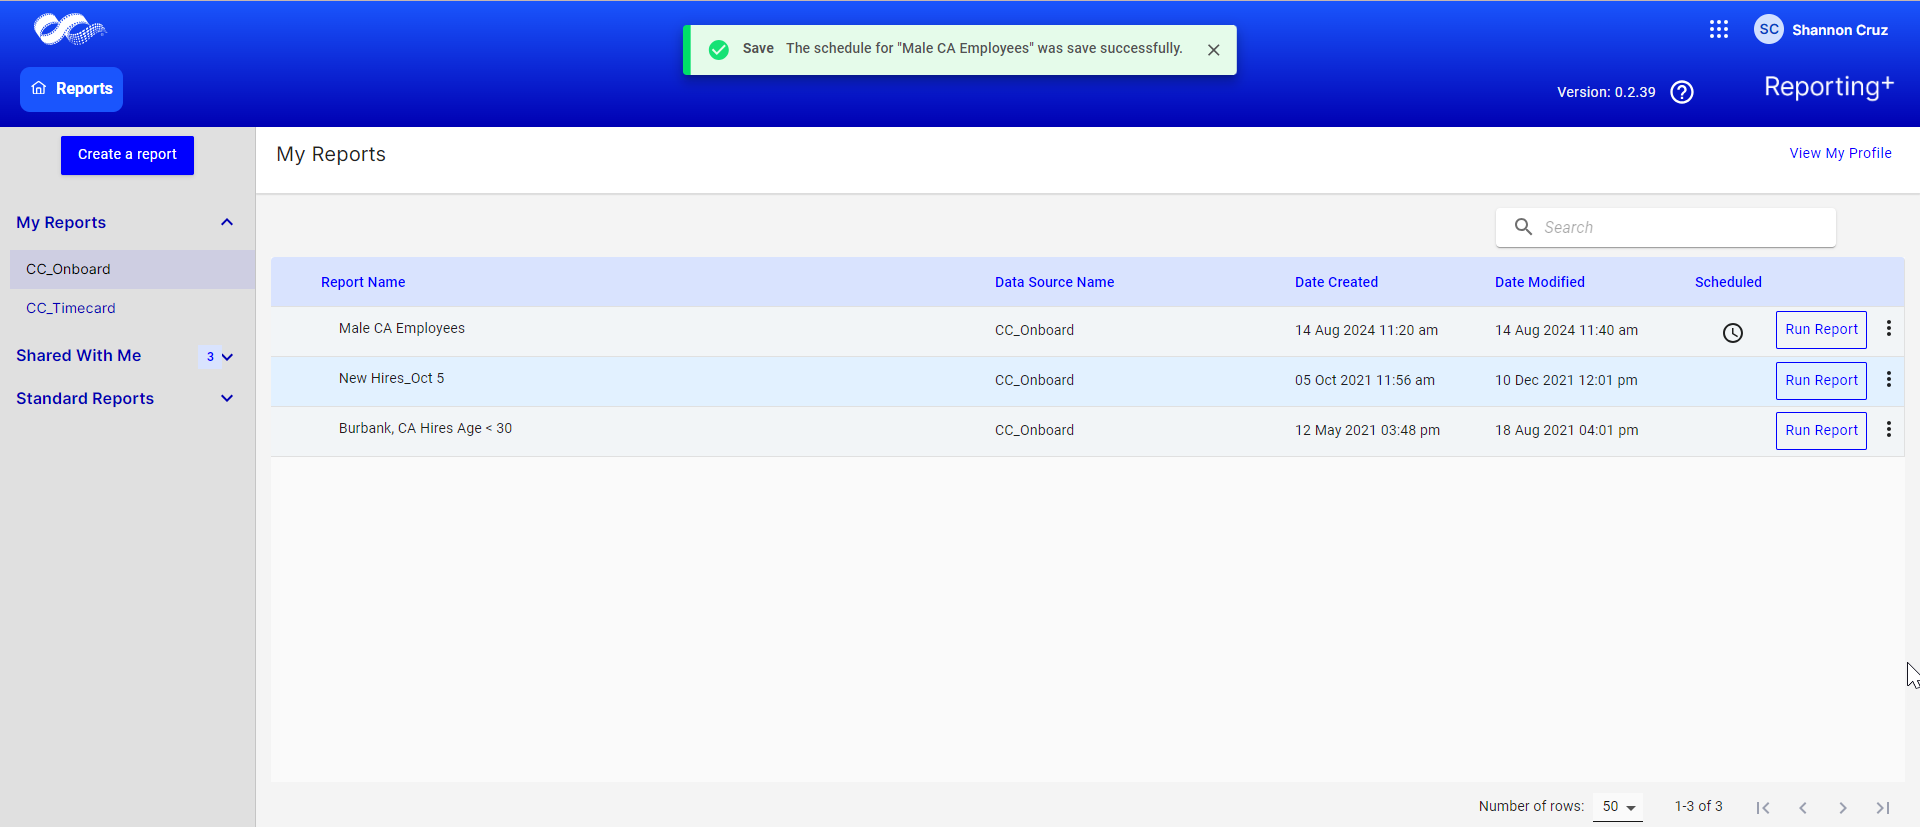
- Once scheduled, reports will be automatically generated at the specified frequency and will be available in the Ready for Download tab.
- Please keep in mind that you can only create one schedule per report. If you’d like to set up multiple or different schedules for the same report, please see “Duplicating a Report.”
Modifying a Schedule
You can easily update the schedule of a report if you need to change the frequency criteria. Please keep in mind that modifying a schedule will reset the date to begin on the present or future day that you’ve chosen to modify it. You can also delete a schedule if needed.
To do this:
- Locate the scheduled report that you’d like to modify and click the 3-dot menu on the right of the row.
- Select Modify Schedule.
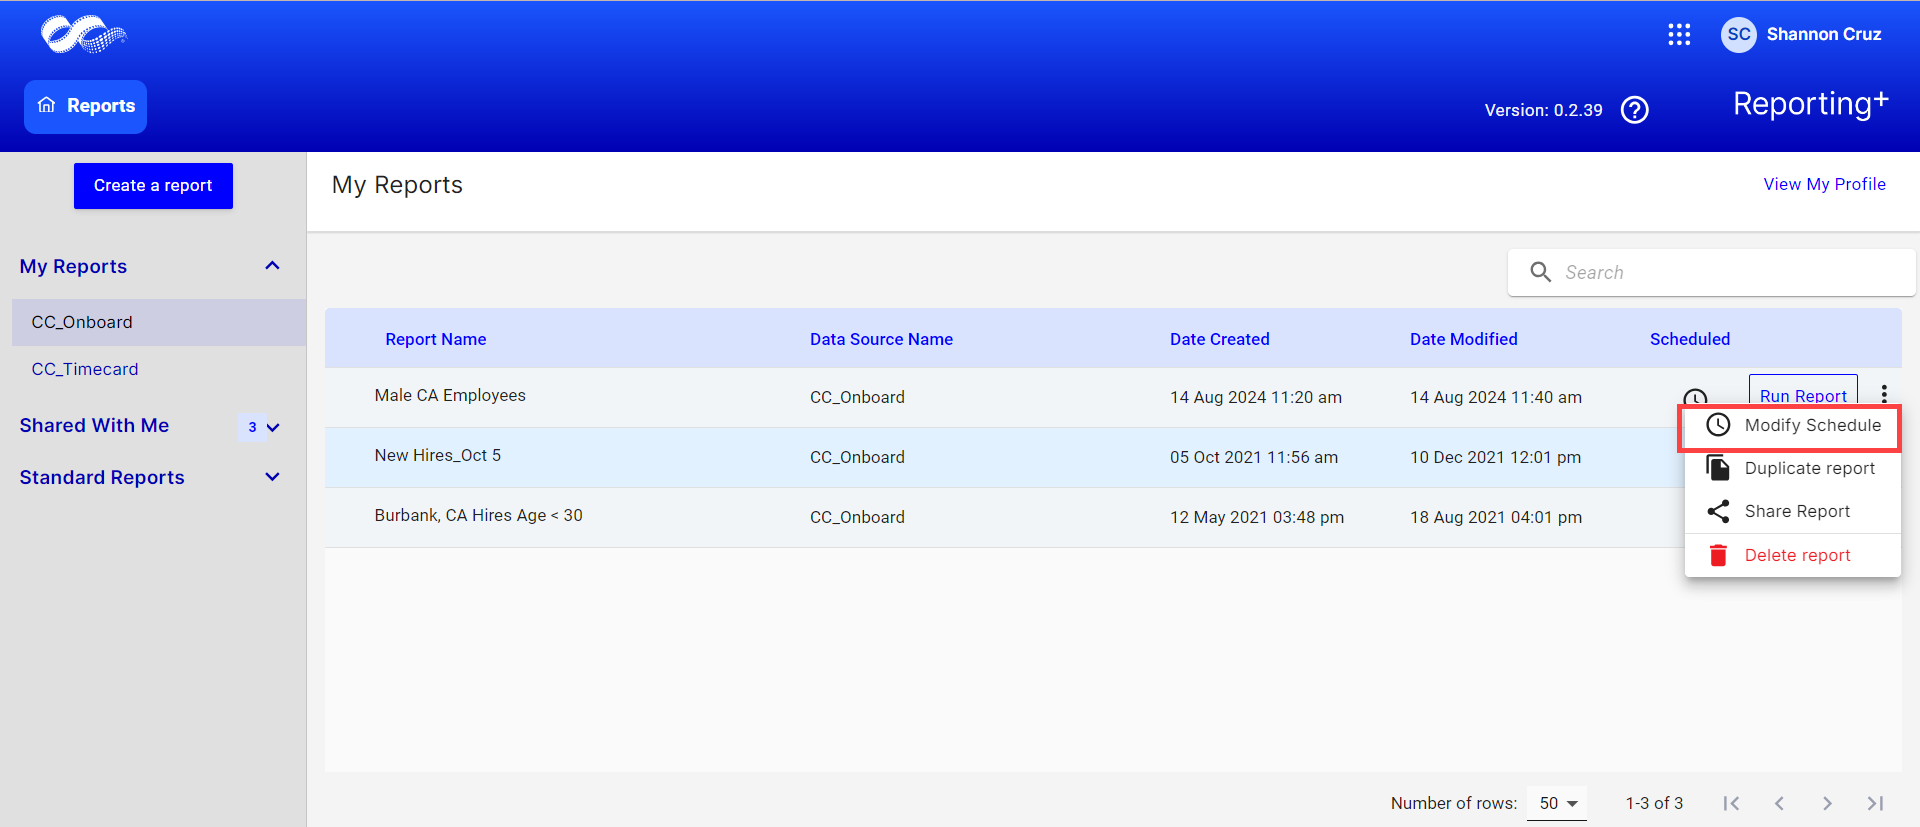
- The "Modify Schedule" modal will display. Update the schedule criteria as you see fit.
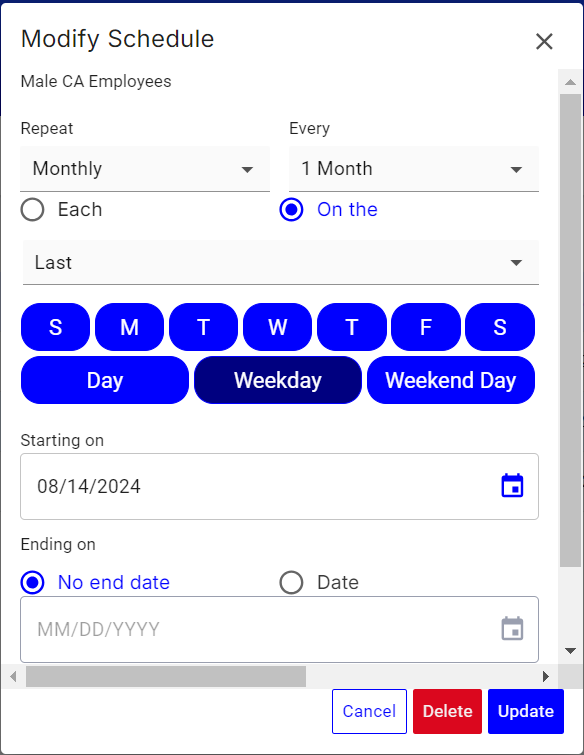
- If you’d like to delete the schedule to stop the report from running automatically, click Delete. This will not delete the report. You’ll still be able to run the report and download the data manually.
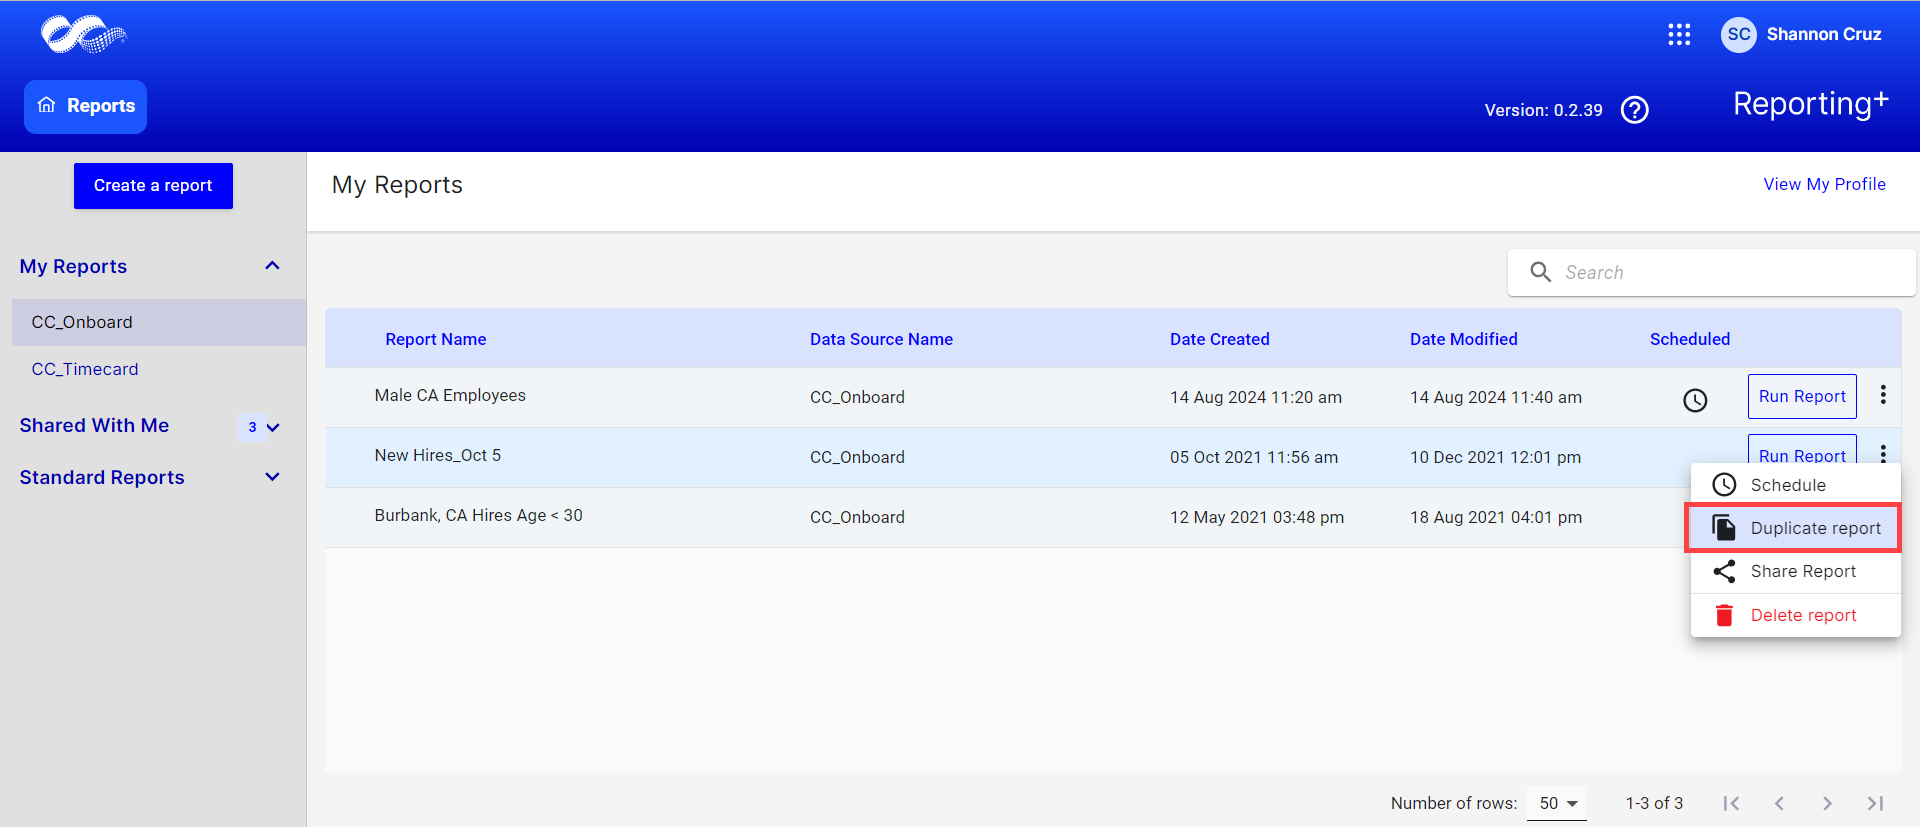
Duplicating a Report
If you’d like to set up multiple or different schedules to the same report, you’ll need to duplicate the report and apply the new schedule. To do this:
- Click the 3-dot menu on the right of the report row and select Duplicate report.
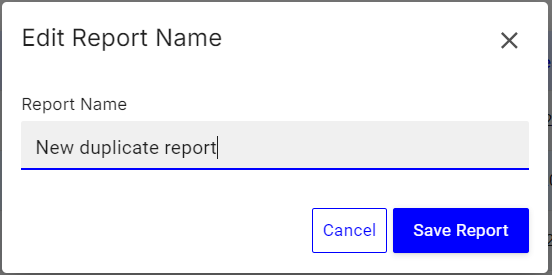
- Give the report a new name and click Save Report.
- To set up a new schedule for this report, please begin at Step 2 and follow the steps to apply a new or different schedule.